When we visited the iconic Hilton Park Lane in May 2024, the hotel was upgrading its offering. We were reviewing their new Park Corner Brasserie and had a pre-dinner drink at the Revery Bar. A few months on and the Hilton Park Lane is rapidly going through a renaissance, bringing back its exciting, vibrant energy and introducing new and imaginative offerings.
On this visit, it was all about the Revery bar, located off the lobby, to sample its first afternoon tea experience: “Tea, Cakes & Cocktails”.
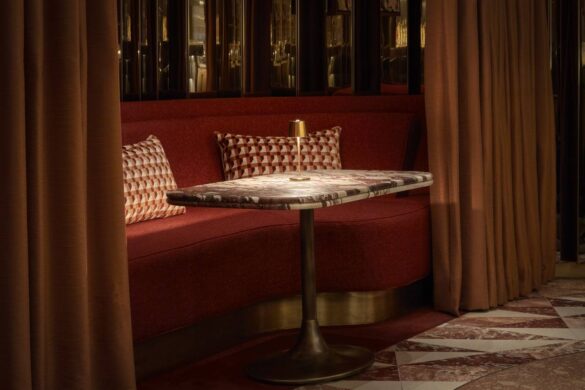
The Revery is an intimate space slightly frivolous with muted pink décor and somewhat decadent with dimmed lighting and plush furnishings from comfy red upholstered armchairs and stools propping up the incredible curved backlit marble cocktail bar.

Revery bar
Peter Avis Fih, the Business Development Manager, has pitched Revery to perfection and his infectious energy, enthusiasm and vision for the hotel are reflected all around.
We arrived in time for afternoon Tea, Cakes & Cocktails priced at £65 per head – which seems a tad expensive for afternoon tea, but this is no ordinary tea. Deliciously crisp bubbles are followed by tea, cakes and cocktails with a difference.
The tableside service is informed, subtle and entirely suitable. Kruthi, Rayan and Eugene strut their stuff effortlessly and we knew we had been guided to choose well from black, herbal, floral and green teas.
This British Afternoon Tea proffers a selection of perfectly paired and meticulously crafted cocktails, ranging from an Earl Grey Sour to my favourite the Pistachio Bliss – a blend of pistachio liqueur, amaretto, and cream. Non-alcoholic options include the Blooming Blossom, featuring elderflower syrup and fresh strawberries, and the Moroccan Souk – an exotic blend of orange juice, ginger, cinnamon, and mint.
The cakes are a work of art including carrot cheesecake, triple chocolate and a strawberry and citrus frothy delight. Traditional plain or fruit scones with strawberry jam and clotted cream were on offer too
Canapes and finger foods complete this unusual blend of cuisine with beetroot cheesecake alongside black truffle macaroon with chicken liver pate, surprisingly matched to perfection.

Finger Feast
This is followed by the “Finger Feast” course featuring deconstructed classic chicken Caesar and Asparagus panna cotta, egg yolk and sourdough soldiers, mini poached lobster roll with Marie Rose sauce and Devon handpicked crab on sourdough toast with citrus bisque jelly.
It could have ended there, but we went on to enjoy the selection of Revery’s pic ’n’ mix, including apple jelly, vanilla fudge, and dark chocolate truffle.
VERDICT: We left the mixology of Revery lost and refound in reverie, our senses surprised, tantalised and deliciously sated. ‘Tea, Cakes & Cocktails’ is no traditional afternoon tea, prepare to be wowed!
Revery Bar, 22 Park Lane, London W1
Revery’s “Tea, Cakes & Cocktails” costs £65 per person and is available to book Thursdays – Sundays from 12pm – 6pm.Bookings can be made here: www.reverybarparklane.com
The post Revery Bar review, Hilton Park Lane, London appeared first on The Travel Magazine.


