Destinations Travel Show: Manchester Central January 15-18 & Olympa London January 29 to February 1
WHAT: Destinations Travel Show
WHERE: Manchester Central and Olympia London
WHEN: Manchester Thursday 15th until Sunday 18th January – London 29th January until 1st February
WHY:
Whether you’re looking to book a bucket list trip of a lifetime, a short European city break, or embark on a solo adventure, Destinations: The Holiday & Travel Show, is returning for 2026 and is a must-attend for travel lovers and those seeking a world of inspiration for their future adventures around the world.
Celebrating its place as the UK’s longest-running travel show, this unmissable event brings the world to your doorstep. Held in association with The Times and The Sunday Times, Destinations: The Holiday & Travel Show continues to provide visitors with a wealth of travel inspiration, whether it’s the latest destination hot-spots or off-the-beaten track gems to be discovered.
Heading back to Manchester Central from Thursday 15th until Sunday 18th January and Olympia, London from 29th January until 1st February, the shows offer a rare chance to meet face-to-face with 100s of travel experts, brands, tourist boards and guides, ready to assist in helping guests plan their next getaway.
From major operators, niche specialists, hotels, airlines and more, the event brings the world’s most exciting destinations and experiences together under one roof. Popular and returning exhibitors include Abercrombie & Kent, Trailfinders, Emirates Holidays, Riviera Travel, Explore Worldwide and One Traveller.
The Manchester show will also be welcoming new exhibitors including HX Expeditions, Just You, Newmarket Holidays and Tropical Sky, while London welcomes Flight Centre, Noble Caledonia, Albatros Expeditions and Madeira Tourism. The shows will take visitors on a journey of discovery and taking your bucket list to new heights.
Destinations: The Holiday & Travel Show can turn your travel itch into action and inspire your next great escape.
Whether you want to sip wine under a South African sunset, glamp in the Sahara or experience a glass igloo under the Northern Lights, Destinations: The Holiday & Travel Show ensures holidaymakers discover stays that make the journey just as unforgettable as the destination.
Visitors can also hear from a stellar line up of speakers providing insight and inspiration. Confirmed for Manchester so far are: presenter and Just You Ambassador, Janet Ellis, travel journalist, Simon Calder and Nicky Kelvin of The Points Guy UK. Nicky will also be in London, as well as presenter, journalist and Just You Ambassador, Penny Smith and presenter and author Louise Minchin. Visitors to the show will also enjoy different flavours of the world with cooking demonstrations, food tastings and cultural performances.
Ben Myatt, Show Manager, at Destinations:
The Holiday & Travel Show says: “Each year, our exhibitors bring fresh ideas, exclusive offers and endless inspiration for every kind of traveller. We are thrilled to be helping our visitors tick that travel box, whether they are dreaming of a sun-soaked vacation or a wild solo adventure, at Destinations: The Holiday & Travel Show, our exhibitors and experts are here to spark imagination and open the door to unforgettable journeys.”
Book Your Ticket
Buy your ticket in advance Manchester and London
Advance tickets to Destinations London are £12 in advance* (with a £1.50 transaction fee) and £16 on the door. Children under 16 can enter for free. Advance tickets to Destinations Manchester and Caravan, Motorhome & Holiday Show are just £1.95 for the booking fee or £7 on the door.
Any ticket purchased for Destinations: The Holiday & Travel Show in Manchester Central will also provide free entry into the Caravan, Motorhome & Holiday Show which takes place at the same time at Manchester Central.
The post Destinations Travel Show: Manchester Central January 15-18 & Olympa London January 29 to February 1 appeared first on The Travel Magazine.
 The Luxury Collection, led by Sun Siyam Iru Fushi, The Lifestyle Collection, including Sun Siyam Olhuveli and Siyam World, ideal for families and groups and The Prive Collection, featuring Pasikudah in Sri Lanka, Sun Siyam Vilu Reef and Sun Siyam Iru Veli, providing intimate, barefoot escapes focused on privacy and soulful luxury.
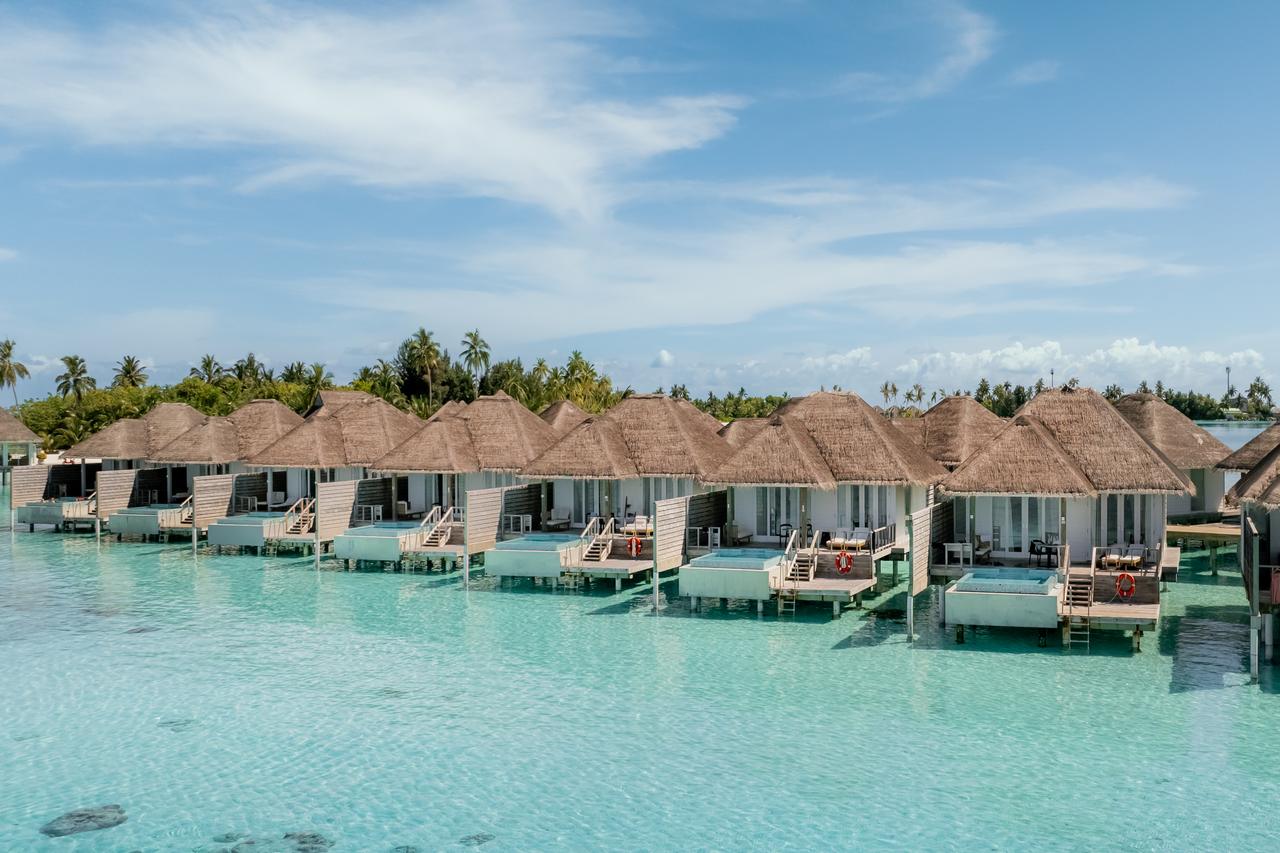
 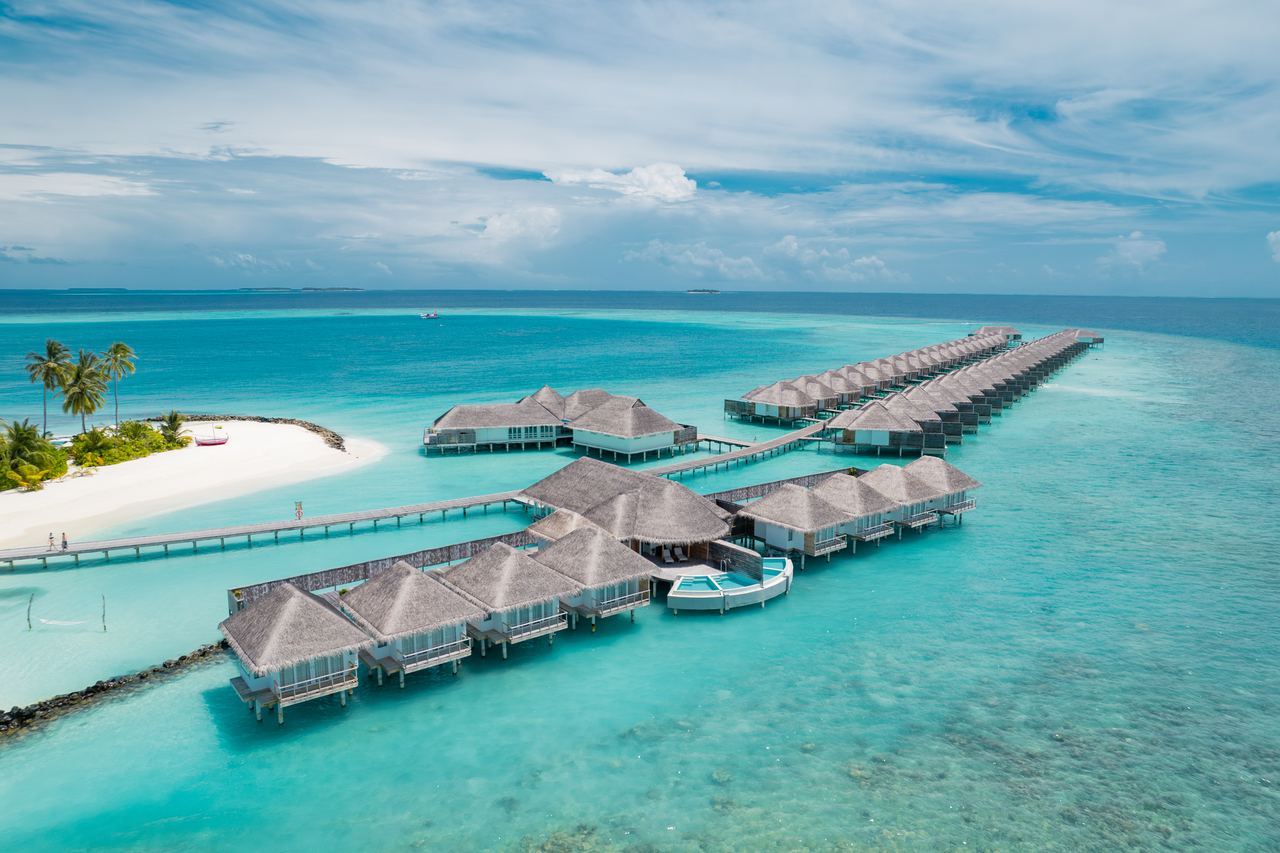 Iru veli, my home for three nights, is your quintessential private island paradise, located in the South Nilandhe Atoll and accessible via a 45-minute seaplane ride from Male’s Velana International Airport. Arriving by sea lane, eyes glued to