Nicknamed “The Grand Canyon of the Pacific” due to its multi-colored canyon walls etched deeply into the terrain, Waimea Canyon on the south shore of the “Garden Island” of Kauai was formed when the Waimea River carved its way through the lava and basalt formations of the region. Waimea is Hawaiian for “reddish water.” Driving through the canyon takes you through both Waimea Canyon and Koke’e State Parks. Throughout the canyon, there are hiking trails where you can see tropical foliage, green and red scenery, waterfalls and rainbows.
Weather
The park’s location on the south side of the island means that it doesn’t get nearly as much rain as the north and east sides, and due to its elevation, the average temperatures are lower than the rest of the island. Elevation at the first lookout is about 3,400 feet. Average high temperatures range between 61 to 68 degrees Fahrenheit during the year, which is about 20 degrees cooler than the nearby town of Waimea. It will generally rain between nine and 12 days per month throughout the year, but the rain doesn’t last long and creates wonderful conditions.
Photo Experience
From the town of Waimea, State Route 550 winds about 18 miles through the canyon, offering several lookouts. This shot was taken from the popular Waimea Canyon Lookout, and continuing along the highway, you’ll encounter other lookouts. From the Pu’u Ka Pele Lookout, the 800-foot Waipo’o Falls are visible after a heavy rain, and the Pu’u Hinahina Lookout offers a view of the nearby island of Ni’ihau. Further up the highway is the spectacular Kalalau Lookout, which has stunning views of the Na Pali Coast.
If you travel to the end of the highway, you’ll be treated to one of the most breathtaking views in all of Hawaii at the Pu’u o Kila Lookout. There, the jagged green cliffs of the Na Pali Coast contrast with the red soil as you gaze out toward the impossibly blue waters of the Pacific Ocean. If it’s cloudy when you go, wait around a while for the clouds to disappear.
If you’re interested in getting away from the crowds, there are many trails throughout the park that offer exceptional photographic opportunities. The late-afternoon sun provides the best light for photography since the canyon walls will catch the light, and the reds and greens will glow. If there has been recent rain and there’s still moisture in the sky, you may even catch a rainbow. Sunrise can be special here as well.
Best Times To Visit Waimea Canyon
Because it’s Hawaii, there’s no bad time of year to visit. The summer and winter months tend to be more crowded, but don’t let that stop you. Winter means that the days are shorter, and the temperatures will be only a few degrees cooler. It’s always a good idea to have a light jacket when visiting Waimea Canyon.
If you plan on starting a business, website, or video channel, you need to get royalty-free images and videos for your online content. So, you have to look for sites that sell stock images and videos. Adobe Stock is one such site where you can get high-quality stock content.
Now, the question is, is it really worth buying stock images and videos from Adobe Stock in particular? You will find the answers to these questions in this full guide to Adobe Stock.
One thing that attracts many businesses to Adobe Stock is that they not only sell images but also other types of stock content like videos, illustrations, etc. They are also a famous brand when it comes to image editing solutions.
Types of stock media in addition to photos
Apart from the regular stock images, you can also get many other stock assets. Other royalty-free assets provided by Adobe Stock include the stock video footage, stock audio, vector art, illustrations, 3d, paintings, cartoons, royalty-free templates, plugins, etc.
When it comes to templates, they offer templates for Photoshop, Illustrator, InDesign, etc. If you see the stock video section, you can get 4k and HD versions of the video. Thus, you will get almost all types of stock content under one roof.
Editable elements in illustrations and other templates
They offer many types of vectors, illustrations, 3d models, and other templates. Most of these files come with editable elements. You can customize the design according to your requirements. If it is a cartoon or a painting, you will not get the file that comes with the editable element options.
Is Adobe Stock best for certain types of photos or subjects?
If you browse through the database of Adobe Stock, you will be able to see lots of images of various subjects in various poses. They cover all types of photos and different varieties of subjects. Anyone looking for stock images with a royalty-free license can easily find their subject images in this big database. So, in my opinion, it is good for all types of subjects and photos.
How is the search function?
One thing which I liked very much about Adobe Stock is its search feature. It looks like they have put good effort into building an intelligent search option on their website. I have tried many stock photography websites, and believe me, it is a nightmare to search and find the right kind of images in many stock photo sites.
They have got a great collection of images and videos. So, it is easy to get any kind of image from their database. They have added AI (Artificial Intelligence) to their search function. I really love their search feature. It makes life so easy for me. This feature helps me save a good amount of time. The results are really accurate. Another interesting feature I like about the search here is that it is possible to find images or stock content that are not used by others. It helps me provide fresh and unique images to my readers.
Another search method that I use is using the category option. You can click on any popular category and easily find the appropriate images. There are many categories listed here.
Image selection/ number of photos on a subject
They have got images of almost everything on this planet. It is one thing that I liked very much about Adobe Stock. Once you buy an Adobe Stock subscription, you don’t have to look for other stock photography websites. You will get all types of images from Adobe Stock. It is possible with their massive collection of pictures. Earlier, when I used free stock photography sites, I had to browse many sites to get an image.
They have also got many images for the same subject. When I search for pictures, I will look for a particular subject pose from a specific angle. It is pretty easy to find such images in Adobe Stock. It has helped me to accelerate my content creation process.
Integration with Creative Suite
If you are using the Creative Cloud app from Adobe, you can download images directly from the app. You don’t have to go to the site and search for images. If you use the CC version of Adobe software like Photoshop or Lightroom, you can quickly download the stock content and start your editing process.
I used to download from the website during my initial days. Later, I started using the CC app since I use Adobe Lightroom and Adobe Photoshop for my work. It allows me to try each of the images in my design quickly. Thus, I can go ahead and purchase the one that fits my design the best. You will find this feature extremely useful if your workflow involves these software programs.
Click here to sign up for the Adobe Stock program or view current trial/discount offers
You can watch this YouTube video to learn how to use Adobe Stock images with Photoshop.
What is Adobe Stock lacking?
In my opinion, they could have built a separate app for Android and iPhone users. Many popular stock photography sites have got apps. It is a really good feature to have.
When I travel, I prefer using my phone. So, it would be great if there was an app where I could easily browse images and bookmark images for the future.
When it comes to the audio section, the search results show many audio files with similar content. So, it is really a time-consuming process to play each of these files and select the best one. It will be good if they can bring some technique to keep only the unique ones. It will help to improve our productivity.
Are images too “stock-looking”?
When I look for stock images, I am interested only in real-life like images. In my opinion, only real-life images bring more value to the content I publish on the web. There are many stock photography websites out there, both paid and free. Many of these websites have more than 70 percent of stock-looking images. When the reader goes through my article, and if I include these stock-looking shots, I will lose my connection with my reader. I always want to deliver high-quality content to my readers. It is the main reason why I prefer original-looking shots.
Adobe stock has a mix of both stock-looking and natural images. But from my experience, most of the pictures here are natural-looking ones. Maybe around 20 to 30 percent of images in Adobe Stock images fall into the stock-looking shots.
Is the photo collection unique?
Adobe stock offers two types of images to the customers. They are the standard and the premium ones. From my experience, the premium images are more unique when compared to the standard ones. If you are a person looking for unique pictures, the premium section is for you.
How is the licensing?
There are three types of licenses offered by Adobe Stock. They are Standard, Enhanced, and Extended License. In standard and enhanced licenses, you cannot use the stock content on products that are for resale. In addition, you cannot sell the stock content as the primary asset in these two licenses. You can do both these things if you buy the extended license.
I use the standard license. In my opinion, it will serve as the best option for most users. However, if you plan to do an unlimited reproduction of the content, you need to go for the enhanced license. All these three licenses come with unlimited views on the web, the right to modify the stock content, use the content for commercial purposes like advertising, social media content, and email marketing, and you are also allowed to transfer the license.
In my opinion, all these 3 licenses from Adobe Stock ensure that their content can be used in almost all sectors. However, if you want to buy an extended license for any of the assets, you will have to pay an extra amount of around $80 or more.
How is the customer service?
Whenever you go for any stock photography sites, you must not only look at the price but also check the customer service provided by them. Believe me, it really matters.
Adobe Stock provides three types of support. You can get in touch with them through phone, chat, or forums for any issue. Most of the solutions will be available in the forum itself. If you want a quick resolution, the phone and chat are the two good options. I usually go for chat support to resolve all my queries and issues. They are good at resolving any issues at a fast rate.
How easy is it to set up an account in Adobe Stock?
I really hate filling out long forms to set up an account. They have provided three options to access Adobe Stock. You can sign up with your email address. Otherwise, you can sign in using Facebook or your Google account. If you have an Adobe ID, you can use that also to create an account here.
Once you complete this step, you will be asked to select an appropriate plan. Now, you need to enter the payment info and billing address details. After completing this step, you are done with setting up the account. So, the account creation process is quite easy in Adobe Stock.
How is the pricing?
When it comes to pricing, there are two options in Adobe Stock. One is the Credit pack option, and the other one is the subscription model. You can choose any of these according to your requirements. I started with a credit pack initially. Later, I moved to the subscription model since my stock content requirement increased.
There are five credit options, starting from 5 credits, which costs around $50. The biggest credit pack of 150 credits costs around $1,200. I purchased the 40 credits pack initially. It costs around $360. I required only a few standard images and some standard templates initially. So, this package proved to be a cost-effective one for me.
You can purchase different types of stocks using the credits. The number of credits required to purchase the stock content also varies. For example, you will need only one credit to purchase a standard high-resolution image. But you will need 8 credits to buy a 1080p video. If it is a 4k video, it will cost you 20 credits. In my opinion, if you are looking only for a few stock images and videos, the credit option will work good for you.
I later moved to one of the subscription models since three was an increase in the requirement for images. I need new images on a monthly basis for my website. They provide an annual subscription model as well as month to month subscription. Each of these models comes with three types of pricing. In my opinion, the yearly subscription is the best option compared to the credit option. It is cost-effective in the long run.
The number of assets you can purchase also varies for each model. The basic subscription plan comes with 10 assets per month. You can get more assets per month in the other two plans. From my experience, an annual plan is a cost-effective option compared to the month-to-month plan, provided you have the stock image and video requirement every month.
They also offer various plans for teams and enterprises. If you belong to any of these categories, you can have a look at these plans. The subscription packages for the team are the same as the individual packages. There will be additional provisions so different team members can access the database.
I strongly recommend you make a list of your monthly stock requirements and then select your plan accordingly.
Click here to sign up for the Adobe Stock program or view current trial/discount offers
Is the pricing fair?
You can get a standard image for a price as low as $0.26 per asset. This costing is available for the $199.99 per month plan that offers 750 standard assets. If you take the service of a photographer or a videographer to create all these pictures and videos, it is going to cost you more.
If you go for the lowest plan, which costs around $30 per month, a standard photo will cost you $3. In this plan, you can only get 10 standard assets per month. The next plan offers 25 standard assets for around $50. So, you will get a standard asset for $2.
In my opinion, the $30 and $50 plans are good for small businesses. However, the $200 plan seems to be very cost-effective for large businesses where the stock content requirement is higher. I am now using the $200 plan since I have requirements for both photos as well video content. One thing that I felt slightly high is the credit cost of 4k video. It costs 20 credits.
Does Adobe Stock provide any special offers to customers?
Yes, Adobe Stock does provide a special 30-day free trial option. You are entitled to 10 free standard assets during this one-month trial period. In my opinion, if you are reluctant to invest upfront in Adobe Stock, the 30-day free trial option will be the best choice. If you are unsatisfied with their resources, you can cancel them at any time. There are no risks here.
What are the pros and cons of Adobe Stock?
Like any stock photo and video site, Adobe Stock has also got its pros and cons. I will list it below. It will help you to decide whether this platform will be helpful for you or not.
Pros
The intelligent search feature in Adobe Stock makes it easy to find images and videos quickly. It helps to save some time.
They support both subscription-based plans as well as credit-based plans. So, all types of users can use their service.
They offer plans for individuals, teams, and enterprises.
They offer different types of stock content. It includes standard images, premium images, 1080p video, 4k video, illustrations, templates, etc. You will get all types of stock content under one roof.
One thing that attracted me to Adobe Stock is their massive collection of around 300 million images.
The integration with the Creative Cloud app makes it easy to select images from other Adobe apps. You will find the Creative Cloud app option very useful if you use other Adobe CC applications.
The 30-day trial is a really good option. It will help you to make a decision.
Cons
Finding the right audio track takes some time since they have many sounds coming under the same category.
The premium images are costly compared to the standard ones.
The credit cost for the 4k video is slightly on the higher side.
How to get Adobe Stock for free?
You can get the Adobe Stock for a limited time of 30 days. You can go to their website. Click on the pricing section. Here, you will be able to see the different subscription plans. You can see the “Start free trial” option for the first two plans. Click on any of these options to get free Adobe stock for a month.
Click here to sign up for the Adobe Stock program or view current trial/discount offers
The personal camera industry is a highly competitive space filled with several high-profile camera brands. Together they make some of the best cameras that dominate this space. The top three positions are dynamic spaces that Canon, Sony, and Nikon dominate in that order.
As someone looking for a camera for personal (or professional) use, it can get confusing very quickly as one tries to shift through a myriad of camera makes and models and tries to make sense of the long list of features that each camera has to offer. Let’s look at where each brand excels and specific camera models that do so.
This discussion will discuss the top eight camera brands and their current position in the industry. We’ll also briefly discuss the best camera system representing each brand and what makes that camera so unique. We’ll also recommend a specific camera that represents each of the brands.
Some brands like Canon and Nikon make all kinds of camera systems, from point and shoot to full-frame mirrorless units. It isn’t easy to generalize their camera lineup into one specific area as they make cameras for all genres and all types of photography. Yet it will remain an endeavor for us to select one camera from each brand that best represents what that make is best known for:
GoPro – The best brand for first-person action
Nikon – one of the best all-around camera systems
Canon – a cinema shooters dream come true
Sony – best low light camera systems
Olympus – lightweight micro four-thirds cameras for all-around performance
Fujifilm – one of the best crop camera systems with excellent low light performance
Panasonic – excellent camera systems for filmmaking
Pentax – one of the best weather-sealed cameras on the market.
GoPro – The best brand for first-person action
GoPro is the world’s leading action camera system. They have single-handedly revolutionized the action camera segment. Over the years, they have launched several iterations of their most famous action camera, the GoPro Hero.
Over the years, several other brands have come up trying to imitate the success story of the GoPro. Makers like SJ Cam, Xiaomi, and others have created versions of the popular first-person action cam.
Yet the GoPro Hero has remained the number one choice for action sportspeople, adventure seekers, divers, stunt performers, and anyone looking for a first-person action camera.
If you have been a GoPro fan for the last five years, you would love the new GoPro Hero 10. The new camera bundles a great video stabilization system. It also has 4K at 120 FPS, making it possible to capture extreme slow-motion footage right in the camera. Even the lens element has been upgraded. It now features a better water repellent coating. Overall it is an improved camera in every sense. However, the most critical aspect of the camera is inside the hood. It is the new GP2 processor that makes it stand apart from the crowd. It helps in the faster processing of the images along with the extended low light capability.
A comparison of the GoPro Hero 10 vs the Hero 9 and the Hero 8:
Nikon – one of the best all-around camera systems
Nikon is one of the oldest and one of the world’s largest camera, lens, and photography accessories manufacturing companies. Together with Canon and Sony, it records the most significant number of cameras and lenses sold worldwide. As of October 2021, Nikon has dropped to the third position in the global share of photography lens and camera sales. It currently owns 14% of the worldwide share.
Nikon makes both digital single-lens reflex cameras as well as mirrorless camera systems. They also have a compact camera segment that caters to primarily the beginner photography segment. At present, Nikon is focusing mainly on their mirrorless camera systems known as the Z series. Their flagship mirrorless camera is the Z9.
Nikon’s flagship mirrorless shooter – the Nikon Z9
Widely rated as one of the world’s top mirrorless cameras, the Nikon Z9 is a monster of a camera. Under the hood is a 45.7-megapixel full-frame stacked CMOS sensor. Paired with it is an EXPEED 7 image-processing engine.
Of late, Nikon has been having problems with the global shortage of microchips. They have been struggling to meet the demands of photographers in many countries.
Canon – a cinema shooters dream come true
Canon is currently the world’s top photography brand. It sells more cameras and lenses than any other camera brand. As of October 2021, Canon owns a 48% share of global cameras and lens sales.
Just like Nikon, Canon also offers a massive range of cameras and lenses. They have a dedicated mirrorless segment along with the existing DSLR segment. They also have a flourishing compact camera segment primarily aimed at beginner photographers and those photographers who mainly shoot with their smartphones and look for a proper camera for special occasions.
Canon’s flagship mirrorless camera is the EOS R3. This behemoth is powered by a 24-megapixel full-frame stacked BSI CMOS sensor. It also has Canon’s dual pixel CMOS AF II and Eye Control AF.
It can shoot 6K RAW at 60 FPS and 4K 10-bit internal video at 120 FPS. This camera is an incredible tool for shooting videos, giving you the option to color-grade your footage according to your preferences. You can also shoot high-quality raw at an incredibly high frame rate to facilitate slow motion in-camera capture.
The EOS R3 is an excellent camera for wildlife photography as well. Thanks to its 12 FPS mechanical shutter and the fast autofocusing performance powered by Eye Control AF.
Sony – best low light camera systems
Sony is the second-largest camera brand in the world. As of October 2021, Sony owns 22% of the global share of the sale of cameras and lenses.
Sony systems are widely known for their exceptional low-light capabilities. Although Sony makes camera systems for all kinds of photography, just like Nikon and Canon, they have some tremendous low-light cameras in their stable. For example, the Sony a7S III is one of the finest low-light camera systems you can find on the market.
The a7S III Is the third generation of the a7S. This camera is considered one of the best in the business when it comes to low-light photography. It is a compact full-frame mirrorless camera with 12-megapixel Exmor R BSI sensor technology. The camera system offers a fast Hybrid autofocusing system with 759 points.
The camera is capable of 16-bit RAW output, HLG, and S-Cinetone. There’s a lot of flexibility in terms of color grading if you are a serious videographer looking for a camera to shoot videos with. The camera also comes with a 5-axis SteadyShot image stabilization system. Handheld shooting becomes a lot easier with this.
When it comes to still shooting, the camera offers 10 FPS continuous shooting and adds an extended ISO range of 40 to 409600.
Olympus – lightweight micro four-thirds cameras for all-around performance
Olympus, along with Panasonic, has always been the Champions of the micro four-thirds system. they have been one of the early adopters of digital technology. However, Olympus focused on a segment of users who were not professionals and certainly not regular camera users. Their prosumer camera segment took the brunt of the loss when smartphone systems came up to become the most dominant camera system for everyday usage. The market for regular cameras contracted, and smartphone camera systems dominated the space.
Off late, Olympus has been embroiled in several scams. The top management has been accused of fraud, and there has been a lot of litigation in that respect. More recently, Olympus has sold off its camera business after 84 years of being one of the top camera manufacturing companies in the world.
Olympus’ best mirrorless camera to date for sports and wildlife photography – OM-D E-M1X
The OM-D E-M1X is one of the best mirrorless camera systems on the market. It is powered by a 20.4-megapixel Live MOS Micro four-thirds sensor paired with dual TruePic VIII image processors. The benefit of dual image processors is that the camera can produce high-speed bursts of images with full autofocusing. Additionally, the image buffer is very deep, and you can make long bursts at a high frame rate without the camera going slow. The OM-D E-M1X is one of the best sports and wildlife photography camera systems.
Fujifilm – one of the best crop camera systems with excellent low light performance
FujiFilm was always known for its 35mm camera film in the photography industry. They’re also known for their range of film cameras. They adopted digital photography technology very early and today are one of the largest producers of medium format digital camera systems. Their sensor technology is second to none and is known for extreme low-light capabilities.
Fuji has been concentrating on mirrorless camera systems and has produced excellent cameras in both media format, full-frame, and crop camera systems. Their mirrorless full-frame camera systems are some of the best in the industry.
Fuji’s best medium format mirrorless for landscape and other genres – GFX 100
This Fujifilm GFX100 102-megapixel beast of a camera is powered by a 43.8 x 32.9mm medium format BSI CMOS sensor. Paired with the sensor is an X-Processor 4 image-processing engine. The camera can capture incredible detail and is ideally suited for landscape, cityscape, architecture, interiors, fashion, and portrait photography. You can also use the camera for a lot of other genres. Except for wildlife and sports photography because the frame rate is rather slow at 5 FPS. But it excels in the other areas.
Panasonic – excellent camera system for filmmaking
Panasonic and Olympus have been the Champions of micro four-thirds system cameras. However, Panasonic also makes some of the best full-frame camera systems. Panasonic’s significant pull, however, is in the area of cameras that are tailor-made for cinema making. Their camera systems, such as the Lumix GH5 and the Lumix GH6, are exceptional cameras for filmmaking.
The contraction of the camera market had its effects on all camera manufacturing companies. Panasonic, too had its share of problems. However, recent rumors in the market that Panasonic is preparing to sell off its photography business just like Olympus did is not valid. In a recent statement by one of Panasonic’s directors, the company has no plans to sell its photography business and vows to continue growing the Lumix brand.
Panasonic’s GH6 comes from a long line of tailor-made cameras for filmmaking. These camera systems based on the micro four-thirds sensor have all the bells and whistles necessary for producing high-quality films.
The GH6 is the latest in this series of cameras. It is powered by a 25.2 megapixel Live MOS micro four-thirds sensor. The latest iteration of Panasonic’s famed Venus Engine image processor is paired with the sensor.
The power of the new image processor lets the camera shoot at 5.7 K at 30P internally at Apple ProRes 422 HQ, and FHD 300p. It can also shoot high-quality 100-megapixel stills. The dynamic range of the new sensor is 13 plus stops. A dual image stabilization system ensures that the camera can offer up to 7.5 stops of five-axis stabilization. This ensures that handheld stills and videos are rock solid.
The new camera has an updated auto focusing system with a processing speed of up to three times as powerful as previous generation cameras. Internally the camera has a 315-area contrast detection depth from defocus system. In short, the new system can predict by looking at a subject whether it is moving further away from the camera or coming closer to it. This allows the camera system to expect where the subject will be in the subsequent frame. This incredibly powerful autofocusing system comes in handy when shooting stills and movies.
Pentax – one of the best weather-sealed cameras on the market
Pentax makes one of the best weather-sealed camera systems on the market. Even their entry-level cameras, such as the K-70, are fully weather-sealed against all of nature’s elements. Pentax also makes compact medium format DSLR cameras. Pentax has sometimes been referred to as the dying brand. They don’t have a mirrorless camera in their camera lineup. They don’t even have a mirrorless system somewhere in the pipeline. When the whole world is moving gradually towards mirrorless systems, not having a mirrorless camera in the mix is a serious problem for Pentax.
Noticeably Pentax’s Share in the market has dropped significantly over the years. Even with such robust build quality and an excellent feature list, Pentax has somewhat lost the charm that it used to have back in the 80s and the 90s.
The Pentax K-1 Mark II, a 36.4-megapixel full-frame camera system is powered by a CMOS sensor and the Prime IV image processor. Autofocusing in the camera is powered by a SAFOX 12 33-point autofocusing sensor. The camera can capture full HD videos at 30 fps with 4.4 FPS in still shooting. The 14-bit image processor has been updated with a new Ricoh-developed Accelerator Unit. Apart from boosting the sensor’s ISO sensitivity to ISO 819200, the additional benefits include reduced noise and increased clarity. The color accuracy of images has also improved.
The camera system also has a 5-axis image stabilization system built into the camera body. This makes all compatible lenses image-stabilized automatically.
Concluding thoughts
The problems with Nikon’s supply line have lingered for far too long. Key camera systems and lenses have remained out of stock for a while, which will impact people whose livelihood depends on these items. That said, Nikon is trying to iron out its supply lines even as I write this.
The top three camera brands – Canon, Sony, and Nikon, are the leaders in mirrorless technology. Mirrorless is the new normal so you can opt for any of the three brands. We recommend Sony. If you’re interested in movie-making, then choose Panasonic. Pentax’s superb build quality and decent image quality make it a top choice for entry-level photographers looking for weather-sealed bodies. And if you’re interested in action cameras, then the GoPro is the best choice.
The term “blown out” in photography has nothing to do with tires, explosions, or knees.
In this article, we will discuss what blown-out means, how to avoid and fix blown-out photos, and more. Let’s get started.
In photography, blown-out means that the picture is overexposed, and some parts of the photo are totally white and have zero detail. In other words, the picture is considered to be blown out when its areas lack details because a large number of the pixels received excessive light.
You can have a blown out background, where it appears as a uniform white color, or you can have blown out highlights, where the photo may appear properly exposed, but smaller brighter areas of the photograph are overexposed.
Both digital images and film can be blown out. You will not be able to see any texture when you look at a blown out portion of a photo, whether it is a sky or snow that is overexposed.
How to Fix/Avoid Blown-out Photos?
Here are some steps you can take at the time of shooting to decrease the chance of overexposure!
1. Use RAW Files
You should shoot in RAW if you want to capture a lot of color and detail.
One of the benefits of shooting JPEGs is that your digital camera completes all the processing of the picture. And settings like tone curve, color saturation, and white balance are applied to the photo. So you don’t have to spend any time processing the picture.
However, one of the drawbacks of using JPEGs is the loss of detail.
When your camera compresses a picture into a JPEG, the picture ends up with less detail. Your photo may appear pixelated, grainy, or blurry due to a compression issue. Know that whenever you resize a photo, you are also enlarging or reducing the pixels of that picture. The loss of detail tends to be more apparent if you are taking an extremely detailed picture. A significant resizing of JPEG photos will lead to a visibly poorer picture.
Further, JPEGs don’t preserve all the details. And usually, every detail matters in photography.
Therefore, ensure you shoot in RAW.
There are some drawbacks to shooting RAW, though.
RAW files are not immediately shareable. You will have to convert them to a compatible format before you can share them with your friends. Your friends and clients might not have the right tools to see these files.
2. Use Exposure Compensation
Overexposure can happen in many ways.
For one, your scene might contain a combination of extremely dark and extremely light elements, and your camera might not be able to capture all that tonal range.
Exposure compensation is a feature on your camera that lets you make your photos look darker or brighter with less difficulty. When there is a significant difference in light between the lighter and darker areas in the frame, you can use this feature to expose the light areas and then recover details in the darker areas using photo editing software post-shoot.
Almost every camera you can purchase right now has this feature. Exposure compensation is extremely easy to use and it can be of great use across several situations, letting you get the picture you want with minimum fuss.
3. Use a Graduated Neutral Density Filter
Using a neutral density filter is another way you can prevent blown-out highlights, particularly at sunset or in the sky. It’s a filter that easily attaches to the front of a camera lens and decreases the amount of light entering the camera. It doesn’t have any impact on sharpness, color, or picture, though.
Click here to find out more about neutral density filters and pricing.
4. Shoot in HDR
HDR stands for high dynamic range in photography. Dynamic range refers to the range of tones in a scene, from the brightest highlights to the darkest shadows. HDR involves shooting multiple images of the same scene using different exposure.
When you combine all the shots, you end up with a picture that is exceptional. Your software will take the darkest areas from the overexposed image, the lightest areas from the underexposed image, and the other tones from the shot in between and you’ll get the best exposure for that situation. Many people recommend shooting HDR on a tripod. Apart from this, you also need post-processing software that can combine the three images into one HDR file.
5. Highlight Alert
The Highlight Alert is an extremely valuable tool that will show you any area of your photo that is overblown or overexposed.
To view the highlight alert, you have to switch it on from the menu system of your camera. The camera menu can be accessed by pushing the Menu button on your camera’s back.
6. Check Your Histogram Regularly
A histogram is a graph that displays the light distribution in your exposure, the brightest areas to the right, and the darkest ones to the left. When taking pictures in challenging conditions, check the histogram after taking the picture.
7. Photo Editing Software
Exposure can be adjusted and details can be restored in the overexposed areas with photo editing software like Lightroom. Try the following methods to fix a blown-out picture.
A graduated filter allows you to add a dark gradient to a portion of your image. Choose the overexposed area and adjust the settings to darken the overexposed parts and reveal more detail.
The highlights slider allows you to adjust the lightest parts of your photo. Move it to the right to enhance brightness or move it to the left to reduce brightness in the highlights.
The white balance slider allows you to adjust the mid-tones of a photo. Move the white balance slider to the left to reduce brightness or move it to the right to increase brightness.
The exposure slider allows you to add or take away brightness from the picture. Move the exposure slider to the left to reduce exposure or move it to the right to increase exposure.
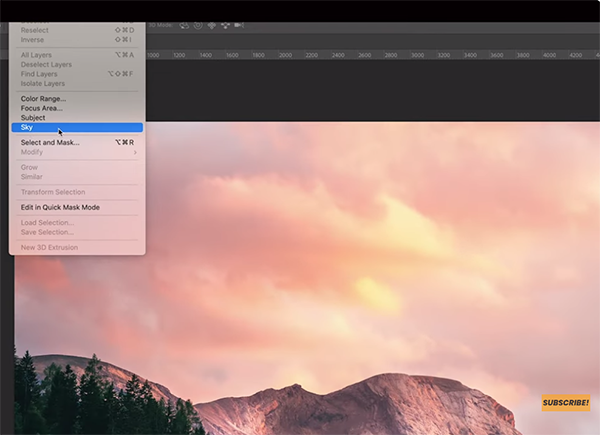
Watch the tutorial below to know how to fix overexposed pictures in Photoshop CC:
Is It Better to Under or Overexpose?
First, let’s understand a little about underexposure.
A picture that is correctly exposed is neither very dark nor very light. A photo has achieved good exposure when nothing is lost in shadow or blown out in it. Aperture, shutter speed, and ISO work together to determine exposure.
Rich shadows and bright highlights make your pictures memorable and captivating. Highlights are the brightest elements in a picture, whereas shadows are the darkest parts.
A picture is underexposed if it is very dark. Details will be lost in the darkest parts of the photo and in the shadows.
And the picture is overexposed if it is very light. Details will be lost in the brightest parts of the picture.
By using a light meter, you will know if the photo is the correct exposure.
A light meter measures the amount of light in a particular environment so that you can determine the settings (Aperture, shutter speed, and ISO) needed for correct exposure.
Here is how to correct an underexposed picture.
1. Open up the aperture of your lens more
You can change the aperture of your lens to a wider opening to allow more light into your camera and prevent underexposing your picture. However, you should keep in mind that you can’t do this when your camera is in automatic mode.
2. Change your camera’s ISO setting
It’s important to know how much light your camera needs to get the correct exposure. Set the ISO number to a higher number, so the sensor of your camera is more light-sensitive. And don’t change any other settings. This will prevent underexposure in your pictures. The downside to this is an increase in digital noise and a reduction in sharpness.
3. Add light to your subject
Use a flash or a big white reflector to add light to your subject. The other way to add light involves either capturing the picture at a different time of day or moving subjects to a well-lit place.
4. Use the exposure compensation feature
You can override the exposure settings of your camera using an exposure compensation feature. This is a great way to darken or brighten a picture.
Now back to our original question: Is it better to under or overexpose?
It’s better to go for an underexposed shot instead of an overexposed one. This is because it is easier to adjust an underexposure with photo editing software than to adjust an overexposure.
Underexposed shots record most of the detail of your image. And you can bring these details out with some tweaking in photoshop. In contrast, overexposed shots tend to record less of the detail of your shot.
Here are some more reasons to intentionally underexpose your pictures.
Getting skin tones right is extremely important. A beautiful skin tone is something photographers want to get in their photos. Underexposure gives you richer skin texture and tones.
As mentioned earlier, underexposing excessively can add noise. However, dialing the exposure down by one or two stops will not damage your photograph. It will prevent you from overexposing your pictures and retain details of the lighter background.
I hope that now you know what blown out means and how you can avoid or fix it.