The Dordogne-Périgord region offers its visitors a fascinating blend of extraordinary experiences in château courtyards, underground caves and canoeing on its rivers.
Explore its historic towns, wander through some prehistoric caves, visit a troglodyte fort and city and paddle slowly down the Vézère River. Be thrilled by the sight of many of its charming one thousand and one Châteaux while driving along the quiet roads through lush agricultural fields and dense forests. Choose the accommodation that best suits your requirements from a whole villa on an estate, bed and breakfast in the woods or a chic urban hotel. The Dordogne has it all.
Two Historic Towns in the Dordogne, Périgueux and Brantôme-en Périgord
Périgueux is the largest city in the Dordogne and the only main city through which the L’Ilse River flows. The historic centre of this city has some excellent examples of Medieval and Renaissance architecture. Small brass cockle shells indicate the pilgrimage route to Santiago de Compostela that passes through this area.
For centuries, the city was actually two cities, the Roman city, Civitas Petrocoriorum and le Puy Saint Front next to it, where the town’s first monastery and church were built. They were replaced by a Romanesque-style basilica in the twelfth century. The two settlements united during the thirteenth century to form Périgueux, and the basilica became the focal point in the old town. It remains so today and is known as the Cathédrale Saint-Front, and a good starting point when exploring the old town. All the main sights here are within walking distance, and most of them are in the old town. They include the Vesone Tower, a Roman tower, several interesting museums and the Mataguerre Tower. Enjoy a landscape of the town’s history from the top of this tower. Just 30 minutes’ drive from Périgueux is the pretty village of Brantôme.
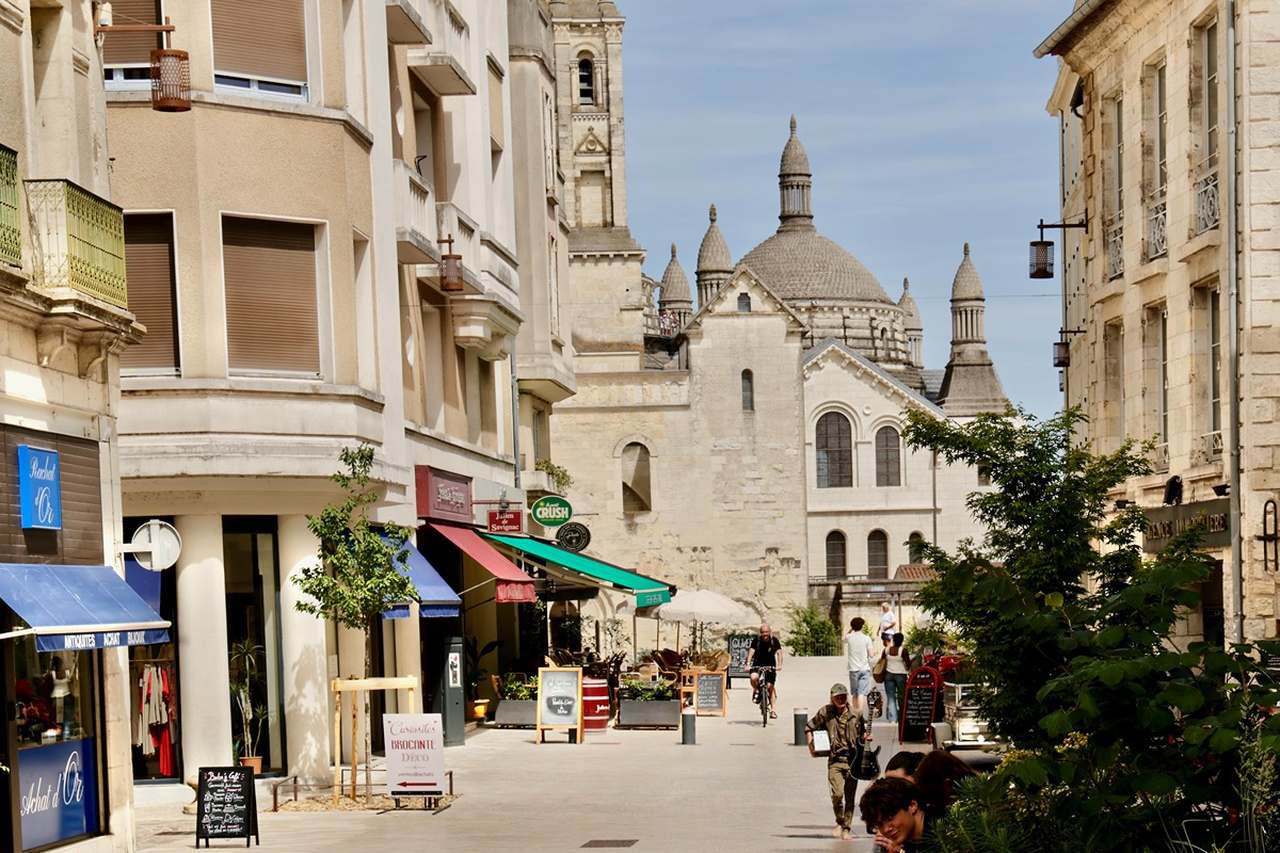
The Old Town of Périgueux in the Dordogne, France
Christened the Venice of Périgord Vert by Raymond Poincaré in 1913, Brantôme en Périgord enjoys a picturesque location on the River Drone. It lies in the shadow of an impressive Benedictine Abbey built in front of a cliff. Carved into the base of this cliff is an ancient troglodyte settlement. On the wall of this hollowed-out area is an engraving of a scene from the Last Supper. It was during the fifth century that pagans and hermits arrived here and settled in these natural troglodyte shelters. Three centuries later, the Benedictine monks arrived to find the ideal setting for an abbey, with all necessary raw materials at hand and water from the river to irrigate crops grown on the fertile soil. Despite a chequered history featuring occupations by the French and the English, the abbey has remained largely intact. These included a small cloister, the church and the monks’ buildings now occupied by the Town Hall and the Fernand Desmoulin Museum.
The medieval old town is surrounded by canals crossed by five bridges built by the monks to bring water into the city. Information boards strategically placed help visitors to find their way around this fascinating village with its narrow streets and lovely local freestone houses separated by the canals. An intriguing troglodyte settlement comprising a fort and a city can also be found at the Roque Saint-Christophe.
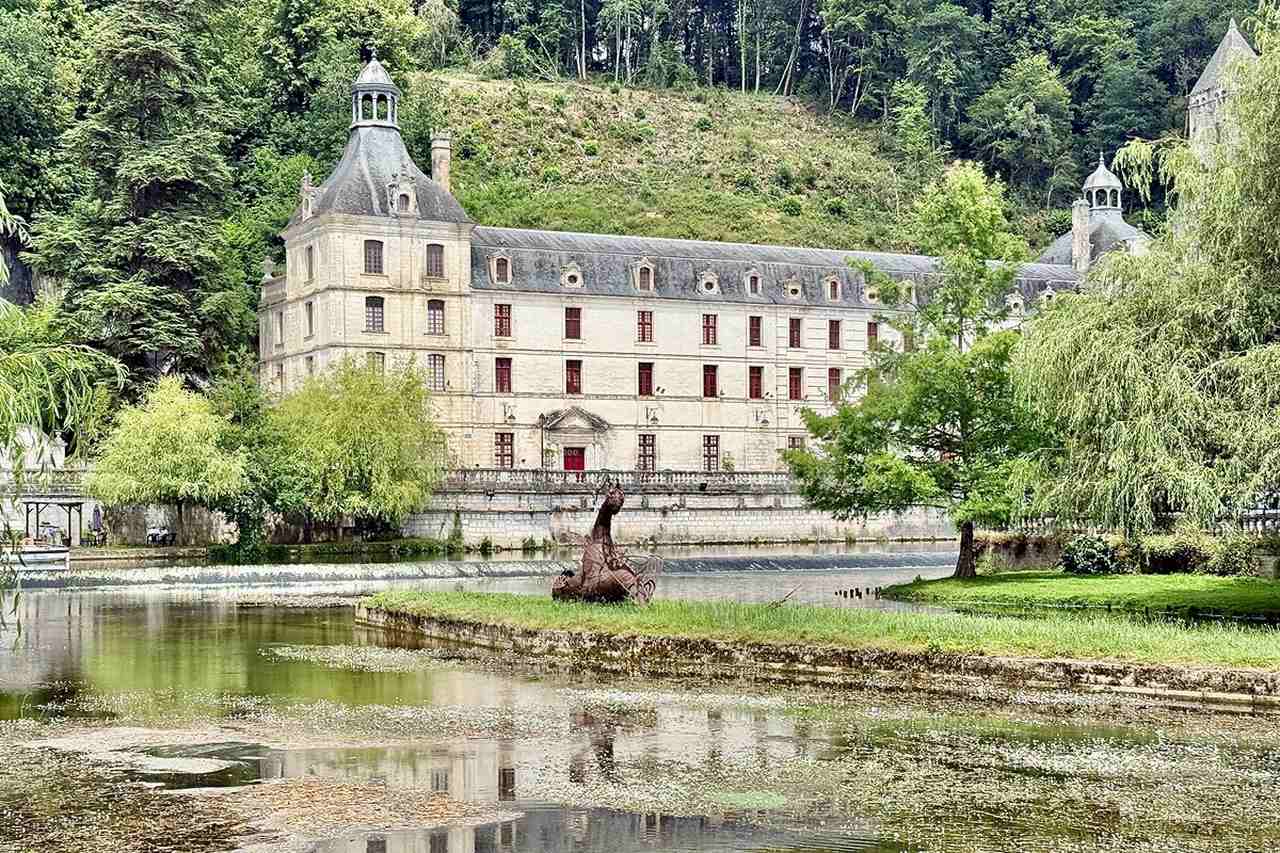
Benedictine Abbey in Brantôme in the Dordogne, France
Meet the Troglodytes in the Dordogne
Naturally hollowed out caves in the limestone cliff of La Roque Saint-Christophe, situated at Peyzac-le-Moustier, were once the site of a large troglodyte settlement. There is also evidence that this area was used by Neanderthal man before the creation of the troglodyte settlement, which began during the sixth century. A town and fortress were fashioned out of the five terraces in the cliff face. People lived here until the sixteenth century, when the town was destroyed during the Wars of Religion. But enough remains to conjure up a picture of how these people lived. They hacked holes into the rock to support the beams of traditional medieval houses that extended back into the rock itself. Roofs were created using flat stone known as lauze. Different sections were created for different activities, including a church, a forge and a cowshed. Replicas of the winches, cranes, capstan and scaffolding have been created to illustrate how the building was undertaken. At one time this biggest natural shelter in Europe was the site of hundreds of houses with a population of around one thousand people. It was the ideal location above the valley through which the Vézère River flows. Once used to transport goods the river is now ideal for exploring the area in a canoe.
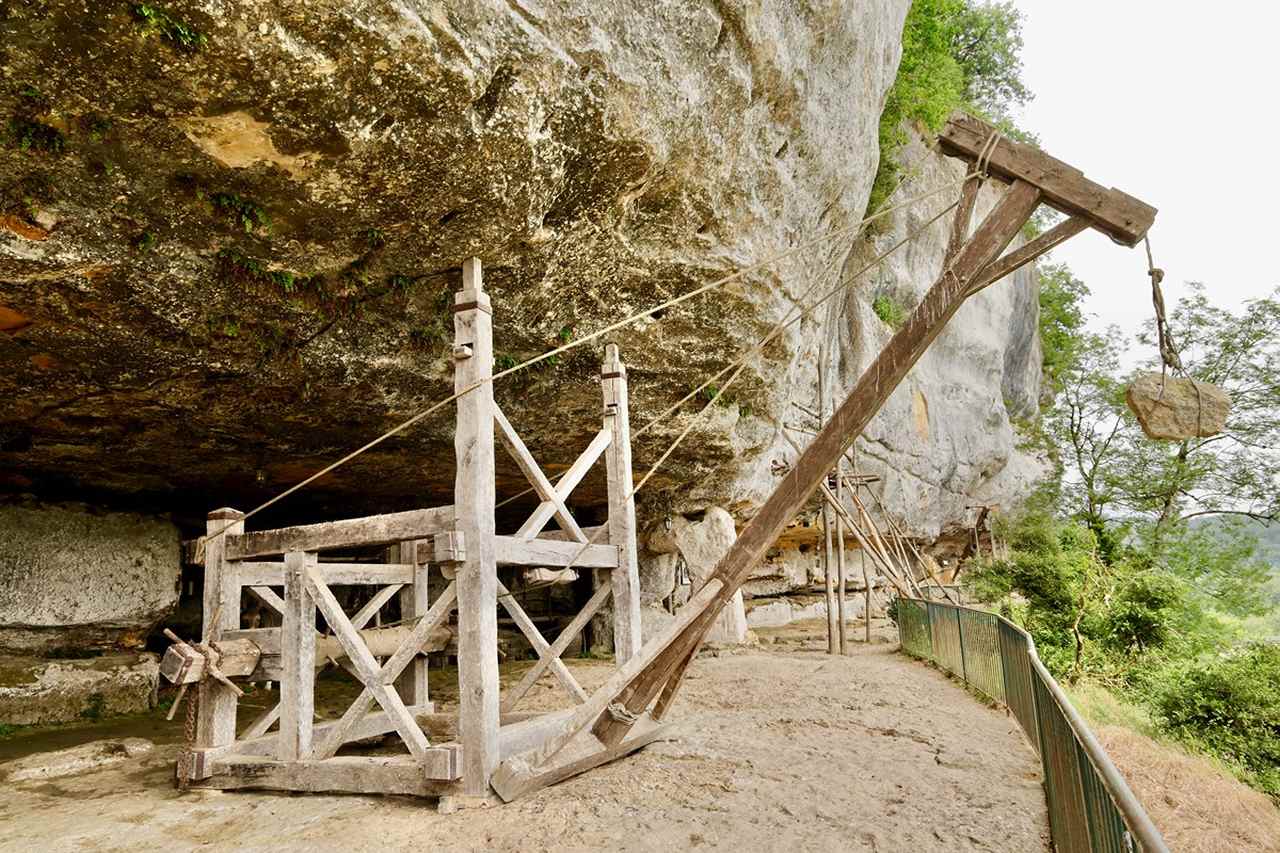
Troglodyte Settlement at La Roque-Saint-Christophe in the Dordogne, France
Canoeing on the Vézère River in the Dordogne
Beginners, novices and experts can safely drift gently along the Vézère River, enjoying the changing landscapes of the surrounding countryside. A good starting point is the APA Aventure Plein Air base, located in Saint-Léon-sur-Vézère. From there, once equipped with life-jackets and paddles, participants are driven up-stream where the canoes are kept and once launched make their way downstream. Points of interest on this journey include a small waterfall and a lock that was built but never used due to the advent of the railway and a decrease in river traffic. Tow chateaux on the river banks are the impressive Château de Belcayre, which is available as a holiday rent on AirBnb. The other, in the village of Saint-Léon-sur-Vézère is the Château de Clerans which is privately owned by can be hired for weddings. Another château on the banks of the Vézère River is the Château de Losse at Thonac, which is open to the public.
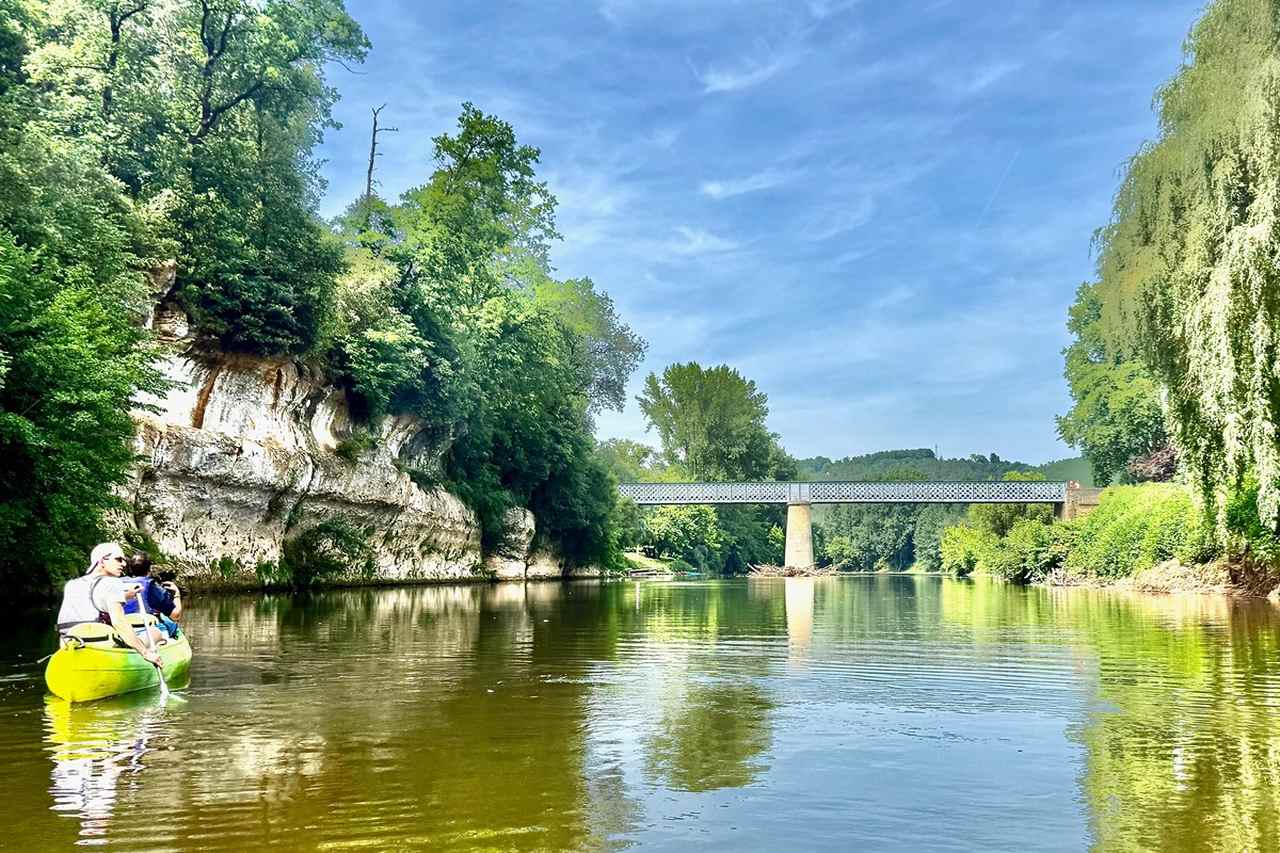
Canoeing on the Vézère River in the Dordogne, France
Château de Losse and Gardens in the Dordogne
Château de Losse, a splendid Renaissance château, dates as far back as the eleventh century when the Losse family from Flanders built a fortress on the banks of the Vézère River. This powerful family played an important role in the history of France until the French Revolution. Its transformation from fortress to residence occurred during the sixteenth century. But it retained some defensive features. After the French Revolution, the castle was abandoned until it was acquired by the family of Prince Hàm Nghi from Annam in Vietnam.
The restoration was undertaken by Princess Nhu May, who also transformed the estate into a productive farm. After bequeathing the château, gardens and farm to her nephew, the princess moved into a small house in the grounds where she lived until she died in 1999. She was renowned for her support of the locals, and it is said that weapons for the French Resistance were hidden in the grounds of the château. Sadly, the château and farm went through another period of neglect until 1976, when a Franco-Belgian family decided to save it and meticulously restored it to its former glory. The luxurious Renaissance residence and gardens are now open to the public.
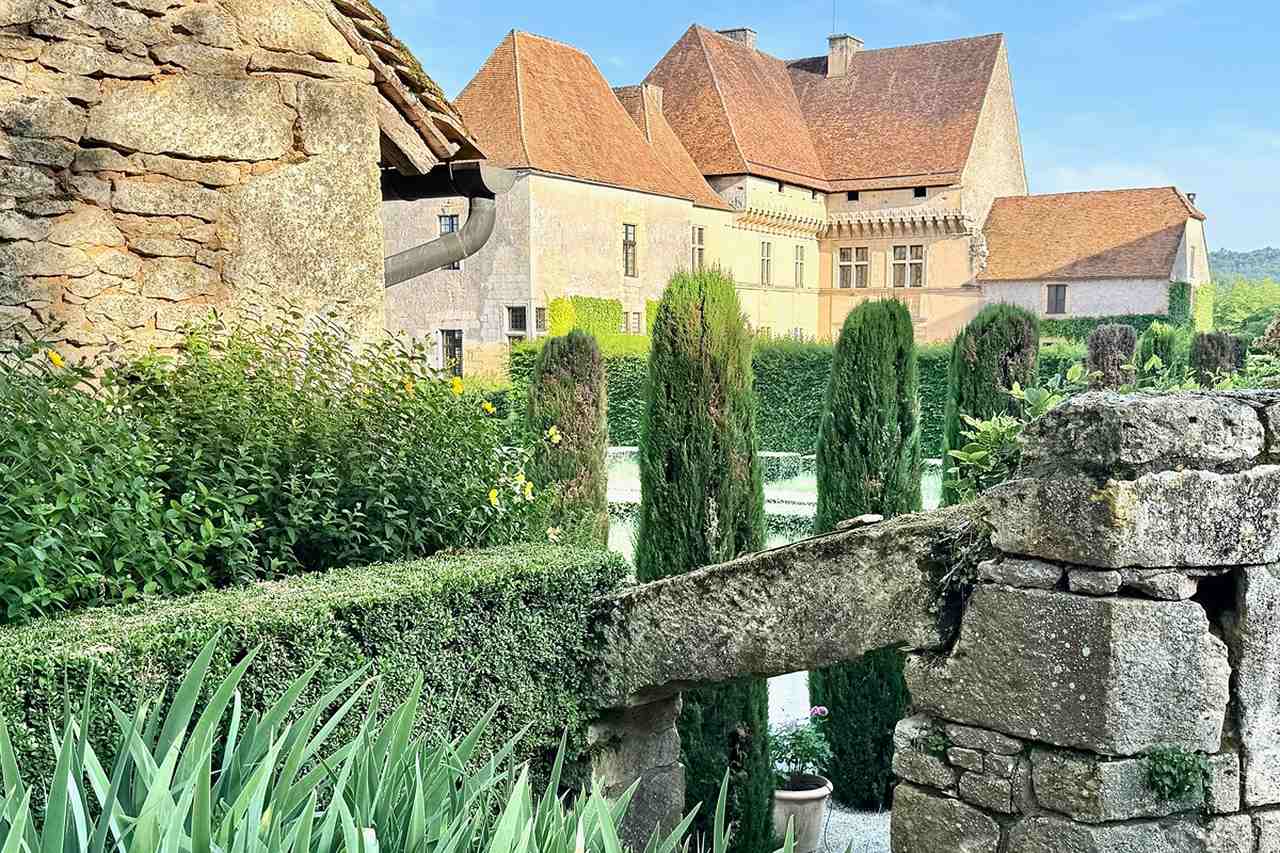
Château de Losse & Gardens in the Dordogne
Guided tours of the state rooms, complete with furniture, tapestries and paintings from the sixteenth and seventeenth centuries, are a real treat. Visitors can also explore the defensive features, which include a moat and a watchtower. The garden is also typical of the period and has been awarded the title of Jardin Remarquable due to the exceptional design and historical experience. Different experiences are available, including the Premium Visit. This exclusive tour reveals some intriguing secrets of the castle, including some exhibits not on display and cocktails on the terrace after the tour – a magical experience. Facilities include a picnic area and tearooms/restaurant, the Jardin de la Princesse. Having explored the Dordogne above ground, there are also some amazing caves to explore underground.
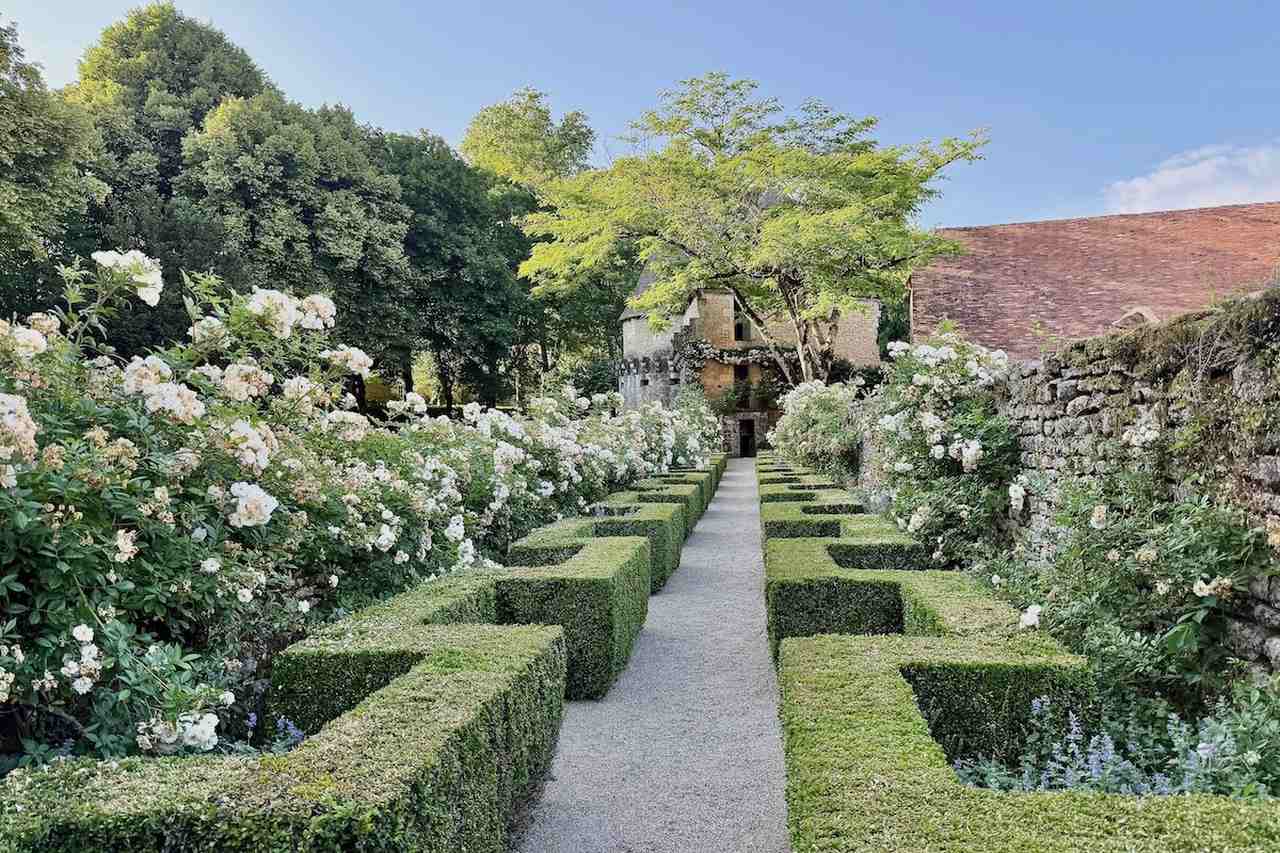
Garden at Château de Losse in the Dordogne
Going Underground in the Dordogne
The Cave of Tourtoirac, or Grotte de Tourtoirac (also known as Grotte de la Clautre), is known not only for its unusual formations but also for offering full accessibility for wheelchair users. This is thanks to the installation of a lift that takes visitors below ground to level paths that wind their way through impressive rock formations that have been formed over millions of years. Discoverers of these underground caverns did not have such an easy means of entry. They were discovered in 1995 after several attempts were made to enter via a narrow tunnel submerged under the waters of a lake. Following the discovery of this underground wonderland, it was not until 2010 that the caves could be opened to the public. Visitors can now learn how water infiltrated its way through a crack in the rock and slowly carved a way through that rock. It created a network of passageways full of stalactites, stalagmites and unique formations. On their journey through a small part of this immense cavern, visitors will be treated to a light and sound show that infuses life into the formations – towering pillars created by the fusion of stalactites and stalagmites and intricate structures hanging from the ceiling. They will also hear the rush of water as an underground river still flows through the cave.
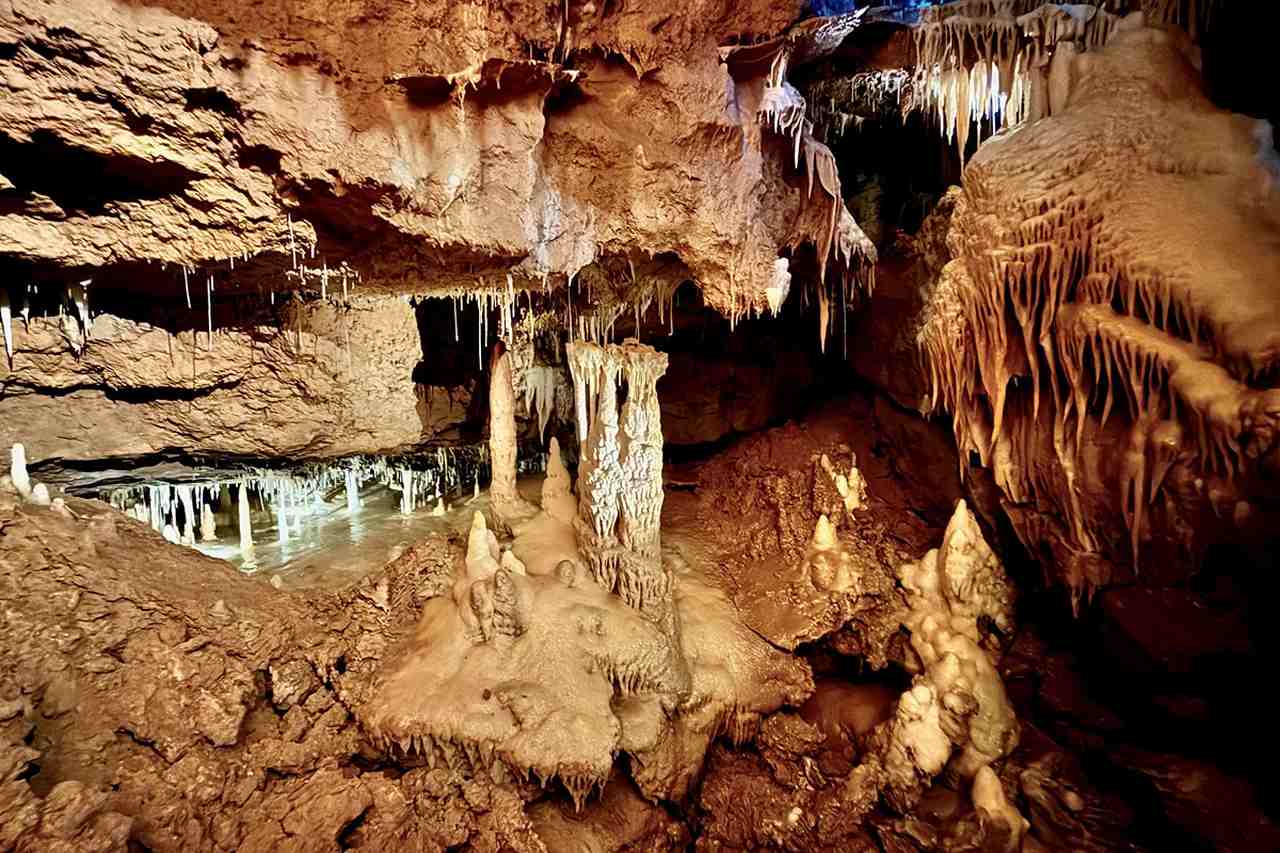
Inside the Cave of Tourtoirac in the Dordogne
The emission of steam through the ground led to the discovery of the Grotte de Villars (Villars Cave) in 1953. Nearly 13 kilometres of this cave have been explored so far making it one of the largest underground networks in the Périgord region. Immense chambers connected by galleries have been carved out by an underground river. And seepage of water has created a surreal but natural setting of calcite flows, fine stalactites, gours, translucent draperies, and numerous stalagmites. Awe-inspiring in this cave are the prehistoric paintings, and this is the only cave in Périgord where they have been found. They were created using the contours of the cave and include the horse rotunda and the scene of the bison and the man – a rare human figure in prehistoric art. Guided tours are available and can be enhanced by the addition of the light and sound show and the VIP experience – cocktails in the cave. There is also a café, a prehistoric garden (included in the entrance fee to the caves) and a souvenir shop. But for more authentic French shopping a local market experience is recommended.
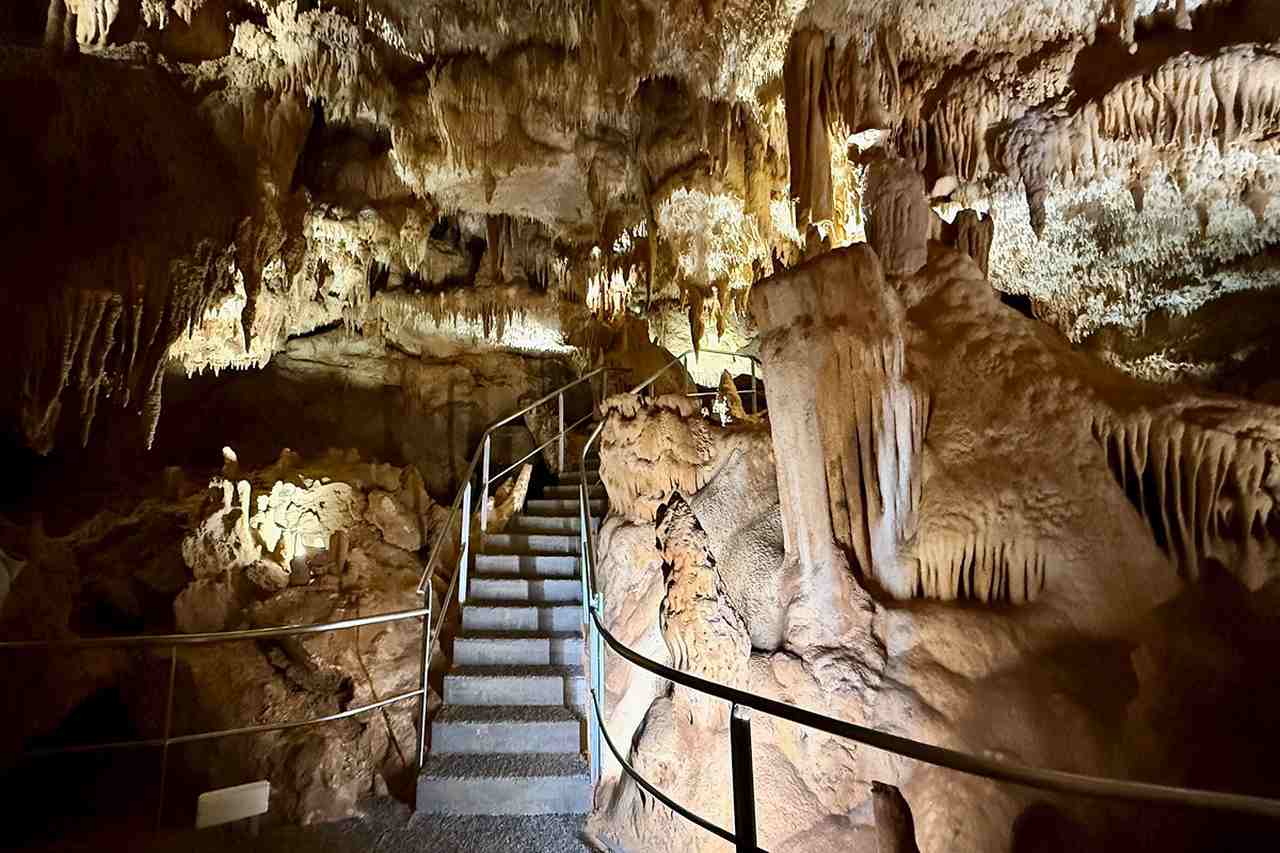
Inside Villars Cave in the Dordogne
Browse the Markets in the Dordogne
Traditionally, the market in France is the place where the locals do their food shopping. In many towns and villages in the Dordogne, regular markets are still being held either indoors, outdoors or a combination of both. Périgueux has an indoor market every day in the Halle du Coderc in a square of the same name. And in the summer, the Nuits Gourmandes, a producers’ market, is held on Wednesday evenings. The Brantôme weekly market happens every Friday morning selling local delicacies, local produce, artisans’ products and clothing. The town also has a night market on Friday evenings during July and August. But to get the best flavour of a traditional French market head for the authentic village of Le Bugue in the Dordogne on a Tuesday or Saturday. The Tuesday market is the largest and livelier of the two. It is a mix of local farmers and local traders offering fresh produce and local products. Tastings are encouraged including different varieties of the traditional chestnut cake. After browsing the stalls enjoy a convivial coffee in the main square. Visitors who enjoy browsing flea markets will delight in the treasure trove of all things imaginable at the Brocante et Bibelot (flea market and trinkets) near the car park. But the Dordogne is not explorable in a day and a wide variety of holiday accommodation is available in the region.

Market in Le Bugue, the Dordogne
Where to Stay in the Dordogne
La Chartreuse des Ormeaux just a few minutes’ walk from the village of Saint-Alvère, offers a choice of two different self-catering villas on a private four-hectare estate. The larger of the two villas, Le Domaine des Ormeaux has ten bedrooms and nine bathrooms. The smaller villa has seven bedrooms and six bathrooms. Either is suitable for a family or a group of friends and both feature a kitchen, dining room and lounge. This exclusive retreat has a swimming pool in the lovely grounds and offers an a la carte menu of services that can be purchased during a stay. These include a chef to cook meals and extra cleaning services.
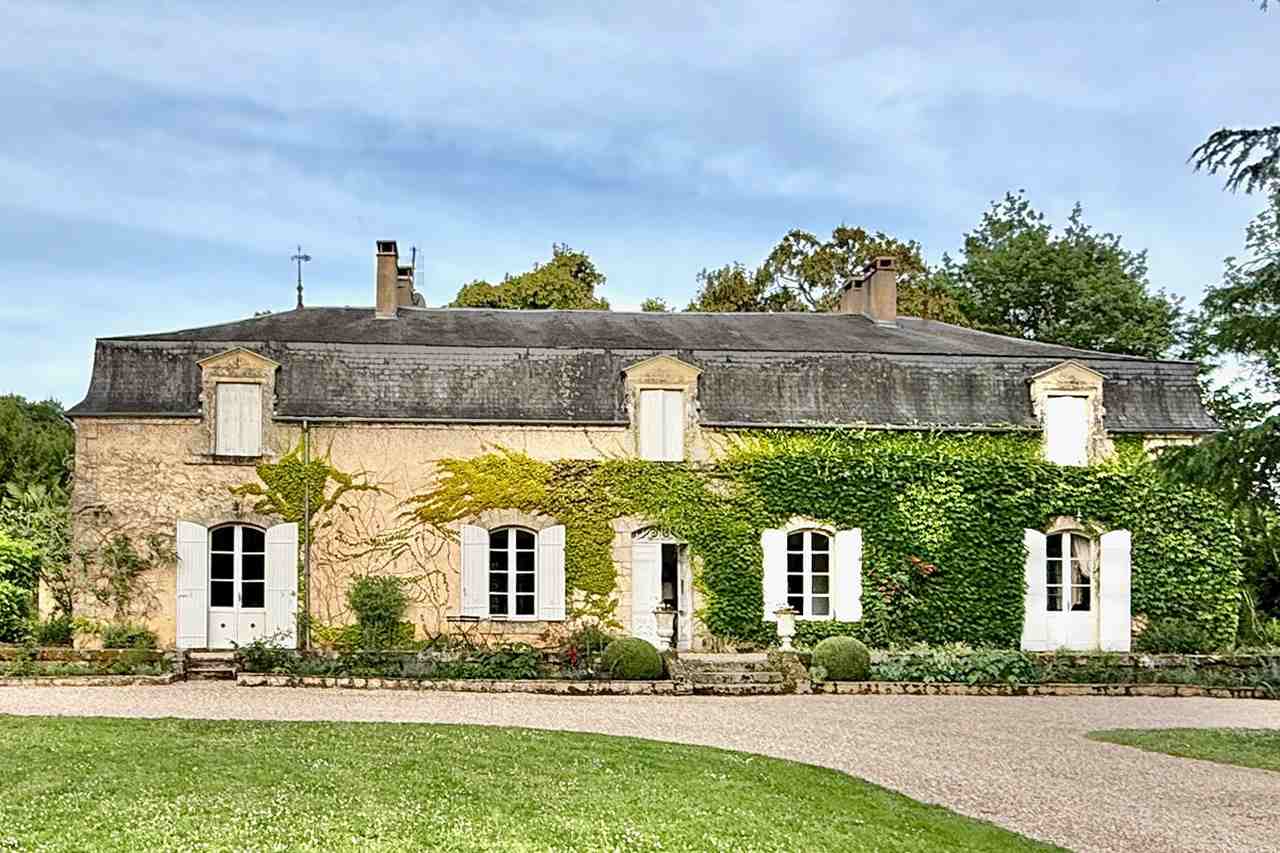
La Chartreuse des Ormeaux in te Dordogne
Maison Les Grands Chênes is a unique bed and breakfast property in the Vézère Valley as it is situated in the heart of an oak forest that is a designated UNESCO World Heritage Site. The property features four bedrooms with windows facing the forest, giving guests the feeling of being in the forest itself. Above these rooms is a lounge/dining area and a kitchen. Although it is modern in appearance, the building reinterprets a construction typical of the Dordogne using materials from old agricultural buildings already on the site and some of which have been renovated. Breakfast is a delicious buffet and the facilities include an outdoor swimming pool and a play area. Perfect for those who appreciate the tranquillity of nature.
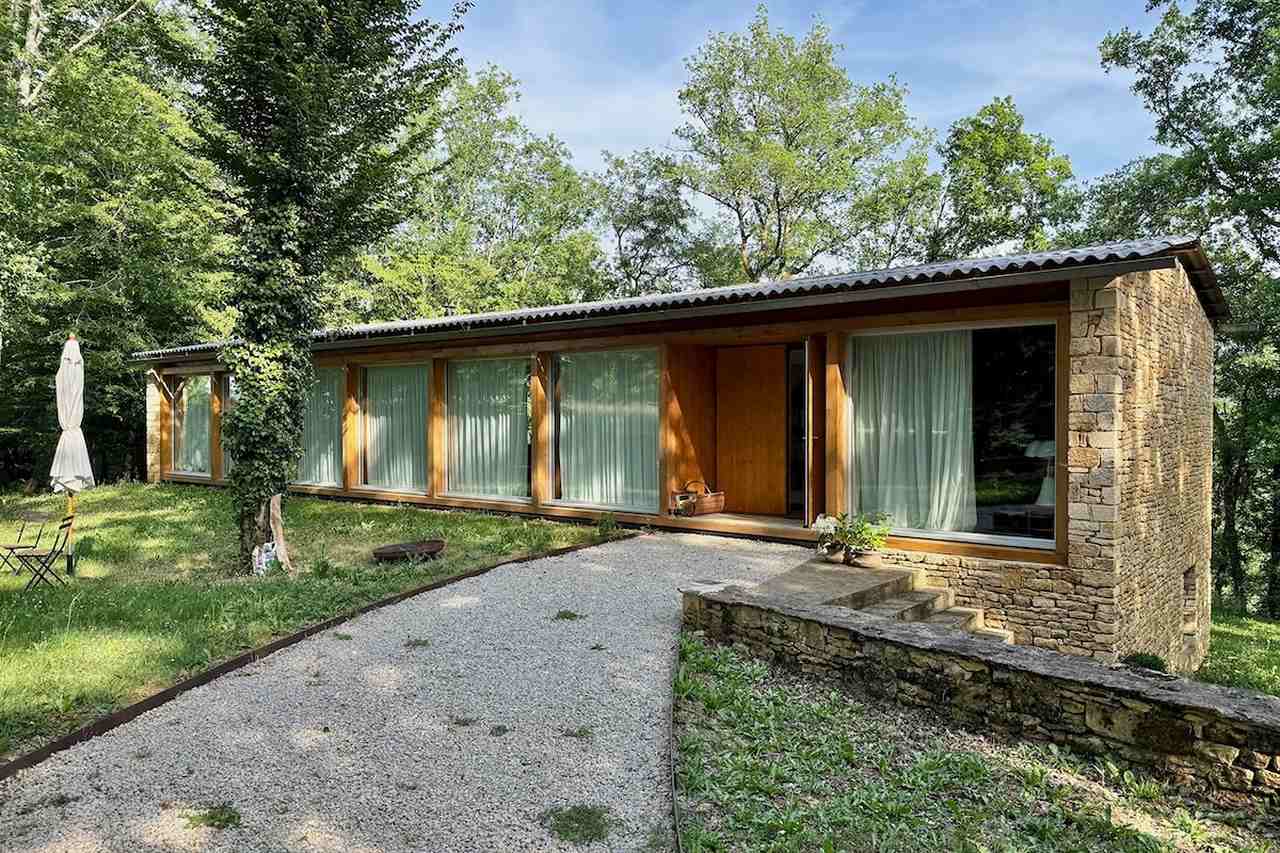
Maison Les Grands Chênes in the Dordogne
Le Moulin de l’Abbaye is a delightful hotel in the heart of Brantôme one of the most beautiful villages in the Périgord. The hotel is a combination of three historic buildings, the Mill, the Miller’s House and the Abbot’s House offering elegant, well equipped rooms. Guests have three options for dining: a Michelin 1-Star restaurant in the Mill with seating on the terrace outside overlooking the river. Across the river is the Au Fil du Temps a classic bistro and the Au Fil de l’Eau is moored to the bank of the river Dronne.
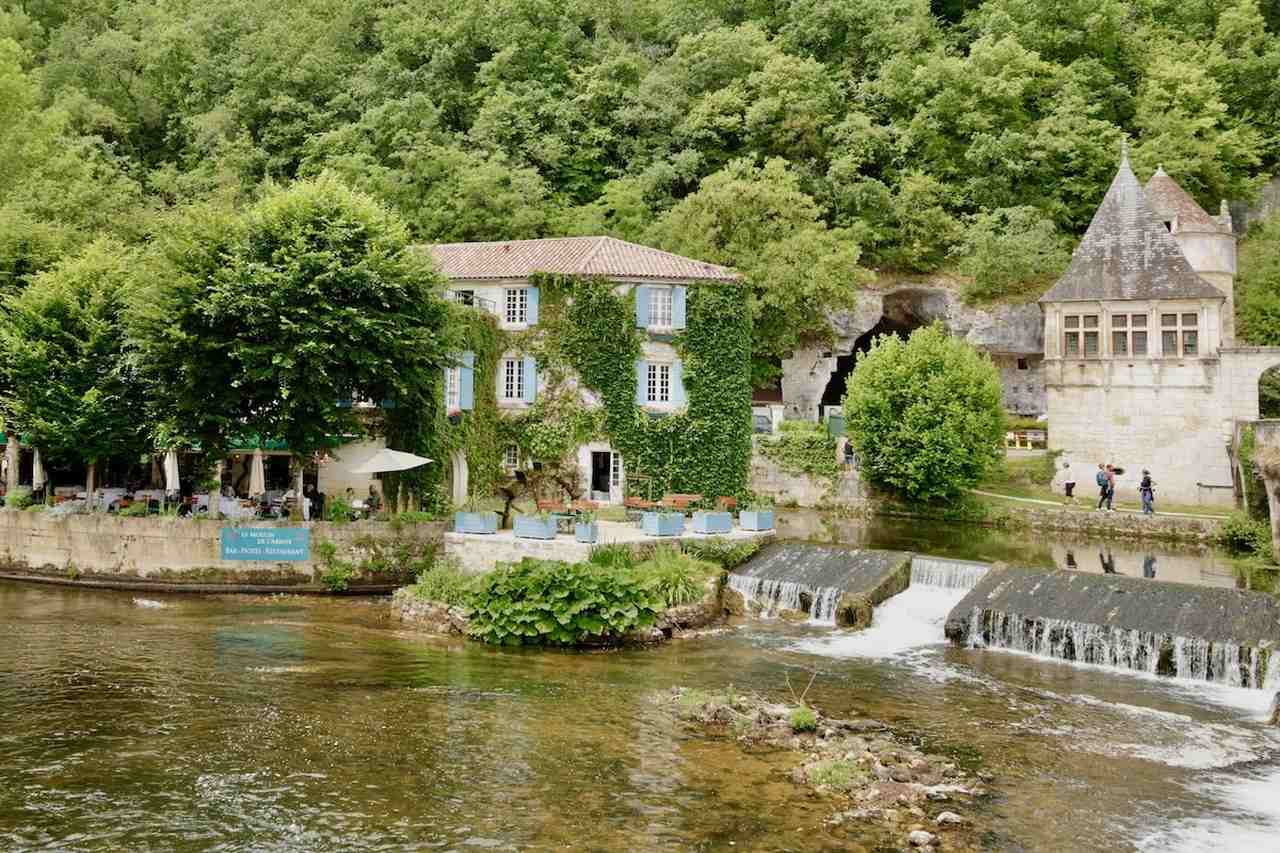
Le Moulin de l’Abbaye in Brantôme, the Dordogne
A journey through the Dordogne-Périgord region is a gentle but exciting adventure and a great way of experiencing authentic France.
For more information about the places mentioned above, click here
The post Experience France at its best on a journey through the Dordogne appeared first on The Travel Magazine.


