Zonerama’s ability to show HDR pictures and the latest AVIF and HEIF formats is a world premiere in the photo sharing services arena. Here’s what this means to you.
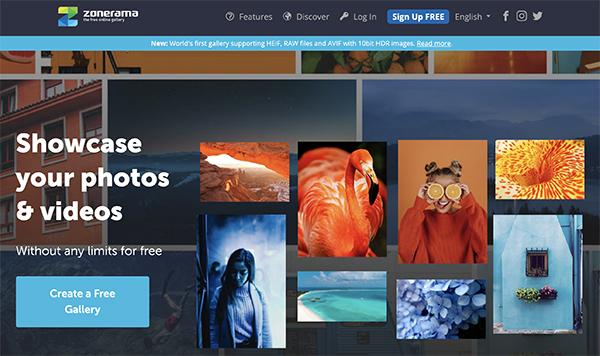
Zoner, makers of Zoner Photo Studio X, just added several powerful new features to Zonerama. Zonerama is the free online platform that provides users unlimited space and encourages them to upload photos and videos where they’re securely stored and shared. It’s simple and easy to use, and suitable for every member of the family. And now, with the introduction of support for HDR, the latest AVIF & HEIF formats and Raw files, professional photographers will find it the most useful and versatile online gallery available, bar none.
What’s Been Enhanced?

1. HDR Support
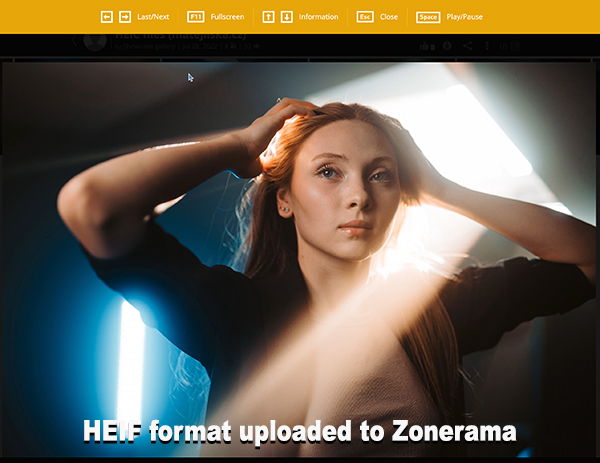
Venture into the world of 10-bit HDR images, enabled through Zonerama’s support for the AVIF and HEIF format. Photos can be shared with followers who can view them in nearly all mainstream browsers (mainly Chrome-based browsers) given the right hardware.
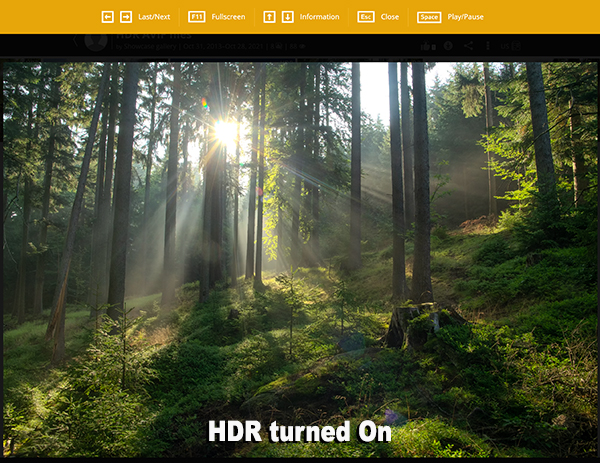
Naturally, HDR display must be enabled in Mac or Windows settings (ideally with calibration). Check your display for HDR support by opening an image in full view in Zonerama’s sample gallery (open the full image, not thumbnail). If the bright areas of the photo are brighter than the white part of the operating system interface, the photo is displayed in HDR.
2. RAW File Support
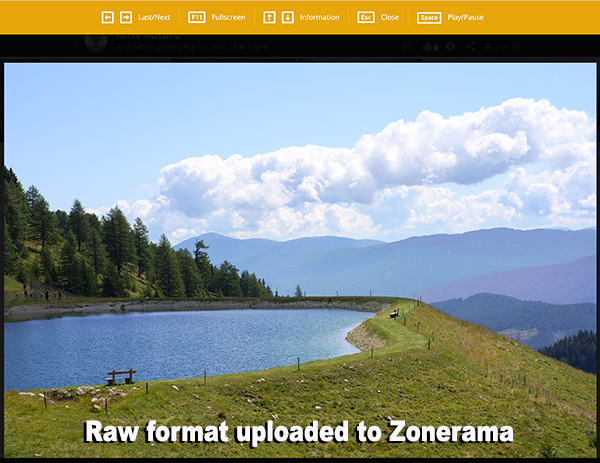
For the first time anywhere, photographers who have a ZPS X subscription can publicly or privately share all common Raw files as effortlessly as other standard photo formats.
Being able to share Raw formats without compressing them or changing them to JPEG or TIFF first is a real time saver. Even if you mainly shoot JPEGs you’ll find this unique ability to handle Raw files convenient.
3. Latest AVIF & HEIF Format Support
Users of newer iPhones or cameras that shoot to HEIF (also known as HEIC or HIF) can share their photos without the hassle of conversions. While the iPhone is a popular device, cameras supporting this format are now beginning to emerge in the market. Zonerama is ahead of the curve—it’s prepared for 10-bit HEIF files with PQ (Canon) or HLG (Sony) characteristics. What’s more, HDR is supported here too.
Photos can also be shared in AVIF which is known for its excellent quality-to-size ratio. Both formats are also supported by Zoner Photo Studio X for editing.
Adopted by Apple for iPhones and iPads about five years ago, HEIF files are compressed more efficiently than JPEGs and retain higher quality. HEIF files are smaller than comparable JPEGs, often about one-half the size, and therefore occupy less space on your phone or hard drive.
Both better and smaller? Yes. The image quality of HEIF files is in fact higher than JPEG files. HEIF supports image transparency (like PNG files) and has broader dynamic range capabilities. Both JPEG and HEIF formats store EXIF metadata (camera, date, GPS location, etc.) but HEIF has a distinct advantage because the format also stores editing information, so it’s possible to undo the edits later.
Available Now
All of these new formats can be uploaded to a Zonerama online photo gallery with both free and paid (Zonerama Premium) accounts. To share Raw files, users must use Zonerama Premium which is included with any ZPS X subscription.
What Makes Zonerama Special?
The addition of the new tools in Zonerama Premium make it the unparalleled free online gallery for sharing photos and video. The original Zonerama platform that is still free to everyone, even those who do not use any Zoner products, is awesome stuff, too.
Zonerama is 100% free. No credit card needed to set up and account and no hidden charges. And all users receive unlimited space—upload as many photos as you want—and never worry about storage charges. Furthermore, all images retain their original quality. No compression to squeeze the life out of your images.
Zonerama Premium
The premium tier of Zonerama, free to holders of any Zoner license (e.g., Zoner Photo Studio X) offers several enhancements and advantages in addition to all of the new features. Users can upload videos of unlimited length (Free Zonerama users are limited to videos up to five minutes in length). Premium also provides a link manager offering editing of existing links plus advanced settings (e.g., link expiration dates) and the highly configurable embedding of HTML galleries in your own website. It also eliminates ads from your albums and on your profile.
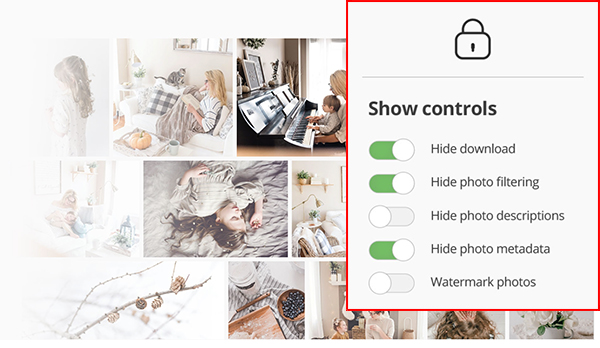
Privacy and security are key issues for everyone. With Zonerama Free and Zonerama Premium, you can password protect your albums and share photos with only those you authorize, and you can add a watermark to your photos to protect your copyright. Authorized guests can download viewed albums in high quality. If you want photographs to be view-only, you can disable downloads in the album settings.
Zonerama does video. In fact, it’s the only platform of its kind that supports 4K in AV1 codec.
Zoner Photo Studio X
Zoner Photo Studio X is an affordably priced but extremely powerful Windows 10/11 PC software tool for browsing, managing, enhancing, editing and printing photo and video files, including Raw format.
If you haven’t tried Zoner Photo Studio X yet, download the Free Trial Version. Use it free for 7 days—no credit card required. For the record, you absolutely can access Zonerama Premium while using the free version.
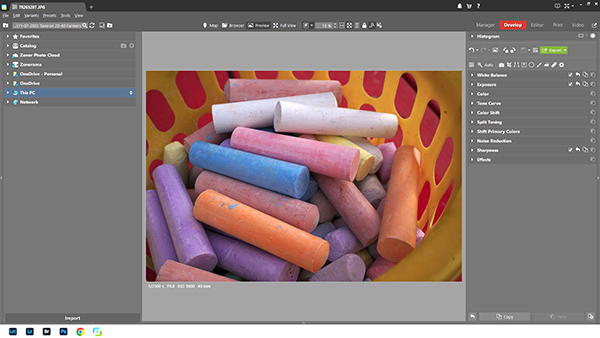
ZPS X’s unique ability to navigate its five interface modules and switch from one module to another without leaving the Zoner Photo Studio X program, provides a significant lift to workflow efficiency. The five modules are located as tabs labeled Manager, Develop, Editor, Print and Video. There are flexible workspace layout choices, too. And you can select the Browser view and see all images in a specific folder—all without leaving the Photo Studio X workspace.
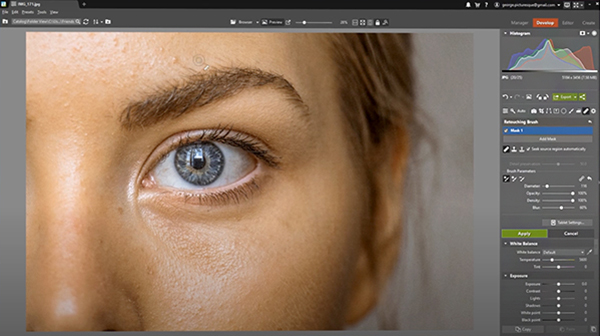
ZPS X is used to edit JPEG and Raw images (including use of Layers and Masks) and perform all cropping, blemish removal, cloning and other editing functions with ease. The unique retouching brush and the Facial Features tool in the Liquify submenu make portrait enhancement a snap.
Unlike most photo editors, with ZPS X you can edit video and turn your photos into a video, a presentation, or a time-lapse without switching software. Enjoy creative presets. Change a photo’s entire mood with just one click (one of the best-loved features in ZPS X). Catalog your images for easy organization and retrieval. Browse them by date, shot location, keywords, or folders. You can even order prints and printed merchandise from a menu inside ZPS X.
Zoner Photo Studio X costs $5.99 per month or $59 per year. Click here to order. It’s always been a bargain. And now that holders of any Zoner Photo Studio X license can access Zonerama Premium, it’s an even bigger bargain.
∞ Shutterbug Staff

")