16 Best Free Photo Editing Software for Mac & Windows
If you want to retouch your photos for free, you will need to find the appropriate photo editing software for exactly what you want to achieve. There are many such software programs out there for both the Mac and Windows platforms. But many of them are not really that great in the free category.
To save you time and frustration, I will share the best free photo editing software programs that you can use to post-process your pictures. There are some real gems if you know where to look.
I have tried many free photo editing tools to retouch my images over the years. The number of features varies for each of these photo editing software. Let us look at the various pros and cons of these software based on my experience.
Let’s get started.
1. Pixlr

Rating: 9/10
I have been using the Pixlr photo editor for quite some time. It is available for both Windows and Mac OS.
Believe it or not free alternatives to Photoshop exist, and Pixlr is at the top of the list. Not only that it is made to function and appear like Photoshop, which will make Photoshop users happy.
You get layers, brushes, filters, the magic wand, transforms, effects, adjustments, texts, retouching, color replace, eraser, lasso, etc etc.
You will get all the basic retouching options along with overlays and filters in the basic version. However, the feature I really liked about this free photo editing software is the number of collage templates. You can get almost all types of collage templates in this photo editor.
This photo editor comes with a simple user interface which you will definitely enjoy. They have also provided lots of video tutorials with the editing software which is a helpful feature for those who dont like reading long manuals. I really love this feature. It is very useful for beginners.
You can get more photo editing features in the premium version of the software.
2. GIMP

Rating: 9/10
GIMP is a very useful tool for advanced retouching of images. It is my first photo editing tool. GIMP is the short form for GNU Image Manipulation Program. It is available for Mac, Windows, and Linux operating systems.
One thing that I love about GIMP is its number of tools and features. You will really wonder how anyone can offer such a post-processing tool for free. Whether you are creating composites, retouching photos, restoring old photos, or creating original artwork, this software can do it all.
You can use this software to open and edit almost all types of image files. Moreover, they allow you to customize the user interface according to your editing workflow. I love this feature. It really helps to accelerate the editing speed. Thus, more pictures can be edited at the same time.
One thing that I do not like about the GIMP is its default user interface. It is a cluttered one. It can be a little confusing for beginners, but with more use you become better at it.
3. DarkTable
Rating: 8/10
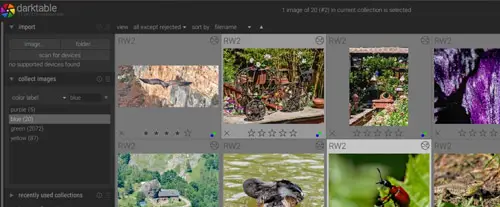
DarkTable is considered one of the best free Lightroom alternatives. You can use it on Windows, Mac, and Linux operating systems.
The straightforward interface of DarkTable ensures that anyone can learn it easily. In addition, the RAW rendering capability of the DarkTable is really good. It is comparable with that of Adobe Lightroom.
They do offer all the basic photo retouching tools. Along with that, they also offer lens correction profiles, color grading and denoising options. You will also get the brush tool and gradient mask adjustments. Many photographers love to have these two tools in their photo editing software.
They don’t allow you to customize the interface. As a photo editor, I didn’t like it. Also, Darktable does not allow you to import subfolders. You can import only individual folders or pictures. Not a huge deal.
If you want to use DarkTable for photo edits, I strongly recommend referring to the user manual. You will be able to find lots of useful shortcuts in the manual. These shortcuts really helped me to accelerate my photo editing process.
4. RawTherapee
Rating: 7.5/10
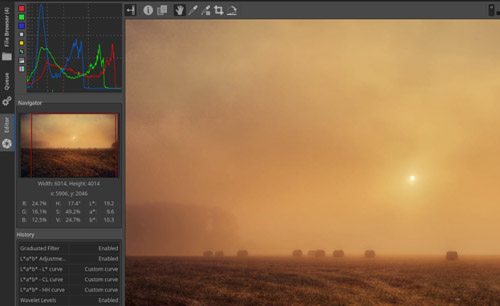
RawTherapee is another great photo editing software that you can use for retouching. It is available for Windows, Mac, and Linux systems.
The tools and features offered by RawTherapee are almost similar to that of Adobe Lightroom. But, I found the user interface to be a little less user-friendly. But the fact that it is free and does not require any signup or registration makes it a popular choice.
I liked the color correction and the RAW processing ability of this software. You will also get the option to fix chromatic aberration. The tool does support batch processing of images. It is a wonderful feature to have when you have lots of images for editing.
If you are a complete beginner to photo editing, I would not recommend using the RawTherapee because of its slightly complex user interface. It can easily make you lose interest in photo editing. Also, if you compare the speed of the software with that of Lightroom, it is on the slower side.
5. PhotoDirector 365

Rating: 7.5/10
PhotoDirector is one of my favourite photo editing programs. It is available for both Mac and Windows OS. One thing that I like about this software is its user interface. Their UI is so flexible that anyone can easily start using it.
You can get most of the basic photo retouching tools in this photo editor. They also give you the option to color grade the image. This color grading feature helps me to make my images stand out on platforms like Instagram and Facebook.
This AI-powered software will make the whole editing process much easier for you. For example, it is easy to replace the sky and add a sunset to a landscape scene with the help of this photo editing software.
If you want to take your pictures to another level by converting them into animations, you will love this software. I use this feature to create animated pictures to bring more life to my images. You can get more tools and features from this program if you upgrade it to a premium version.
6. Fotor
Rating: 7.5/10
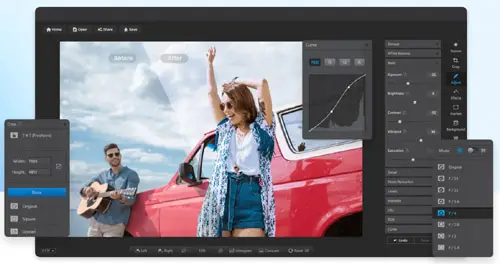
Fotor is a photo editing tool that comes with lots of smart filters and effects. You can get it for Mac as well as Windows versions. It is a free photo editing software.
I really love the user interface of this software. It is very simple and easy to use. Anyone can easily learn this software in a few minutes. So, it is a good photo editing tool for beginners.
Fotor supports almost all popular RAW file formats. You can process your RAW files using this software. Many of the features supported by Fotor can be found only in premium photo editing tools. I loved their One-click photo enhancement feature. It does a decent job.
There will be ads in the software. If you want to get rid of the ads, you need to upgrade to a premium version. You will get more tools and full HDR support in their premium version. You can also create collages of various sizes using this software.
When it comes to a number of features, it has fewer features when compared to GIMP. Also, if you are interested in creating artwork out of your image, Fotor will not be a good choice.
7. Movavi Picverse
Rating: 7.5/10
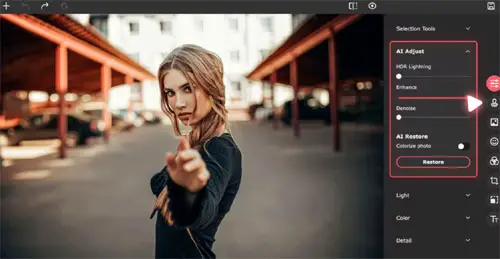
Movavi Picverse photo editor is an AI-powered photo editing software you can get for free. It is available on both Mac and Windows platforms.
I found it easy to remove unwanted elements from the picture using this software. The software also does a decent job of removing the background in a photo. I loved the simple and easy-to-use interface of this software. The minimalist interface helps to simplify the photo editing process.
It is also easy to insert elements from one image to another. You will also get the basic tools like crop, level, rotate, etc. The tool does come with lots of filters. The image Enhance option under the AI adjust does a good job of enhancing the picture without overdoing it. Movavi also provides tools to retouch portrait images. You can easily smooth the skin, whiten teeth, reshape the body, and apply makeup to the portrait with the help of this tool.
This photo editor will be a good choice if you want to restore old images with creases and wrinkles. I have colorized many of my old black and white photos using this tool.
The performance of their erase and stamp tool is not up to mark. When I tried applying multiple edits to an image, the program froze at times.
8. Apple Photos

Rating: 7/10
Apple Photos is a free photo editing software that comes along with the Mac OS. So if you are a Mac user, you can use it for retouching your pictures.
It comes with all the basic photo retouching tools. It includes exposure correction, white balance adjustments, curves, noise removal, sharpening etc. Apple is constantly bringing new updates to the Apple Photos software. It supports the ProRaw format (photo format used by iPhones).
Apple Photos come with an easy-to-navigate interface. So, you can learn it fast. In addition, it is capable of handling popular RAW file formats. If you are interested in making a quick retouch, you can go for the Auto Enhance option.
One thing I felt missing from Apple photos is the option to fix chromatic aberration and geometry correction.
9. Picktorial
Rating: 6.5/10
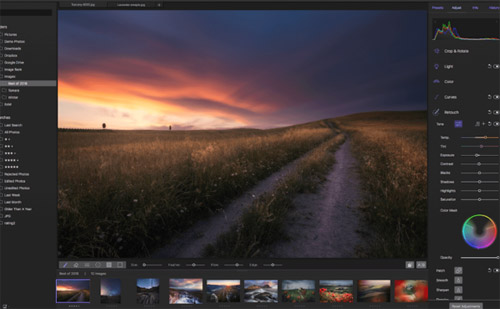
Picktorial is a photo organizing and editing software. It is available only for Mac OS. It supports the editing of JPEG, RAW, and DNG files.
The free version of Picktorial does come with some limitations. You can only make two local adjustments per image in the free version. Dont you just love a numerical limit on features? Also, the batch processing feature is not available in the free version.
The Picktorial software follows a non-destructive photo editing workflow. I am pretty sure that the photographers would love this feature. I really liked their user interface. Also, their color correction tools have really impressed me. But unfortunately, they don’t support RAW photo editing in the free version.
I don’t recommend using Picktorial for complex photo retouching. It is only good for basic photo retouching but again, its free.
10. Photoscape X

Rating: 6.5/10
Photoscape X is another free photo editing software good for beginners in photography. It is available for both Mac and Windows OS. You can use it to adjust the white balance, crop pictures, exposure adjustments and color grading.
One really good feature of this software is its number of filters. Photoscape also supports different file formats. I also liked the screen capture feature. You can batch edit images using this software. Anyone can easily learn this software with the help of the simple interface. It is definitely a good photo editing tool for beginners.
The One-click auto level feature will be very useful for beginners. The software also allows you to create animated gifs with the help of multiple images. You can also use online help if you get stuck. This section has useful tutorial videos that will guide you using the tool.
There was some lag when I tried editing multiple images in this program. The limitations of free software 🙂
11. Photo Pos Pro

Rating: 6.5/10
Photo Pos Pro photo editing software is available for the Windows platform. This software comes with some powerful image editing tools.
I really loved the user interface of this free photo editor. It is more user-friendly than GIMP. They have also provided a novice layout option. You can switch to this layout if you find the default interface a little complex.
One thing that attracted me to this software is the layers and layer mask options. It allows me to do complex photo edits. Photo Pos Pro also comes with all the basic photo retouching tools.
One issue with the free version is that there is a resolution restriction on importing the final images. You can only export up to 1024 x 1024 pixel images. If you want to export higher resolution, you need to buy the premium one. Nevertheless, this software will be a good choice if you plan to edit pictures only for the web.
12. Ribbet
Rating: 6/10
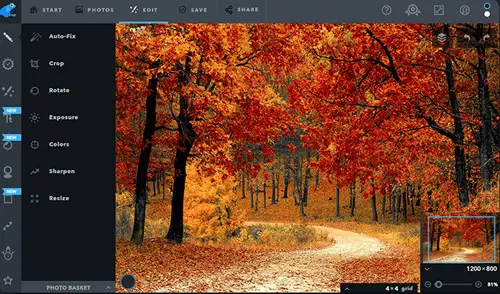
Ribbet photo editing software comes with an intuitive user interface. It is available for both Mac and Windows operating systems.
It comes with all the basic photo retouching tools. It includes rotate, crop, exposure, color, sharpen, resize etc. So it is a good tool for basic image editing. Ribbet also allows you to create collages and postcards with your pictures.
They don’t provide any option for customization. Many photographers like me love to have this feature in the photo editing tool. The simple interface of Ribbet ensures that you can learn the tool in a few minutes.
If you are a beginner in photo editing, you will find the “Auto-Fix” tool really useful. The software will do auto adjustments on the image. However, from my experience, you still need to make a few more tweaks to complete your edit.
You can get more tools and features only if you upgrade to a premium version.
13. Ashampoo Photo Optimizer
Rating: 6/10
Ashampoo Photo Optimizer is a Windows-based photo editing software. It comes with a clean and simple user interface.
One thing that I liked about this free tool is that there are no ads. But you need to submit your email address. The tool comes with a powerful batch processing feature. You can choose multiple images and apply any effect to all the images in one click.
The one-click optimization feature will be really helpful to people who want a quick edit. One thing that I observed here is that this one-click optimization works best for nature and landscape shots. It is not that good for portrait shots. Also, there is no layers option in this tool. You can get more tools and features in the premium version.
14. Adobe Photoshop Express

Rating: 6/10
You can get the Adobe Photoshop Express free photo editing software if you are using a Windows system. It comes with a minimal interface. Don’t expect this tool to be as complex as Photoshop or Lightroom.
This photo editor is specifically built for mobile platforms. It comes with all the basic tools that are required for retouching an image. The thing that I didn’t like about this tool is that all the high-end retouching tools are only available for premium users. The tool follows a non-destructive workflow. Most photographers will love this feature.
If you are interested in using the premium features of this tool, you need to upgrade your subscription. Another drawback of this software is that it will only allow you to save the final image in JPG format. No other file formats are supported.
15. Canva

Rating: 6/10
You might already know about Canva, a popular web-based app for editing photos. You can get this software for Mac & Windows also.
I mainly use it to edit pictures for Instagram and Facebook. The main advantage of using this software is that it comes with a large database of free elements and designs. Thus, you can easily create any design of your choice with this photo editing tool.
Canva also allows you to do basic edits on your image. You can adjust brightness, contrast, and saturation. In addition, you can get lots of filters and overlays for your pictures from this software. It is one of the main reasons why I use Canva. Canva is also one of the best tools to add text to an image.
16. Inpixio Photo Studio
Rating: 6/10
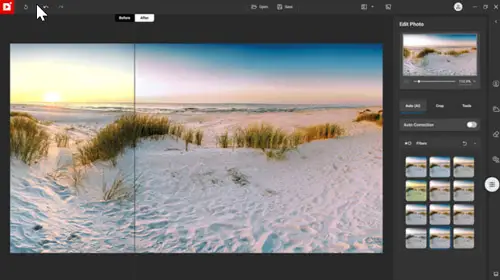
Inpixio Photo Studio claims to be the world’s first one click photo editor and in terms of simplicity you can’t get much simpler. There is some fancy AI technology behind the scenes of this software which makes it appear so simple for the user yet so powerful in terms of the end result. It is available for PC and Mac.
From removing a background in a photo automatically by having AI determine where the background is, to removing and replacing a sky in photos automatically, to one click image correction, to using presets to create a specific look this program is a real time saver if you need one of these particular actions to be performed on your photos. It really makes a difference when you have hundreds of photos to edit and don’t have the time to do everything manually or using 10 steps for each photo.
And don’t worry, you can always fine tune your photo modifications. This software does not take creative control away from you just because it simplifies and speeds up the workflow.
I hope this article has helped you choose a free photo editor for your platform and for your needs.
Consider reading this article on the best photo editing apps for ios and android.


