Where can visitors on a spring vacation getaway find the largest gathering of Jeeps, the biggest rock music festival in America and a flurry of art, cultural and music festivals?
The Daytona Beach area, located on Florida’s East Coast, is known as the Festival Capital of Florida and will be home to a plethora of those festivals this spring. No matter what residents or visitors are searching for, this coastal destination will have something for everyone.
We know the color of the water before the plane even lands; that impossible gradient from turquoise to deep blue. We know the rhythm of the trade winds, the scent of sunscreen and salt, the slow hush of waves folding onto white sand. We know the glossy brochures and infinity pools and the promise of “barefoot luxury.”
But every so often, an island reminds you how much you don’t know.
Which brings us to South Caicos.
Where Is South Caicos — And Why Is It So Underrated?
A short 25-minute flight from Providenciales, this quieter sibling in the Turks & Caicos archipelago feels like a secret whispered rather than announced.
From the plane window, the island looked almost empty; long stretches of rocky coastline, a few clusters of buildings, and miles of water in every shade of blue. There are no high-rise resorts here. No cruise ship docks. No traffic to speak of.
I arrived expecting another beautiful Caribbean resort. What I didn’t expect was how quiet the island would feel.
In fact, the entire island has only a couple of resorts (a rarity in the Caribbean today). The result is a place that still feels quiet and lightly touched by tourism, where long stretches of coastline remain completely empty.
On the southern tip of the island — spread across 770 acres of rocky shoreline and rolling hills — sits Sailrock South Caicos, an exclusive resort positioned between two very different bodies of water: the Atlantic Ocean to the east and the shallow Caicos Bank to the west.
It’s a dramatic setting, even by Caribbean standards.
Sailrock South Caicos: A Luxury Resort Between Two Seas
It’s rare for a hotel to feel like it occupies its own world. Sailrock doesn’t just sit on the edge of the island — it stretches across it.
To the east, the Atlantic shifts constantly, dark and restless. To the west, the Caicos Bank is shallow and luminous, a calm sheet of turquoise that glows gold as the sun sets. Standing on the ridge that runs through the property, you can watch both at once.
It gives the resort a strange sense of scale. Sea on one side. Sea on the other. And very little in between.
The hotel spreads quietly across the landscape, following the natural curves of the hills rather than reshaping them. By design, Sailrock will always remain low-density — no towers, no crowded skyline — just villas and suites scattered across the headland.
Our private backyard view at Sailrock
That sense of space is part of what earned Sailrock the title of “Resort Hotel of the Year” from Small Luxury Hotels of the World.
But accolades feel far away when you’re standing on your terrace and spotting humpback whales in the distance.
From your room.
Ridgetop Suites, Beachfront Villas, And Peninsula Hideaways
The accommodations at Sailrock follow the shape of the land.
The 18 Ridgetop Suites sit high above the shoreline, perched along the island’s natural spine. Each one opens onto a wraparound terrace where the breeze seems to arrive from every direction at once. In the early morning, the view stretches endlessly across the Atlantic.
From here, most of the resort is within walking distance. The beach, the restaurants, the infinity pool — all connected by quiet paths winding through the hills.
Closer to the water, the 15 Beachfront Villas take a different approach. These are designed for direct contact with the sea: open living spaces, wide sliding doors, and terraces that spill straight onto the sand.
Further out, 6 Private Peninsula Villas sit on their own stretch of coastline, slightly removed from the main resort. Each one feels almost hidden within the landscape, positioned to capture sweeping views of the ocean in every direction.
Guests staying here are given a private compact car to move between the villa and the main resort — a small but welcome luxury on a property this expansive. During our stay, it quickly became part of the routine: driving down the winding road toward dinner, passing cactus-lined hills and the occasional wild donkey along the way.
And then there is the Caicos Bank Villa, a single beachfront residence facing the tranquil western waters: a place built for sunsets.
Things To Do In South Caicos
South Caicos has long been known as the fishing capital of the country, and the sea surrounding the island feels alive in a way that’s difficult to describe until you see it yourself.
Coral reefs thrive just offshore, making snorkeling and diving some of the best in Turks & Caicos. On calmer days, guests head out on paddleboards or kayaks, gliding across water so clear it’s possible to watch fish moving beneath the surface.
Fishing remains a central part of island life in South Caicos. Deep-sea excursions leave regularly, and bonefishing trips venture into the shallows of the Caicos Bank with local guides who know these waters intimately.
One of my favorite parts of my stay on the island was the kayaking excursion we took with Ben, Sailrock’s excursion manager. Born and raised in South Caicos, he’s a wealth of knowledge about the island and easily one of the kindest, most down-to-earth people I’ve met on my travels.
Ben showing us a conch coming out of its shell
While we were out on the water, he mentioned that if guests want to experience something unique that the resort doesn’t formally offer, they should ask about it before their stay. Sometimes the team can help arrange it.
But exploring South Caicos isn’t limited to the sea.
Guests can take ATVs across the island’s dusty interior, bike along quiet coastal roads, or simply wander. The island is small enough that exploration rarely requires a plan.
More than once, we rounded a bend to find adorable wild donkeys standing squarely in the middle of the road. The animals (descendants of those once used by salt traders centuries ago) now roam freely across the island, wandering through quiet coastal trails as if they own the place.
The resort was designed with sustainability in mind, from its low-impact architecture to ongoing efforts to protect the coral reefs just offshore. The guarantee that the property will remain low-density helps preserve the fragile ecosystem surrounding it — ensuring South Caicos won’t one day sprout rows of high-rise hotels.
Equally important is the resort’s connection to the local community.
Sailrock employs many residents from South Caicos, works closely with local fishermen to source fresh seafood, and helped establish the South Caicos Heritage Foundation, a nonprofit organization dedicated to preserving the island’s culture and supporting community initiatives.
Sunset view from our Peninsula Villa
How To Get To South Caicos (Flights, Transfers & Travel Tips)
Despite its remote atmosphere, reaching South Caicos is surprisingly simple.
Most visitors arrive via Providenciales, the main gateway to Turks & Caicos, which receives direct flights from major U.S. cities on American, Delta, United, JetBlue, and Southwest, along with international routes from Canada and the United Kingdom.
From there, a short 25-minute flight carries guests south across a chain of islands and shallow turquoise banks to South Caicos. For many Sailrock guests, the transfer is included and arranged directly through the resort.
There are also seasonal direct flights from Miami to South Caicos twice weekly.
Rates at Sailrock begin around $875 per night — about what you’d expect for a secluded luxury resort in Turks & Caicos.
But what you’re paying for isn’t simply a suite or a villa.
It’s the space. The quiet. The sense of standing between two seas with nothing interrupting the horizon.
It’s watching whales breach offshore from your terrace. Seeing wild donkeys wander across the road on the way to dinner. Looking out over a coastline that still feels largely untouched.
The Caribbean has no shortage of beautiful islands.
But South Caicos — wind-swept, sparsely developed, and suspended between two luminous bodies of water — feels like a reminder of what the region must have looked like decades ago. Before the crowds arrived.
And that may be exactly what makes it so special.
If you’re considering a stay at Sailrock, I help clients plan trips here as a travel advisor. Beyond simply reserving a room, I can assist with choosing the right accommodation — whether that’s a breezy Ridgetop Suite or a secluded Peninsula Villa — arranging flights and transfers to South Caicos, and securing preferred perks when available.
Sign up for my travel newsletter here and be the first to get my best travel advice and secret finds — so you can discover hidden gems, and travel like an insider (not just a tourist).
After traveling consistently for over 15 years, I’ve come to trust and rely on a few websites to help me find the best deals on flights and accommodation.
Flights:Going is the first place I check when searching for cheap flights. If you sign up for their email alerts, you’ll receive flight deals at up to 90% off. I have traveled all over the world using their flight deals.
Accommodation:Booking.com offers savings on hotels, apartments, and villas in 80,000 destinations worldwide. You can browse hotel reviews and find the guaranteed best price on hotels for all budgets.
Travel Insurance: I never travel without a travel insurance policy because it’s not worth the risk! I use and trust Visitors Coverage, which I have used for the past 10 years.
Let me book your trip! Looking for a Travel Advisor to help you plan your trip? Learn more here!
When the First Fleet sailed into Sydney cove in 1788 – eleven ships carrying more than a thousand convicts and marines – it marked the beginning of a city that would grow from a precarious outpost into one of the world’s most recognisable skylines. Nearly 250 years on, the spirit of arrival hasn’t disappeared. It has simply evolved. Today you arrive not by creaking tall ship but by taxi, ferry or train, stepping out at Circular Quay with the Sydney Harbour Bridge arcing overhead and the Sydney Opera House fanned out like an invitation.
Staying at the Sydney Harbour Marriott Hotel at Circular Quay is, in its own way, an act of exploration. The bridge dominating the skyline isn’t just something to photograph either. For the more adventurous, it can be climbed.
Who Comes Here (and Why Location Is Everything)
There are Sydney hotels with better beaches and others with higher floors. Few can claim this precise co-ordinate: harbourfront adjacency at the hinge point between the CBD and the historic The Rocks, where sandstone and steel share the skyline.
The typical guest understands the value of proximity. Business travellers who want to roll out of meetings and into a ferry bound for Taronga Zoo. Couples who would rather walk to dinner beneath the Harbour Bridge than sit in traffic. International visitors who know that in Sydney the difference between “near” and “right there” can shape an entire trip.
Rooms With a Front Row Seat
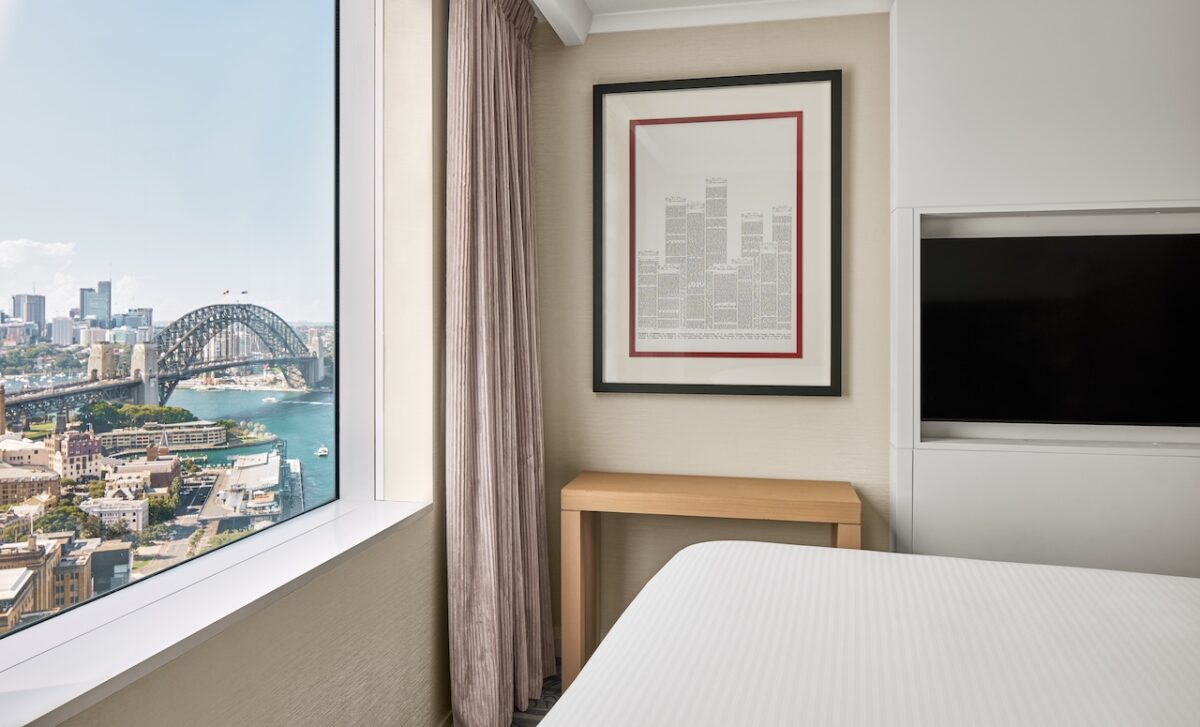
The hotel’s rooms are generous and quietly efficient, designed less for flamboyance than for framing what matters. Floor-to-ceiling windows draw the eye outward, offering a rotating gallery of harbour life. Depending on your vantage point, you may wake to the steel geometry of the Harbour Bridge or the sail-like curves of the Opera House.
Inside, the palette is contemporary and unfussy. There’s space to spread out, proper desks for those pretending not to be on holiday, and beds that encourage you to recalibrate your definition of an early start — useful, given what awaits outside.
Because the main event here is not confined to your room.
Dining Where History Has Been Rewritten
Long before luxury travellers checked in, butchers occupied this stretch of land. The hotel’s restaurant, Silvester’s, nods to that past without becoming trapped in it. Set within a spacious, light-filled atrium, it trades sawdust for polished floors and glass, while keeping the focus firmly on produce.
The menu leans confidently into Australian ingredients: pristine fish handled with restraint and richly marbled Australian Wagyu cooked with precision. It quietly disproves the old assumption that hotel restaurants are merely convenient. Silvester’s stands comfortably on its own merits, whether you’ve spent the day in boardrooms or on bridge arches.
Breakfast benefits from the same setting, sunlight filtering down as the harbour hums just beyond the walls.
Stepping Back Out
What distinguishes the Sydney Harbour Marriott most is how much of Sydney unfolds the moment you step outside.
Within minutes, you can wander the sandstone lanes of The Rocks, board a ferry at Circular Quay for the harbour crossing to Taronga Zoo, or simply follow the waterfront promenade wherever the view improves next. Looming above it all is the Harbour Bridge — less backdrop than invitation.
The hotel leans into this with its Ultimate Harbour Experience package, pairing a stay with a guided climb from BridgeClimb Sydney that takes you 134 metres above the harbour. Up there the city rearranges itself: ferries tracing white arcs across the water, the Opera House shrinking into sculptural elegance, and the skyline resolving into something almost serene.
Back on the ground, and only a short walk from your room, Sydney suddenly feels both vast and perfectly navigable.
Verdict
Sydney Harbour has come a long way since 1788, but its essential promise remains: arrive here, and something begins.
The Sydney Harbour Marriott understands this. It doesn’t compete with the skyline; it frames it. It doesn’t distract from the harbour; it positions you within it. With the BridgeClimb quite literally on your doorstep and ferries, heritage streets and headline attractions all accessible on foot, the hotel turns a stay into a series of discoveries.
In a city built on bold views and bigger ambitions, that combination of location and perspective delivers exactly what the title promises: a view — and, if you’re willing to climb for it, a thrill.
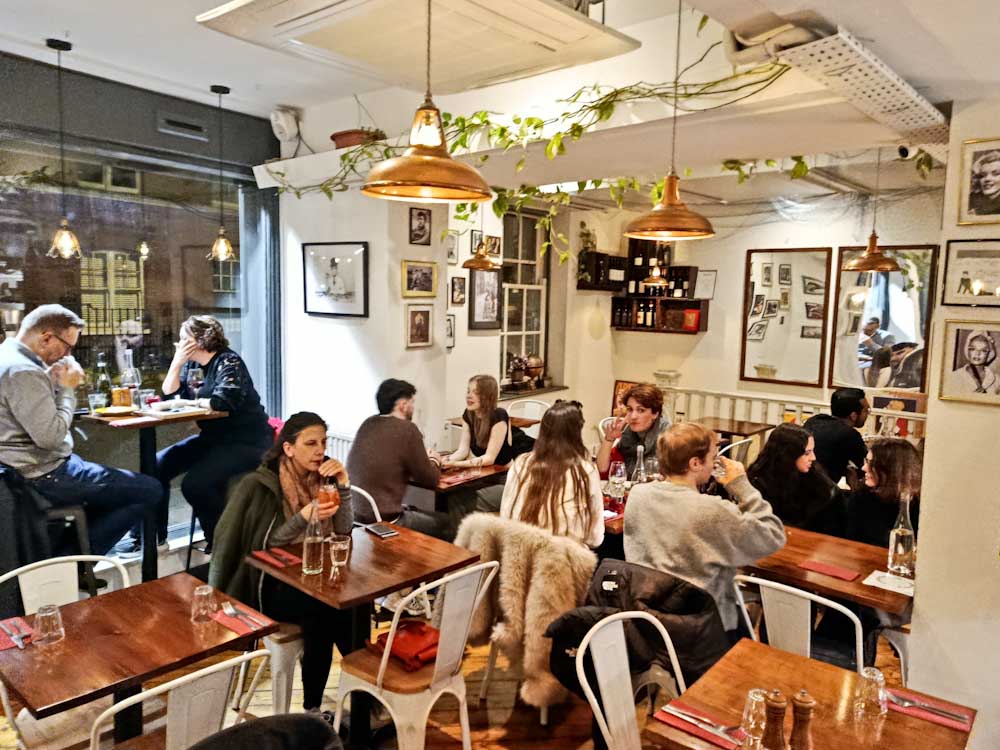
In recent years, the area around King’s Cross has undergone something of a Cinderella transformation. It used to be a desperate place where drug dealers and prostitutes plied their trade. Fortunately all that has gone and Casa Tua, arriving here 10 years ago, has seen all the changes.
Casa Tua
Casa Tua
Even though it’s only five minutes’ walk from the station, Casa Tua seems far away from the hustle and bustle. It’s truly a neighbourhood restaurant and, on a busy Saturday night, we hear plenty of Italian spoken amidst the diners. Décor is simple, all soft colours and wood table tops. It’s on two levels, with large parties occupying the downstairs.
Casa Tua
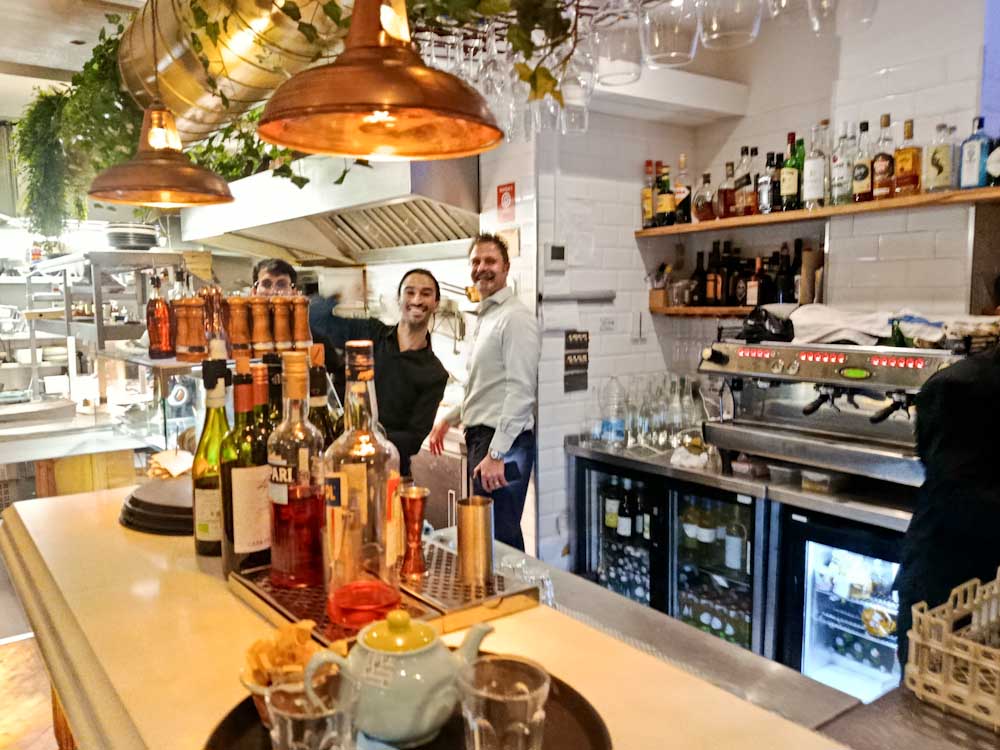
We’re greeted by moustachioed Giuseppe Miggiano, who founded the original branch of Casa Tua in Camden back in 2013. He’s from Puglia and the dishes are inspired by his mother’s cooking, always using quality ingredients, many direct from Italy. You can order a selection from their delicatessen, Casa Tua Delizie, also in Camden, along with wines and olive oil.
Casa Tua
The restaurant is open all day, every day, providing breakfast, lunch and dinner. The evening menu is divided into appetisers, starters, pasta, other mains and pizza. In true Italian tradition, they recommend sharing, picking four dishes for two people. That sounds good, so we ordered glasses of their very reasonably priced Trebbiano from Puglia.
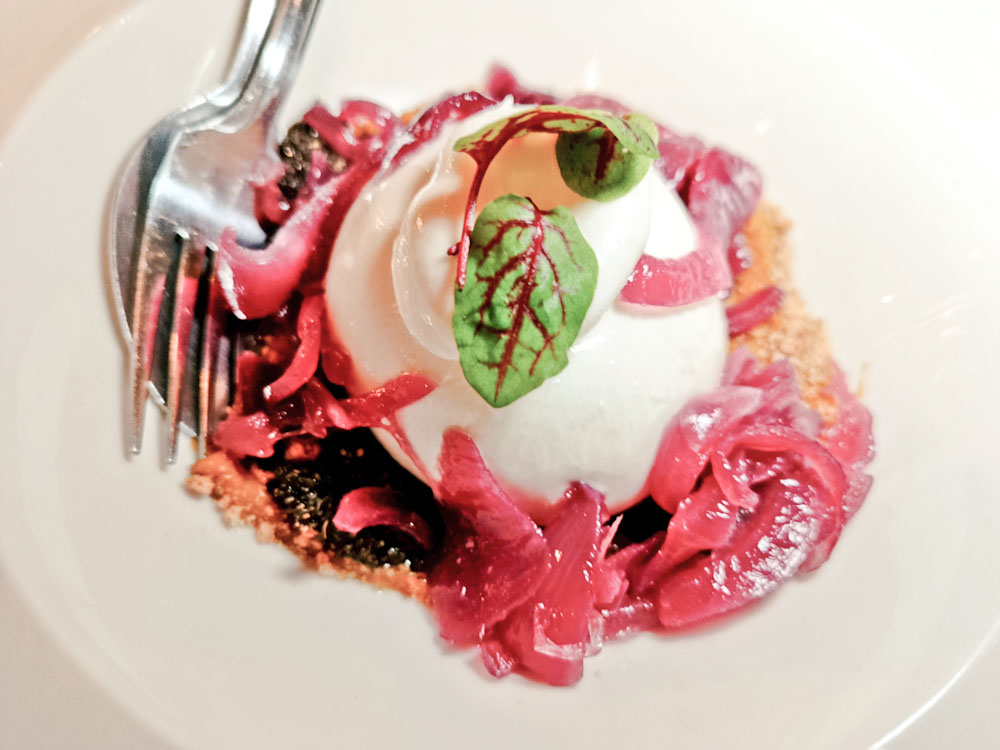
Casa Tua Burrata
First up is Casa Tua Burrata (15.90), the cheese served on pumpkin puree and dotted with black truffle cream. The freshest of the fresh, even though it comes all the way from Southern Italy, it’s surrounded by caramelised red onion and amaretto crumble. The mix of textures works well, with special mention for the distinctive vegetable puree.
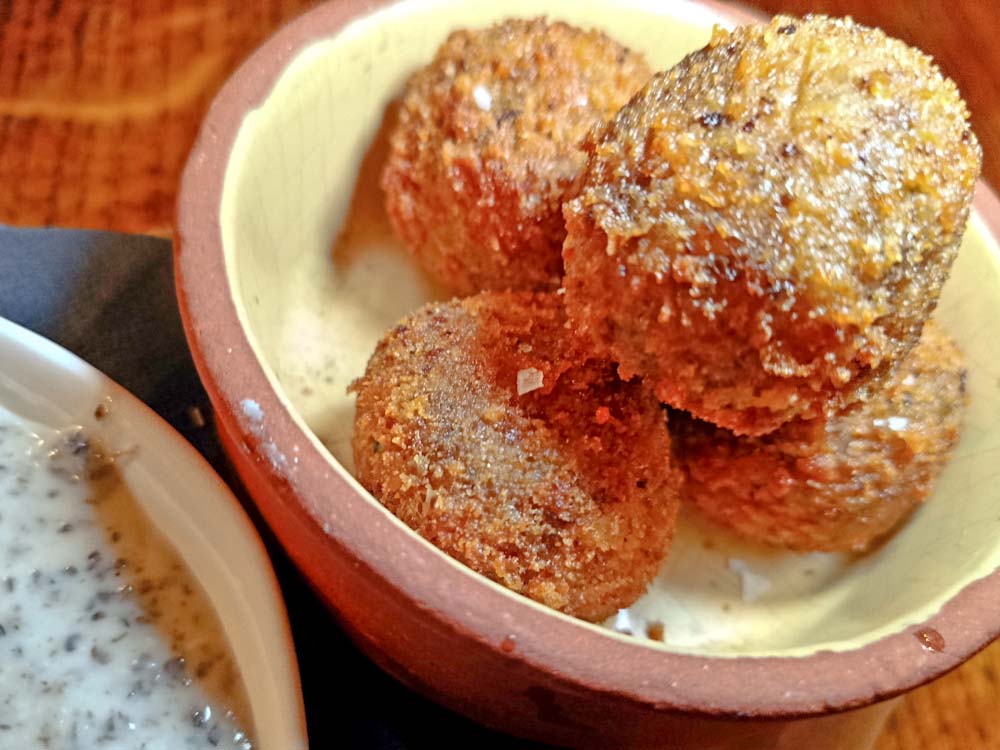
Casa Tua Arancini
A second starter is Casa Tua Arancini (14.90), warm and crunchy on the outside, with Arborio rice, king oyster mushrooms and truffle inside. An added extra is a homemade Gorgonzola and black truffle dip, just right for spicing up the Arancini. We’ve also enthusiastically ordered their Artisan Rosemary Focaccia (10.90), two big slabs of fresh bread which prove slightly unnecessary, excellent though they are.
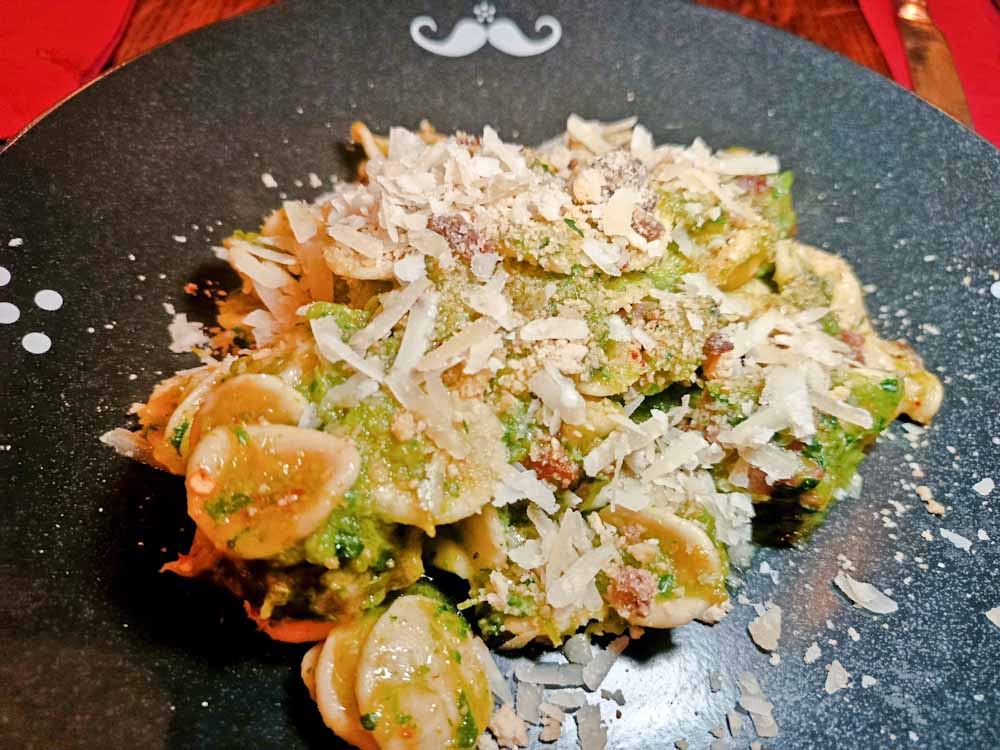
Casa Tua Orecchiette
So bring on the pasta, all made in-house using Semola flour from Altamura (Puglia) and British free-range eggs. Puglia’s signature dish is Orecchiette Sausage & Cime Di Rapa (20.90) so we’d be crazy to miss it. Orecchiette translates as “little ears,” and they’re the perfect shape to scoop up the slices of sausage. The key sauce is a mix of turnip greens, parsley, garlic, and chilli. Add toppings of parmesan, anchovies and Tarallo breadcrumbs, and all is good.
Casa Tua Rocket Salad
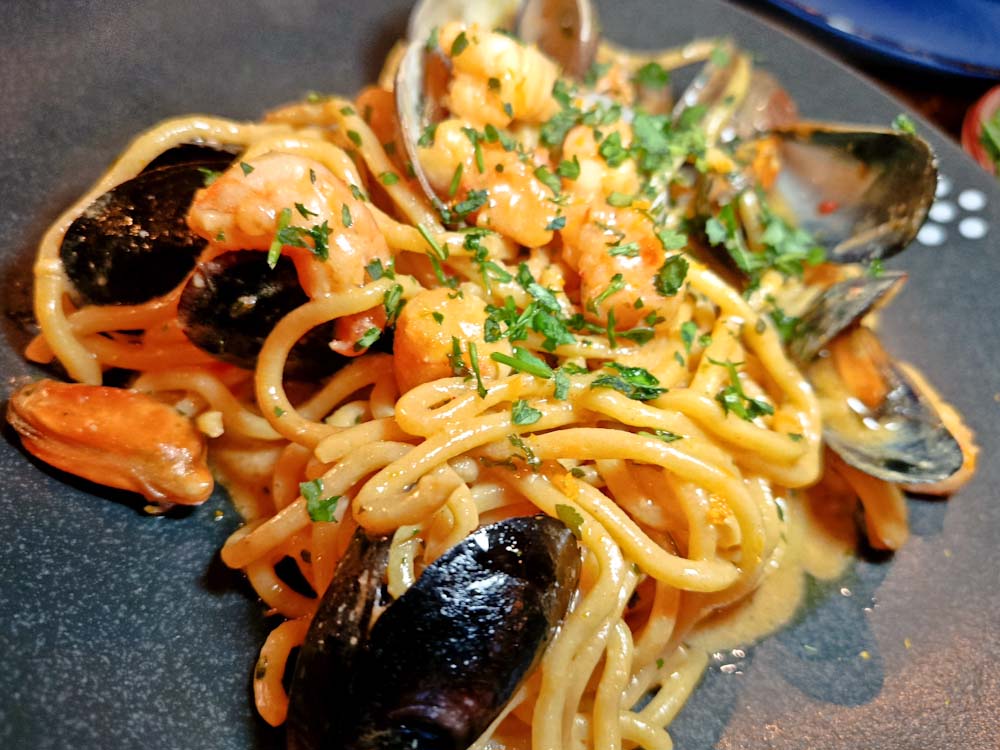
The portions here are ample, certainly enough for two and by the time we’ve tucked into the side of Rocket Salad (7.90), we’re beginning to struggle. Fortunately, the Spaghetti Ai Frutti Di Mare (24.50), a seafood mix of clams, mussels and tiger prawns, is relatively light. It gets an extra zing from the fresh chilli and orange zest in the lobster and saffron sauce.
Casa Tua Fruitti Di Mare
Giuseppe tells us all his deserts are made fresh every morning so we can’t resist his Tiramisu (8.50), with secret ingredients Marsala and Amaretto. It arrives in a see-through teacup with a moustache icon stencilled on the outside. From the cocoa topping, down through the creamy egg and mascarpone mixture, to the alcoholic coffee crunch at the base, this is a definite hit.
Casa Tua Tiramisu
VERDICT
Casa Tua, or “Your House”, certainly lives up to its name. It’s a cosy, friendly space serving authentic Italian comfort food at very good prices. Best of all, it’s not a chain, just two locations, and Giuseppe or his partner is always there to welcome you.


 Who Comes Here (and Why Location Is Everything)
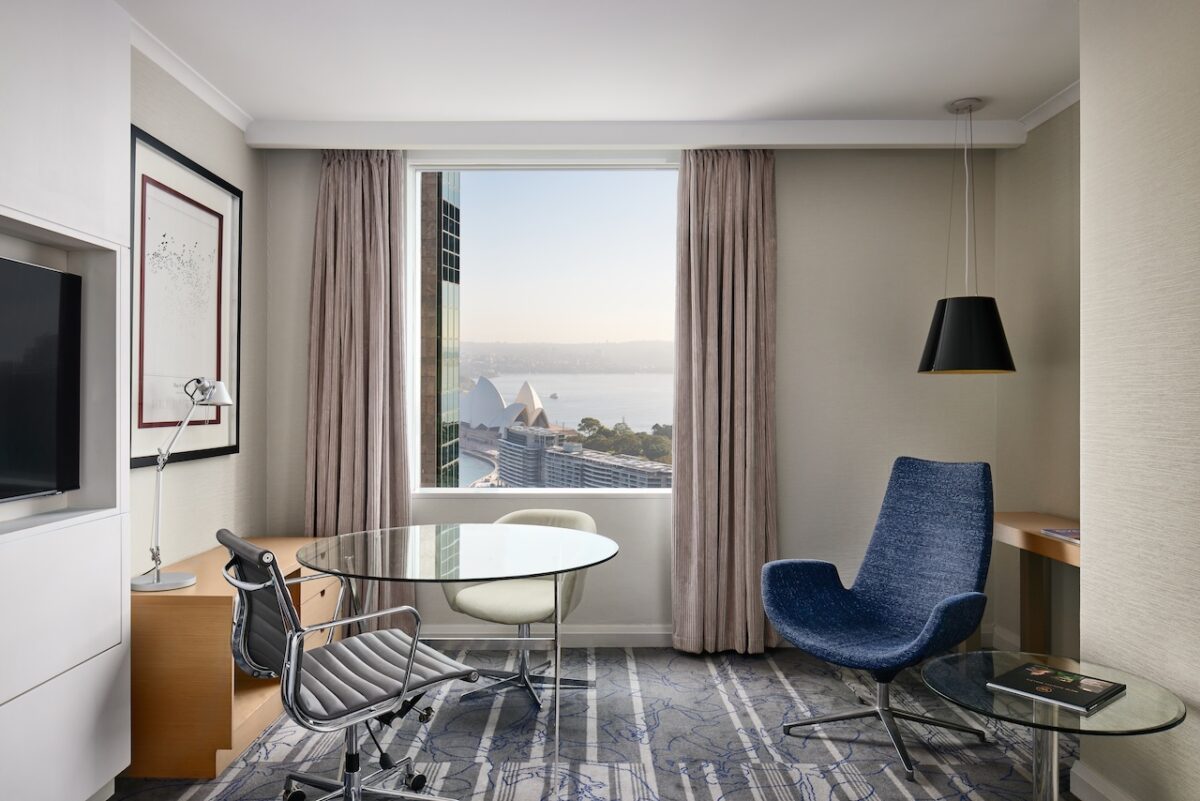 Rooms With a Front Row Seat
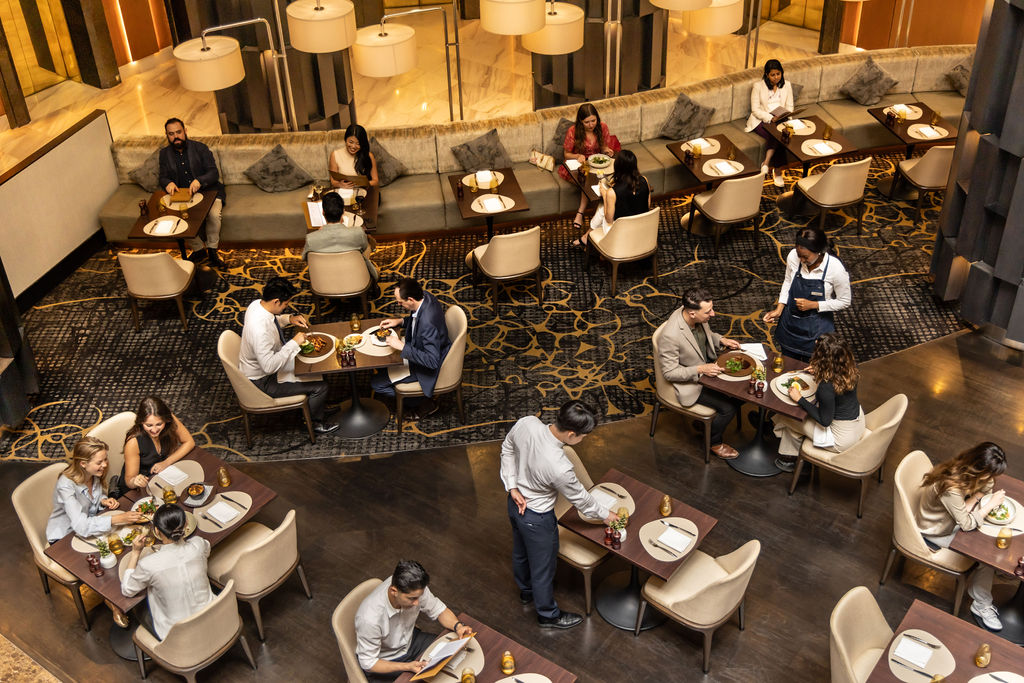 Dining Where History Has Been Rewritten
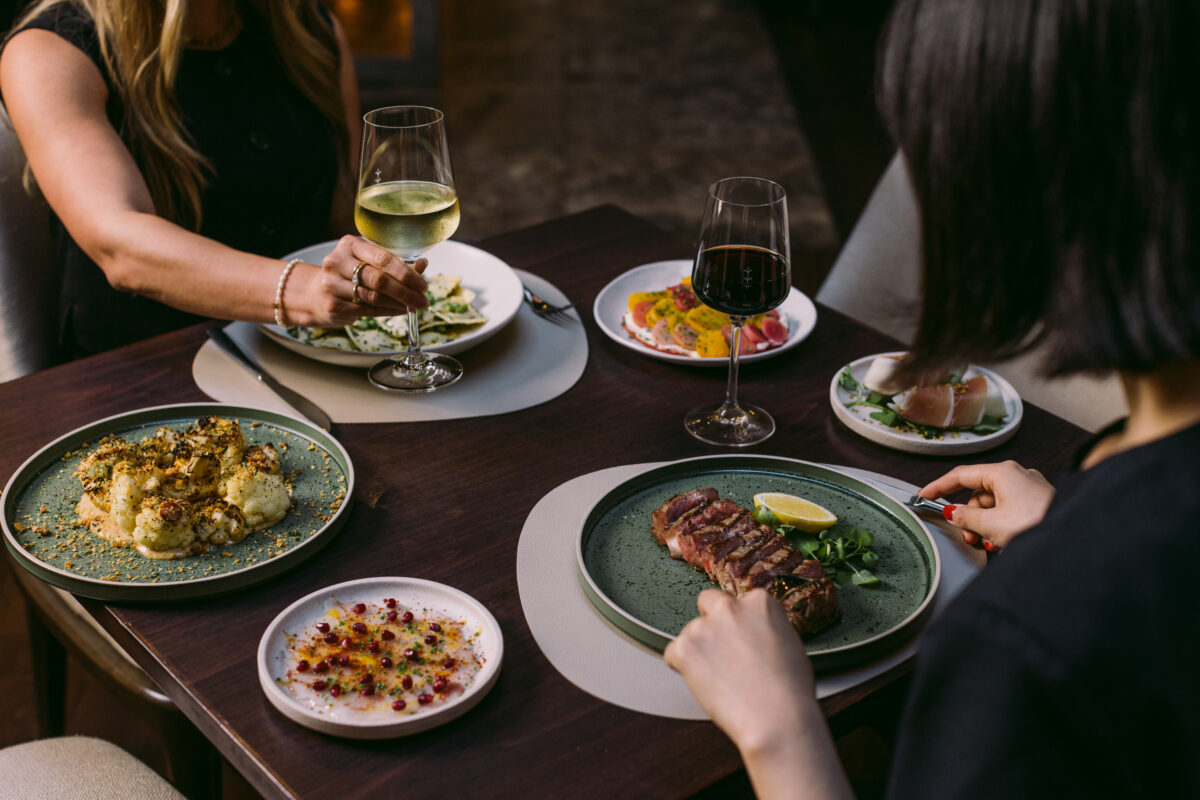 Breakfast benefits from the same setting, sunlight filtering down as the harbour hums just beyond the walls.
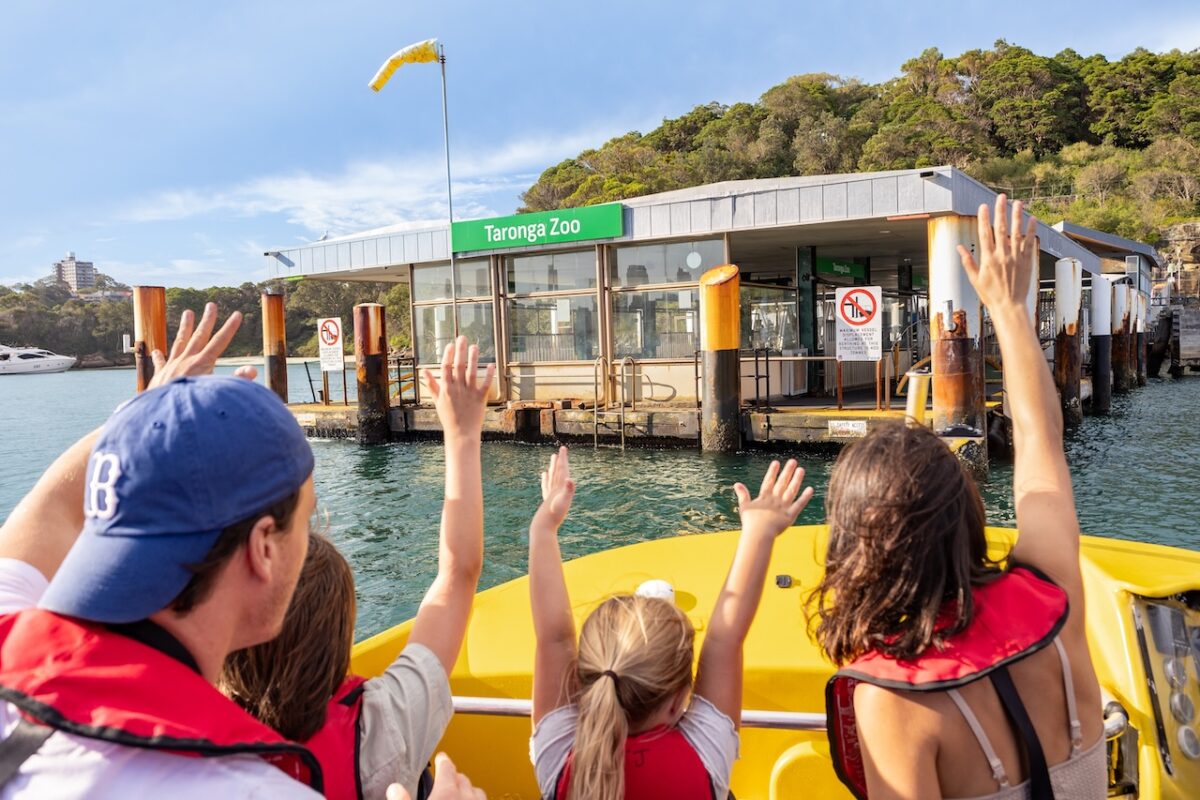 Within minutes, you can wander the sandstone lanes of The Rocks, board a ferry at Circular Quay for the harbour crossing to Taronga Zoo, or simply follow the waterfront promenade wherever the view improves next. Looming above it all is the Harbour Bridge — less backdrop than invitation.
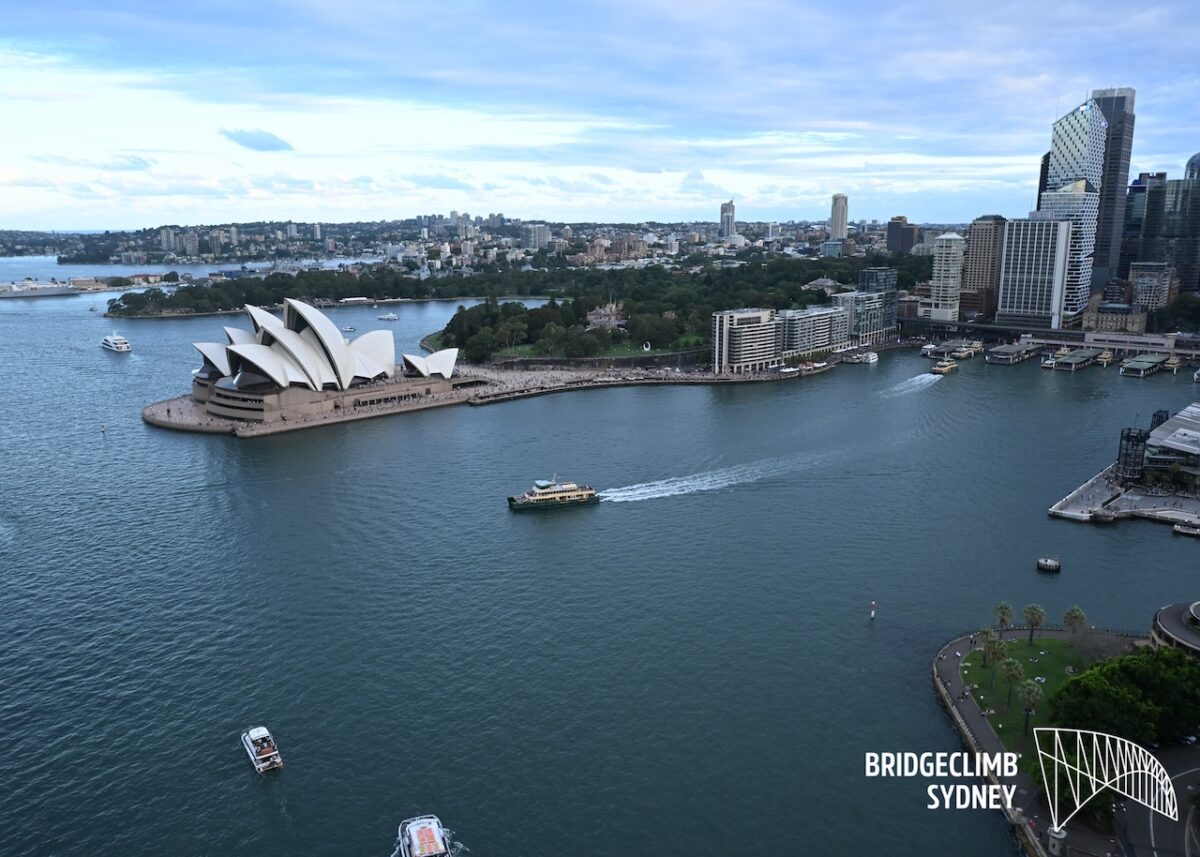 Sydney Harbour has come a long way since 1788, but its essential promise remains: arrive here, and something begins.