Jacuzzi, an Italian restaurant in London’s stylish Kensington, wows with its stunning, perfect-for-posing yellow lit staircase, chandeliers galore, Italian artefacts, and lush and verdant decor, exudes fun vibes and visual vibrancy, perfect as a backdrop for Instagrammers.
Come as a couple and find an intimate corner or with a group if you like, as Jacuzzi has 170 covers over three floors, each with its own demeanour. We were dining on the ground floor, where music, a busy open kitchen, colour, and a young, trendy crowd made for an upbeat evening.

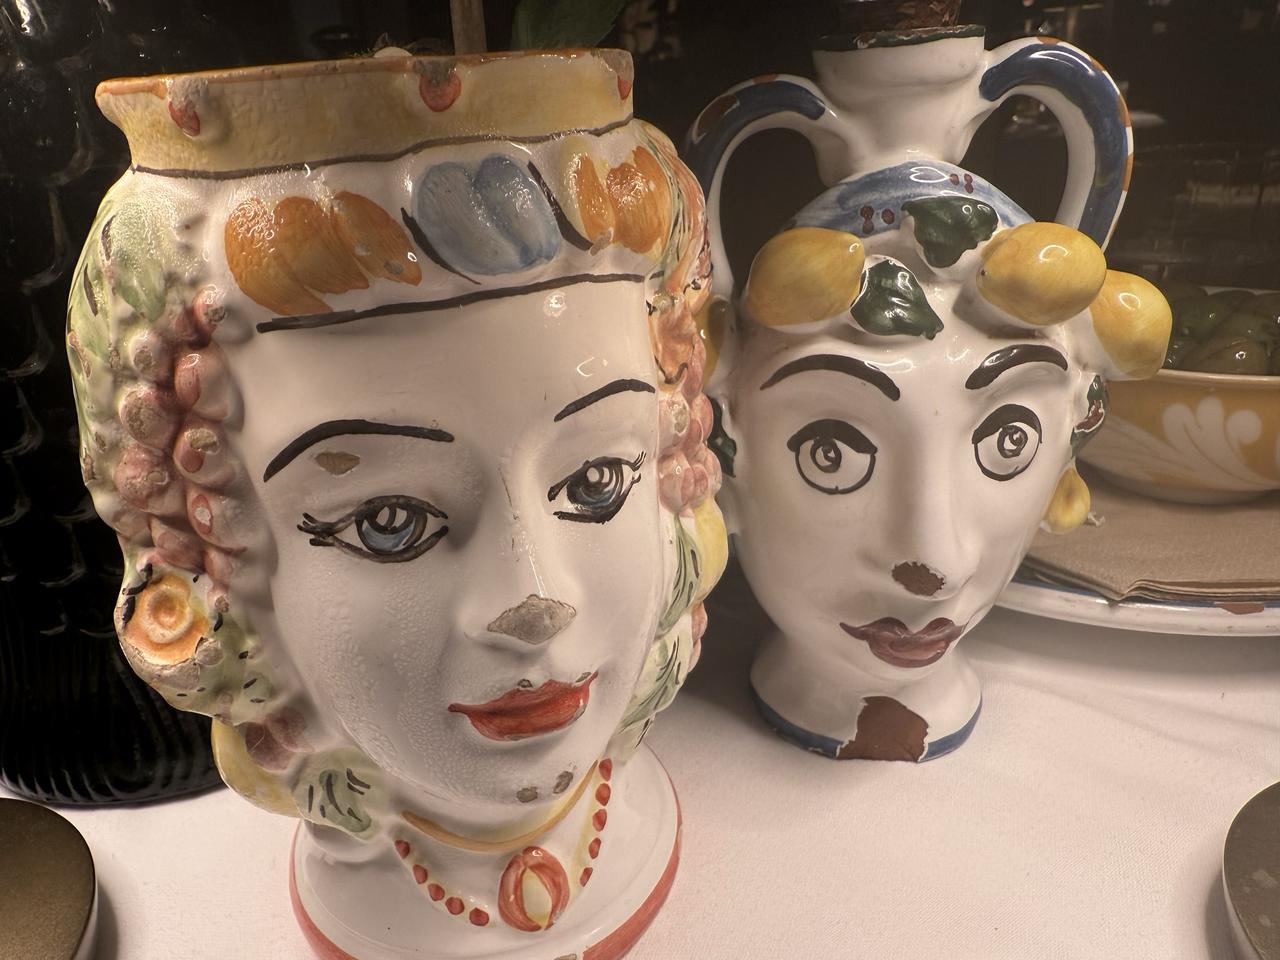
Cocktails and condiments are served in quirky mugs and containers, food is presented on elegant plates, and waiters offer detailed descriptions to accompany their menu suggestions. Even the loos are, shall we say, decadent.

Funky cocktail mugs
The menu is generally wholesome Italian fare, primarily pasta and pizza, often prepared with a twist. I don’t think I have come across La Tartufata, mascarpone and truffle cream, mozzarella fior di latte with sautéed mushrooms before. Or the ultra gourmet pizza Caviale e Fior di Latte, Mozzarella fior di latte, crème fraîche, with a generous 20g of Transmontanus black caviar.

Other options include a lobster and seafood risotto, a Linguine Granchio e Limone a crab linguini and the Gran Cotoletta, a veal Milanese.
It was an extremely busy evening when we visited, with no spare tables, yet we were waited on by friendly staff who took the time to explain the menu with a view to pairing the dishes with our tastes.
We started with a classic Italian Focaccia bread, and their version was stuffed with a delicious mix of herby ricotta and mozzarella cheese.

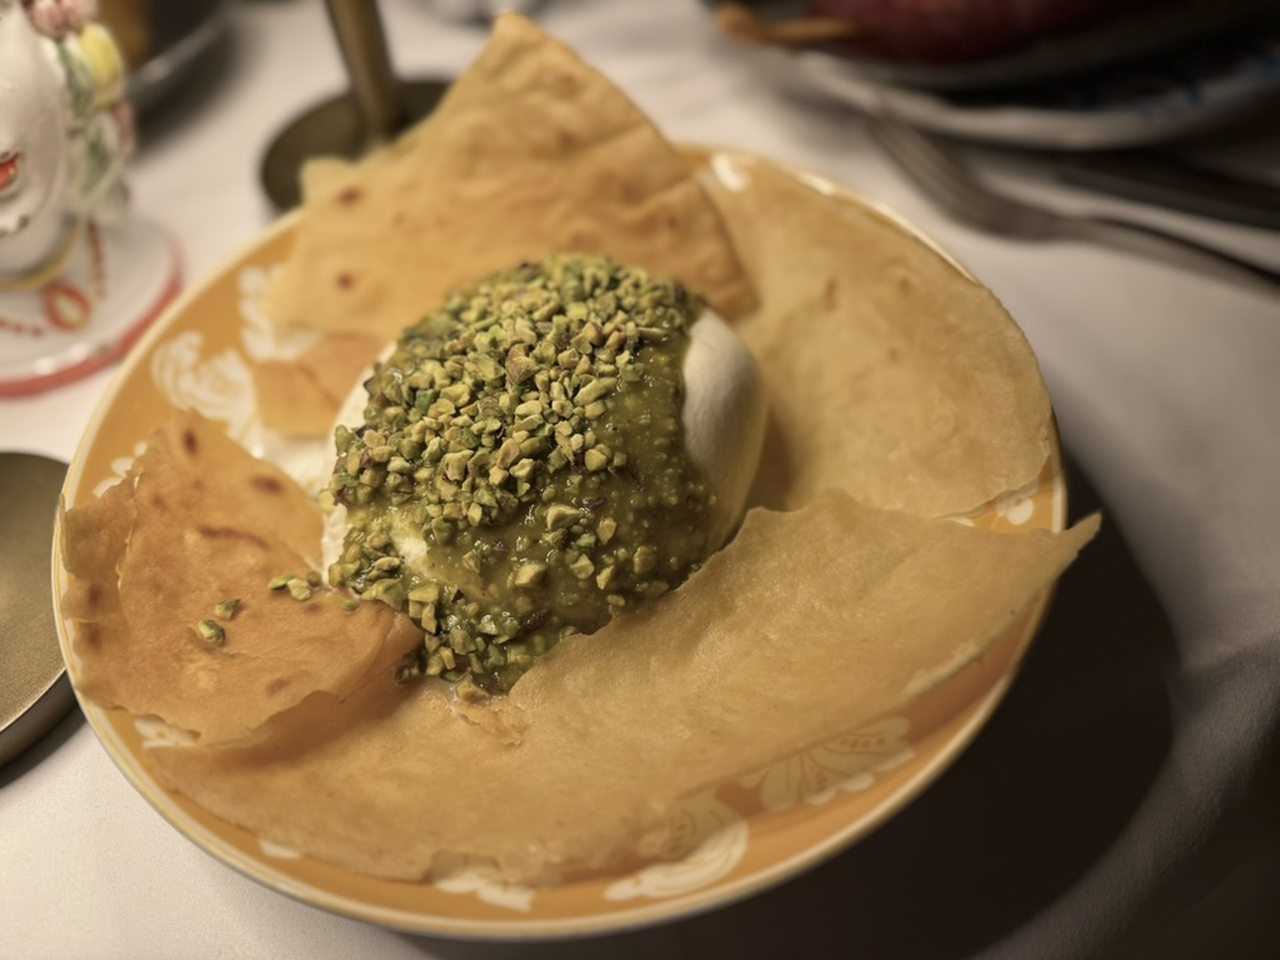
Burrata al Pistacchio – a generous ball of 250g Burrata
We ordered the Burrata al Pistacchio, and were impressed with how generous this ball of 250g Burrata was. It came sitting on crispy Sardinian carasau crackers and served with a creamy pistachio pesto, topped with pistachio nuts.
Our third starter – well, we were on a taste mission – was the Grissini con Bresaola, a trio of long, crispy, dry, onion and Parmigiano breadsticks from Turin, Italy, smothered in creamy labneh and wrapped in beef Bresaola della Valtellina, which is air-dried, salted red-hued beef from the Valtellina Valley in the Lombardy region of Italy. The beef was typically dry and salty, made easier to down by the creamy labneh that added a smooth effect on the palate.
For the main course, my co-diner enjoyed a hefty sized Risotto Funghi e Taleggio, a creamy risotto with chestnut mushrooms finished with a silky taleggio fonduta and Parmigiano Reggiano.

Puttanesca con Tartare di Tonno
I devoured the Puttanesca con Tartare di Tonno, a spaghetti in a San Marzano tomato sauce with Taggiasche olives, anchovies, capers and served with fresh tuna tartare and finished with lemon zest. There was plenty of flavour and also plenty of it.
There are several desserts, including my favourite – Mousse Al Cicoccolato. This is a salted chocolate mousse with hazelnut praline and roasted hazelnuts. We shared this as portions were generous, but we still had a sweet tooth to appease. This dessert was ideal.
VERDICT: Jacuzzi restaurant is true to its name, offering a bubbly and vibrant evening out. This is a great place to socialise and, of course, pose for your Instagram.


