A City Break in Baku, Azerbaijan
At the risk of sounding a little corny, Baku, the capital of ex-Soviet Azerbaijan in the Caucasus, is a city of incredible contrasts. After nine millennia, and a busy trade location on the former Silk Road, it makes total sense that the country is a mish-mash of cultures.
Yet somehow, Baku, the lowest capital city in the world at 92 feet/28 meters below sea level, remained a sleepy backwater until the Nobel brothers stumbled across oil here in the 1870s while searching for wood for rifle barrels. This pivotal moment turned Azerbaijan into a wealthy country producing more than half of the world’s oil by 1900s.
At the end of Soviet rule in 1991 the oil revenues fuelled a building boom that transformed the city into a shimmering landscape of high rises, low rises, amid Soviet-style box buildings and ancient homes.
The visual bonanza starts with the slick Heydar Aliyev International Airport, with its semi-transparent ceiling and experiential designs. It set the scene for the stunning buildings and skyscrapers lining wide boulevards that we passed during a 45-minute transfer into the city for a rather plush stay at the Ritz Carlton hotel.

Trio of Flame Towers, Baku
The most beautiful skyscrapers are the trio of flame-shaped Flame Towers that comprise apartments, office and the Fairmont Hotel. These are symbols of fire and a nod to the country’s ancient Zoroastrian roots (Azerbaijan means flame keepers) and to the gas flares that are emitted from the ground by an abundance of natural gas reserves seeping from the earth’s porous strata. When Marco Polo visited the Eastern Caucasus in the 13th Century, he wrote of the region’s natural “oil fountains” in his memoirs.
I could see those Flame Towers wherever I was in the city, lording it over Baku bay from their perch on top of a hill. They are completely covered with LED screens, and after dark, a light show displays the movement of a fire.
The most eye-catching architectural creation is the impossibly wavy Heydar Aliyev Center. It was designed by Zaha Hadid and resembles a sea of waves and crests, without a single sharp edge, either inside or out. §

Heydar Aliyev Centre
I spent hours there exploring its vast collection of artwork, eyeing up nd the Mini Azerbaijan exhibition, checking out the miniature versions of the country’s key landmarks and the history of carpet weaving. Azerbaijan has a long history in carpet-weaving, considered part of its Intangible Cultural Heritage. The basement has an impressive collection of classic cars on the lower ground floor. At one point, I was stopped in my tracks by a mind-bending sculptural staircase; in the initial moments at the top, I wondered whether to slide or walk down.
For a more historical insight into the city, I headed to the suburb of Surakhany, to visit Ateshgah of Baku or “Fire Temple of Baku”. This pentagonal structure, which looks like a small fortress, is the place where Hindus, Sikhs, and the fire-worshipping Zoroastrians would pray. A quadrangular rotunda of the main altar temple rises in the middle of a courtyard where a never-ending fire burns. This is surrounded monastic cells, where mannequins depict daily life or meditation rituals that are calming to listen to.

Ateshgah of Baku is often called the “Fire Temple of Baku”.
The gem of Baku is the 12th-century Unesco-listed Walled City of Baku, İçəri Şəhər, a living, breathing historical city within a modern city. We entered via Gosha Gala Gapisi, the Double Gate or Gates of Shah Abbas, walking along picturesque twisty streets sometimes with soumaks (flat-weave rugs) hanging over residential walls.
I popped into the Museum of Miniature Books. It is listed in the Guinness Book of Records, and alongside tiny Qurans, there was a Bible and a Torah. Another display cabinet has the world’s three smallest books, just 2mm x 2mm each. They are The Language of Flowers, Birthstone, and The Signs of the Zodiac and can only be read with a magnifying glass.

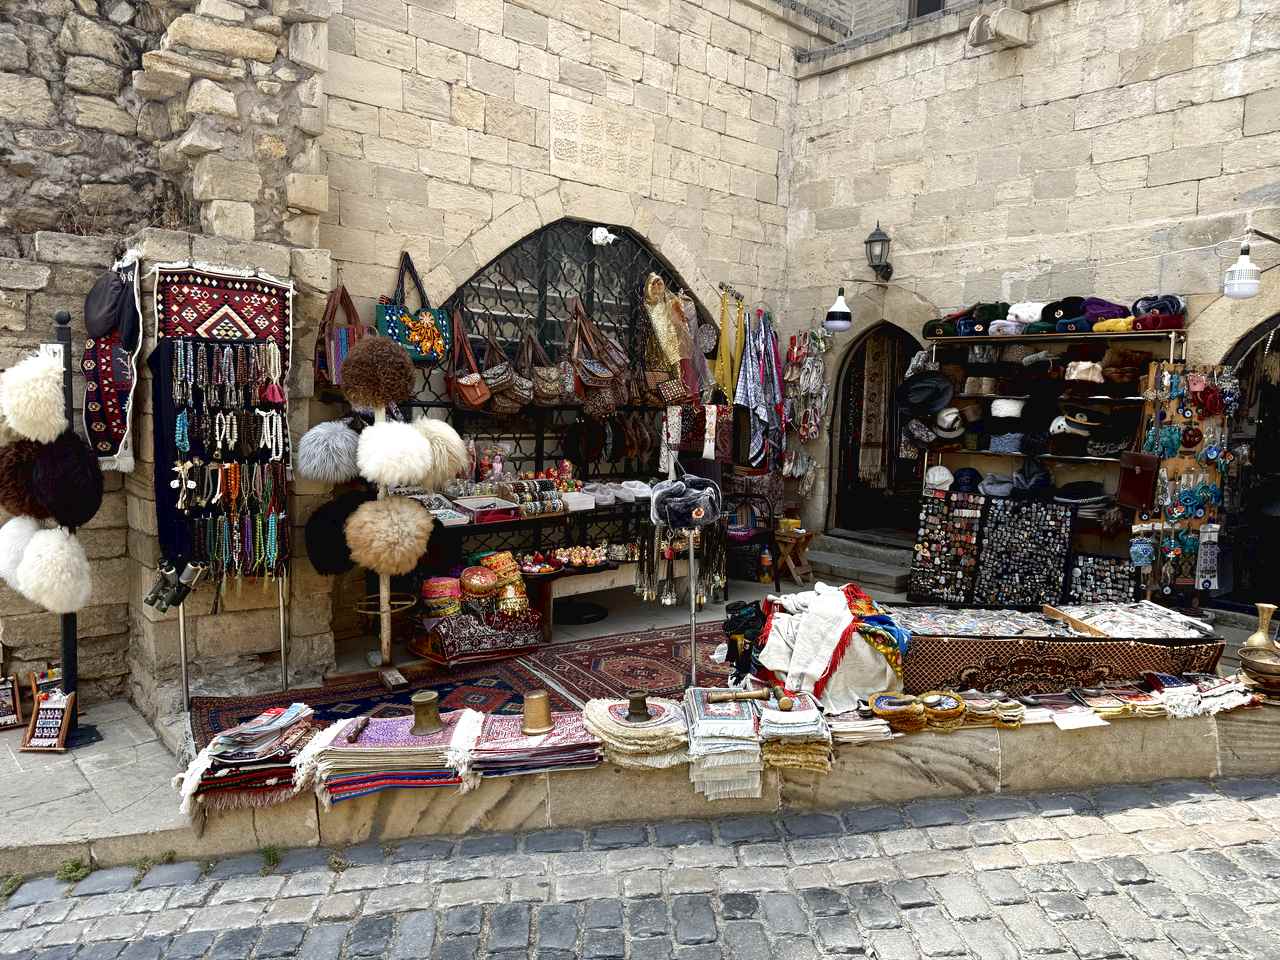
Shopping in the Old City where you can pick up a papaq
In between sandstone buildings and monuments are colourful shops, sometimes subteranean, selling antiques, worry beads, silver, ethnic souvenirs, carpets, and papaqs, a traditional Azerbaijani hat which I was told is a man’s dignity and honour.

Carpets for sale in the Old City
The most significant monuments of the Old City are the 12th-century Maiden Tower (Giz Galasy), whose original purpose is unknown and Shirvanshahs’ Palace, located at the highest point, which is a stunning example of 15th-century architecture revealing traces of the Azeri Muslim identity.

Shirvanshahs’ palace
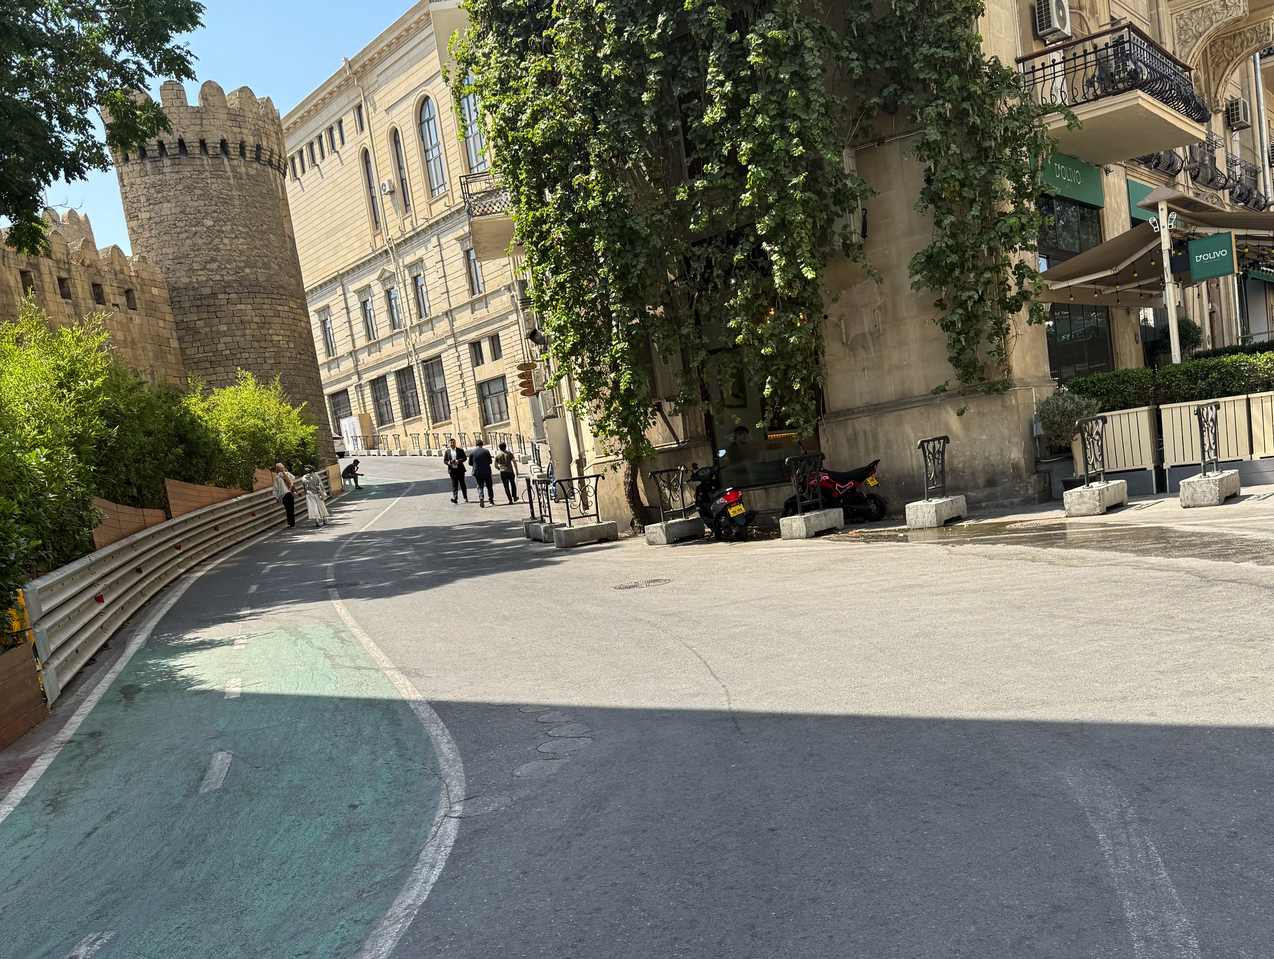
Just outside the Old City is Baku’s F1 race track, the Baku Race Circuit. It has a very narrow section, the narrowest in the world, that winds around the 12th-century Maiden Tower and the ancient walls of the old city. From here it’s easy to reach the Seaside Boulevard.

Narrowest point of the F1 racetrack
Stretching from the Old City to Freedom Square is the city’s Baku Boulevard, looking resplendent with green spaces and This is a lovely promenade stretching along the western shore of the Caspian Sea and includes the Yeni Bulvar (new boulevard), home to the largest flag in the world. This flag is the size of six basketball courts and weighs 1,100 pounds (500 kilograms). The flag’s national tricolour includes blue (symbolising peoples’ Turkish origins), Green (Islam) and red (independence/democracy).
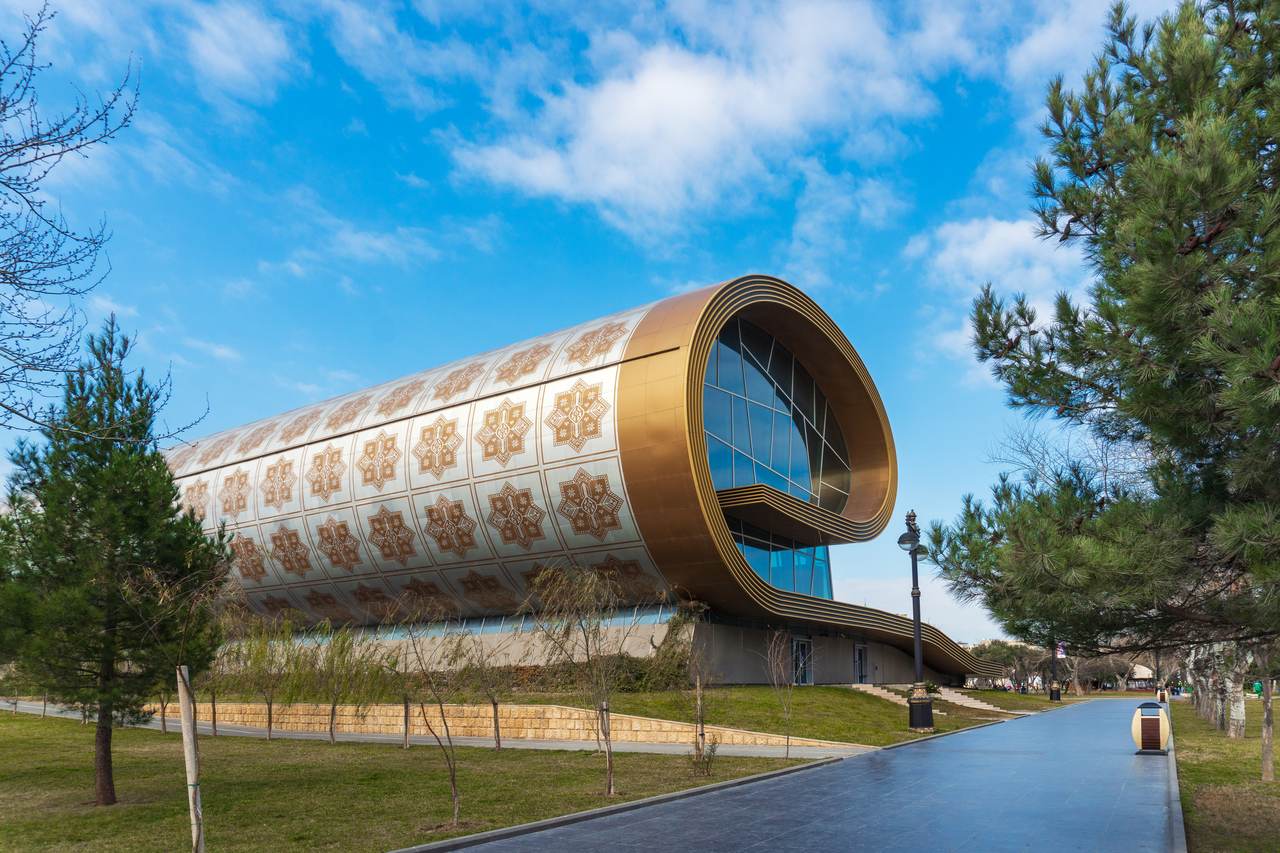
This is also where you will find the Azerbaijan National Carpet Museum on Neftchilar Avenue. It is shaped like a rolled-up carpet, and is in itself sight. Inside are displays of glorious Azerbaijani carpets and rugs with historical and modern weaving techniques.
 Nearby is the oldest park in Baku, the 1-acre Philharmonic Garden, created in 1830 outside the walls of the Old City. I had to stop and stare for a while at the verdant landscape and its gorgeous fountain.
Meanwhile, just outside Baku, a brand new development is unfolding. The 500-hectare resort city Sea Breeze seaside expands a little more each year. It’s both a seaside holiday and residential resort emerging on the coast of the Caspian Sea along a 6.5 km ribbon of beach. Larger than life character businessman Emin Agalarov, an Azerbaijani-Russian singer/songwriter who sang at the Baku Eurovision Song contest in 2012 is the man behind the project.
Seabreeze has everything a resort city needs: a school, hospital, shops, restaurants and homes, and plenty of holiday homes and hotels and swimming pools galore. Getting around is by golf cart, and I hopped on one for a lunch date at Fish Box restaurant for a taste of local cuisine.

Seebreeze resort
The resort hosts the musical festival Dream Fest. I got there in July 2025, and alongside a plethora of local talent, Nicole Scherzinger headlined one night and Justin Timberlake on another.
Eating in Baku is a joy as restaurants are plentiful, but if you only visit one, make it the Sizransah Museum Restaurant. It is located in the Old City and housed in a 200-year-old Ottoman-era castle of the Shirvanshahs, who ruled from 861 to 1538.
I had my last supper in this restaurant-cum-museum, and I fully recommend touring all the various rooms and checking out the ethnic art, jewellery, carpets, and other artefacts before, during or after dinner. There was live music, and in between courses, we all got up to dance to the ethnic melodies.

Sizransah Museum Restaurant, Old City, Baku
I enjoyed some brilliant local flavours of marinated grilled chicken and meats, dolma, which is grape leaves stuffed with minced meat and rice, a staple in Azerbaijani households and kutab, a thin, round bread filled with a variety of fillings like spinach, meat, or cheese.
This was a fulfilling end to a highly satisfying city break in a place that is etching its way into the awareness of savvy holiday-makers looking for something a little different.
Fact File
- FLY: Azerbaijan airlines flies into the beautiful Heydar Aliyev International Airport.
- VISA: You need a visa, which you must obtain online.
- STAY: Ritz Carlton, a beautiful, refined hotel in Baku CHECK AVAILABILITY
- EAT: Sizransah Museum Restaurant a museum restaurant in the Old City. +994(12)5950902
- MORE INFO: here
The post A City Break in Baku, Azerbaijan appeared first on The Travel Magazine.


