Beach boardwalks have a timeless appeal. From enjoying an ice cream cone as you watch the sunset to riding an exciting roller coaster, they offer endless fun for vacationers. To start planning your trip, consider the six best beaches with boardwalks on the East and West Coasts for your next unforgettable vacation.
Best Beaches With Boardwalks On The East And West Coasts
Ocean City Boardwalk, New Jersey
Ocean City, NJ, is the gold standard of family fun. As a dry town, it is a vibrant yet safe
environment suitable for parents and children. You can visit famous amusement parks, such as Gillian’s Wonderland Pier or Playland’s Castaway Cove, and listen to live music in the evening.
You might even take a low-impact exercise class on the beach.
There are bike rentals and a variety of shops to explore. Dine at a seaside grill or a pizzeria, and then end the perfect day with ice cream. Traveling to Ocean City, NJ, is a tradition for countless tourists and families, and it has one of the best boardwalks on the East Coast for families.
Key Features
- Open daily for 24 hours
- Special events, including parades and an annual auto show
- Amusement parks and attractions for all ages
Read more: 10 Free Things To Do In New Jersey
Santa Cruz Beach Boardwalk, California
The iconic boardwalk in Santa Cruz provides West Coast nostalgia and thrills. It has been
family-owned and -operated since 1907, and the historic Giant Dipper roller coaster and Looff Carousel are still operational today.
There’s also an indoor arcade, a miniature golf course and a nearby bowling center — perfect for rainy days during your trip.
The Santa Cruz Beach Boardwalk offers many food choices, including corn dogs and chocolate-covered bacon. Offshore, you might spot dolphins, otters, sea lions and other aquatic species.
Key Features
- Classic carnival atmosphere
- Free concerts and movies on the beach
- Recognized recycling and reuse programs
Myrtle Beach Boardwalk, South Carolina
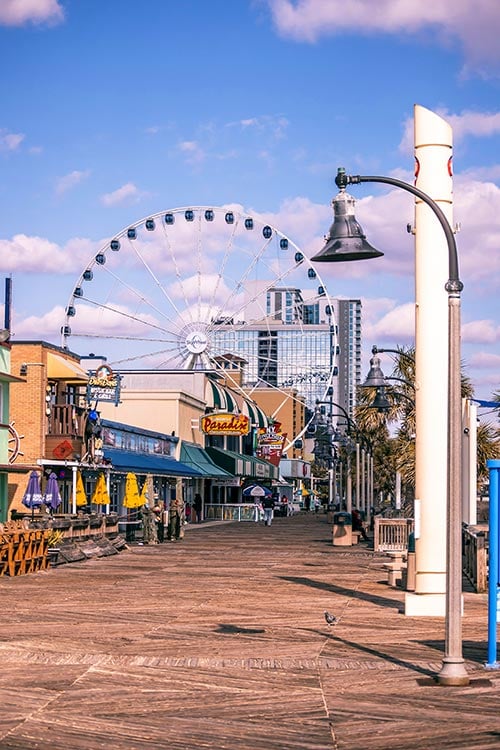
Myrtle Beach offers southern charm and modern entertainment. At the 1.2-mile-long boardwalk, families can take a ride on the iconic SkyWheel and shop at America’s largest gift shop, the Gay Dolphin Gift Cove. The Plyer Park greenspace hosts free live music and family-friendly events.
You will find classic boardwalk treats, fresh seafood, and American-style burgers and wings. The Myrtle Beach Boardwalk is one of the best boardwalks in the U.S. for families with children of all ages.
Key Features
- Numerous restaurants, shops and hotels
- Family-friendly festivals, such as the Kids Carnival
- Free live music
Read more: 15 Affordable Beach Vacations In The USA + Where To Stay
Virginia Beach Boardwalk, Virginia
Virginia Beach is a paradise for active families. The renowned Virginia Beach Boardwalk is a great place for walking, jogging, biking and skating on the extra-wide paths as you take in the oceanside views. Children can also play at Grommet Island Park.
To refuel before hitting the waves, there is a wide array of seaside restaurants and bars.
The Virginia Beach Boardwalk features four beachfront stages for many free events. In the
summer, check out the Live! On Atlantic festival and the amazing sand sculptures. The famous King Neptune statue is a must-see photo opportunity.
Key Features
- Open year-round
- Flavorful seafood
- Free arts and entertainment
Carolina Beach Boardwalk, North Carolina
The vibrant seaside town of Carolina Beach is a great destination for parents and children. It offers easy beach access. For classic summer fun, consider the Carolina Beach Boardwalk, where you will find street food, amusement park rides and games. You can take a self-guided biking tour or surf lessons.
View creative performances and vendors during the Island Arts Festival in May. Throughout the summer, the weekly Fireworks by the Sea and Boardwalk Blast includes live music and seaside firework displays. The Carolina Beach Boardwalk is a charming destination for all ages.
Key Features
- Year-round festivities and events
- Oceanfront accommodations
- Affordable for budget travelers
Read more: 15 Best Places To Have A Destination Wedding
Santa Monica Pier, California
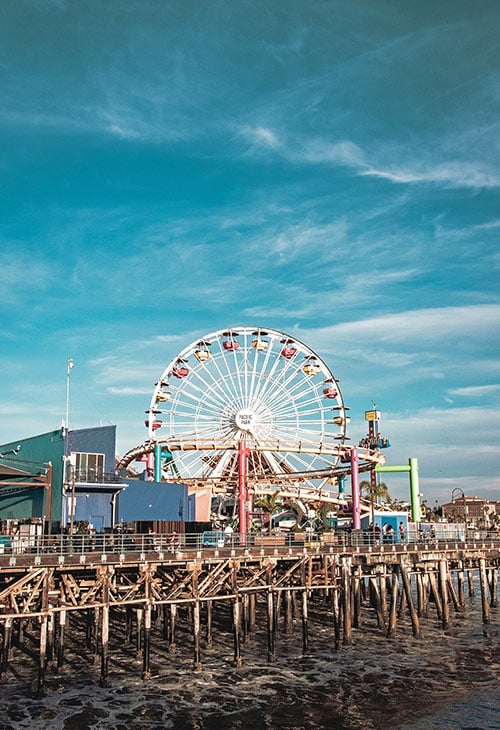
Santa Monica is an iconic SoCal playground for the whole family. The Santa Monica Pier is a highly rated U.S. boardwalk for families, including a full amusement park on the pier and an innovative solar-powered Ferris wheel. For a historic photo-op, you will find a sign marking the end of Route 66.
The 8.3-square-mile area is walkable and offers easy access to the beach. Heal the Bay
Aquarium is a great educational destination for children. Santa Monica also has dog-friendly hotels and restaurants.
Key Features
- Plenty of restaurants, food carts and treat shops
- Vibrant atmosphere with street performances
- Family-friendly destination for adults, children and pets
Read more: These 15 Cheap Honeymoon Spots Are Seriously Underrated
How We Chose The Best Beach Boardwalks
The best boardwalks in the U.S. for families to vacation at offer a blend of seaside leisure,
excitement and memory-making opportunities. The top boardwalks were chosen because they offer the following benefits to travel enthusiasts and families with children:
- Beautiful sightseeing: View the ocean, watch the sunset or look for dolphins.
- Beachfront dining: Enjoy meals ranging from iconic boardwalk hot dogs to indulgent seafood restaurants.
- Active fun: Use designated walking paths or rent bicycles.
- Shopping plazas: Browse beach gear, local artists’ creations and souvenirs.
- Evening events: Watch fireworks displays, street performers, movie nights and concerts.
Families should also consider a boardwalk’s proximity to their lodging and other local attractions, as well as its accessibility by car or public transportation.
Beach vacations offer an array of oceanside activities, dining and entertainment for travelers and families. The many boardwalks in the U.S. for families that blend adventure and tradition, so book your next unforgettable trip.
What is the best boardwalk on the East Coast for families?
The East Coast is home to many excellent boardwalks for families to enjoy. The Ocean City Boardwalk in New Jersey is a top choice for beach days, attractions, bike rides and more summer fun. The boardwalk is open 24/7 year-round, and stores have varying schedules.
What should you pack for a boardwalk beach vacation?
You should pack lightweight clothing, swimwear and comfortable walking shoes — tennis shoes for the boardwalk and sandals for the beach. You might need a light jacket or windbreaker for cooler breezes in the early morning or late evening. Bring sunscreen, beach towels and chairs, and reusable water bottles. Many children also enjoy beach sand toys.
What foods are beach boardwalks known for?
While each destination may have local favorites, American beach boardwalks are typically known for saltwater taffy, funnel cakes, fresh lemonade, hot dogs and more carnival food. You will likely also find seafood, pizza, barbecue and other delightful dishes.
Plan Your Trip
Sign up for my travel newsletter here and be the first to get my best travel advice and secret finds — so you can discover hidden gems, and travel like an insider (not just a tourist).
After traveling consistently for over 15 years, I’ve come to trust and rely on a few websites to help me find the best deals on flights and accommodation.
Flights: Going is the first place I check when searching for cheap flights. If you sign up for their email alerts, you’ll receive flight deals at up to 90% off. I have traveled all over the world using their flight deals.
Accommodation: Booking.com offers savings on hotels, apartments, and villas in 80,000 destinations worldwide. You can browse hotel reviews and find the guaranteed best price on hotels for all budgets.
Travel Insurance: I never travel without a travel insurance policy because it’s not worth the risk! I use and trust Visitors Coverage, which I have used for the past 10 years.
Let me book your trip! Looking for a Travel Advisor to help you plan your trip? Learn more here!
The post Top 6 Boardwalks in the U.S. for the Perfect Family Beach Vacation appeared first on Ordinary Traveler.


