Landscape photographers who’ve spent enough time shooting in the field, especially after the sun drops below the horizon, know that it’s often impossible to capture what they through the viewfinder with a single shot in the camera. This tutorial from the PHLOG Photography YouTube channel explains how to get the job done to perfection with a technique known as exposure blending.
Instructor Christian Mohrle is one of Germany’s best landscape photographers, and he equally adept behind the computer. Today’s challenge involves a sunset scene shot at night with a dark peak in the background, a beautiful golden sky, and car trails running through the middle of the frame. And it’s the perfect situation to demonstrate how exposure blending is the ideal solution for balancing out the varied colors and tones required for optimum results.
Mohrle’s original image is dull and uninspiring, so he begins with several global adjustments to enhance it as much as possible, before the awe-inspiring steps that follow. You can download his Raw file with a link beneath the video, and then follow along as the process is revealed.
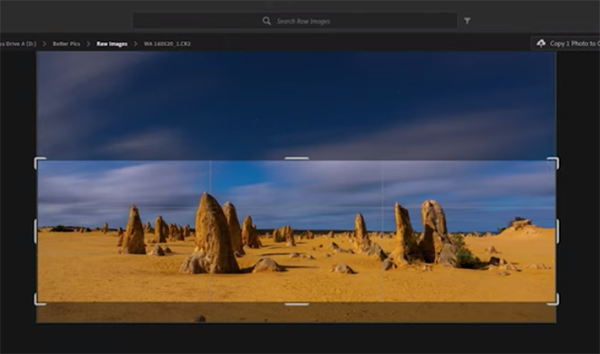
The technique involves shooting multiple images of the same scene (with the camera mounted atop a tripod) at different exposure settings, and then combining them in Photoshop to create one magical image. The preliminary adjustments start by changing the Profile from Adobe Color to Adobe Landscape which helps achieve the vibrant look that Mohrle desires.
Other basic enhancements require modifying White Balance, increasing the Tint for more warmth, and bumping up Exposure while dropping Highlights to help fix the bright sky. Mohrle also boosts Whites and brings down shadows to enhance contrast throughout the frame. Adding Texture and dropping Clarity is also important for the reasons explained.
With the base image now looking as good as possible the fun part begins with some simple masking to selectively enhance specific portions of the scene. A Radial Gradient over the horizon is the first step in this process, followed by a sky selection with a Linear Gradient.
Color grading comes next and Mohrle walls you through the steps he employs to really make the colors pop. A bit of careful sharpening also helps. Then it’s time to work on the vehicle light trails which require enhancements of their own.
The process concludes with the coup de gras; namely, Mohrle’s transformative Photoshop exposure-blending technique—proving once and for all that it is possible to make a silk purse out of a sow’s ear! After watching this eye-opening lesson pay a visit to Mohrle’s instructional YouTube channel where there much more great landscape photography advice.
A firm understanding of how to use Photoshop’s straightforward Eraser tool is a fundamental aspect of improving your post-processing skills, and today you’ll everything you need to know in less than two minutes.
This “essential” lesson comes from our friends at Adobe Photoshop Tutorials, a YouTube channel that regularly provides expert-guided image-editing lessons on basic Photoshop techniques. Today’s unnamed instructor kicks off the video with this promise: “Over the next two minutes you’ll learn how to effectively use the Eraser tool to refine and adjust your images, ensuring that your edits are seamless and professional.”
This tool is located halfway down the toolbar and can be quickly accessed with the keyboard shortcut “E.” Photoshop’s Eraser is a very simple go-to tool for eliminating unwanted elements and/or ugly artifacts from an image, and after watching how easy this is to do you’ll definitely you’ll want to add the technique to your Photoshop bag of tricks.
The goal for this session is to create added depth in a landscape scene by overlaying one image atop a different background. The challenge is to make sure that an errant tree trunk in the original shot doesn’t intrude into the combined image, and this is where the Eraser tool comes into play.
The task is quickly accomplished by combining the Eraser tool with Photoshop’s Magic Wand tool for more accuracy and maximum precision. You’ll discover several important settings, including Brush hardness and size, Opacity and Flow, and there’s an interesting trick for more nuanced control over all of your edits.
Once the Eraser tool is properly configured for the image at hand it’s easy to get the job done with the exact effect you desire—whether you’re blending backgrounds or refining edges within a shot. As the instructor says, “this approach allows for meticulous editing, so that every detail contributes to the overall esthetic of your image.” It’s a very valuable technique for Photoshop users of all skill levels.
Be sure to take a look at the Adobe Photoshop Tutorials YouTube channel after watching this video. It’s loaded with basic Photoshop tips and techniques for improving the manner in which you enhance every image you make.