The household waste item that will stop your bin from stinking in hot weather
There’s nothing worse than a stinky bin
 REAL ESTATE
 REAL ESTATE
 REAL ESTATE
 REAL ESTATE
 REAL ESTATE
 EVENT
EVENT
 LANDSCAPE
 LANDSCAPE
 CONCERT
 LANDSCAPE
 TRAVEL

REAL ESTATE
Residential, Commercial, Interiors

LANDSCAPE
Landmarks, Cityscape, Urban, Architectural

FOOD
Hotels, Restaurants, Advertising, Editorial

PORTRAIT
Traditional, Glamour, Lifestyle, Candid

PRODUCT
Studio, Lifestyle, Grouping

EVENT
Conference, Exhibition, Corporate

FASHION
Portrait, Catalog, Editorial, Street

TRAVEL
Landscape, Cityscape, Documentary

SPORT
Basketball, Football, Golf

CONCERT

STILL

STREET
This timesaving tutorial will enable you to apply any of your edits, like AI Denoise, to dozens, hundreds or even thousands of similar images. It turns out that there are three straightforward ways to quickly get the job done using the recent June update to Adobe’s Lightroom ecosystem.
This trio of techniques work with Lightroom and Lightroom Classic when editing on the desktop. Instructor Terry Lee White notes that two of the methods work the same in either application, while one is specific to Lightroom Classic, and he begins with the latter.
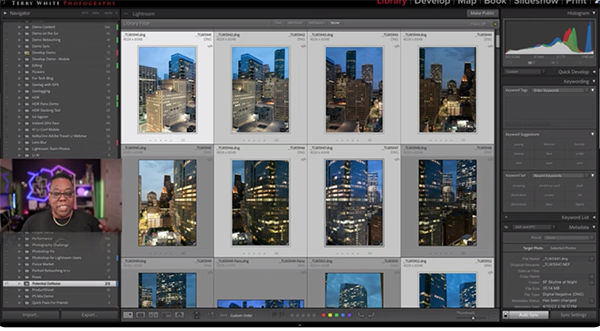
Terry pulls up a series of photos that need to be denoised. He selects his primary image, and three others that he wants to be denoised like the first without repeating the steps. There’s a quick keyboard shortcut for selecting thumbnails that don’t appear next to one another on the screen.

The Denoise tool was recently added to Lightroom’s regular Develop stack, so if you head down to the Detail panel you’ll notice the new Denoise checkbox. You’ll learn why it’s essential to choose the Auto Sync option, rather than the default Sync setting before proceeding further. This way, Lightroom will apply all of your edits across as many files as you have selected.
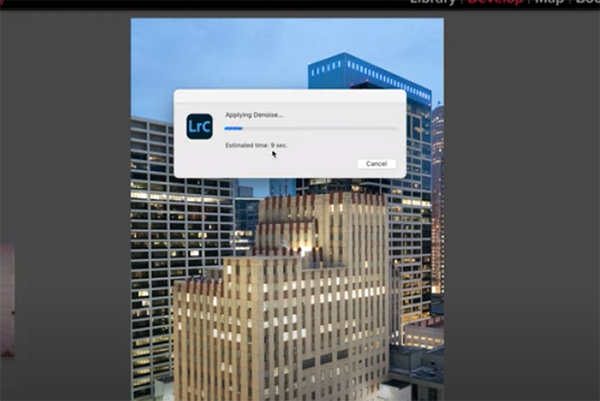
Terry notes that he always leaves Auto Sync turned on because “I can’t think of a reason to turn it off.” Then simply click Denoise and Lightroom Classic processes and syncs your images accordingly and displays a new progress bar on the screen. When the process is complete all four images have been denoised after the initial single click.
Another new feature enables you to refine the amount of adjustment after the fact without generating a whole new DNG file in the Develop module. It’s a pretty slick trick indeed. Terry moves to his other two methods that work equally well in Lightroom and Lightroom Classic, and these are just as easy and effective as the technique described above.

One approach involves copy and paste settings, while the other is creating a preset. All three techniques will save you serious time when editing multiple images—whether you’re using tools like AI Denoise, Adaptive masking, or a variety of tonal adjustments.
Terry’s popular YouTube channel boasts a wide variety of other helpful how-to videos that will quickly elevate you skills.
We also encourage you to watch the earlier tutorial we featured with another post-processing instructor who demonstrates how to use an oft-ignored Adobe profile that will rescue difficult-to-edit nature and landscape photographs.
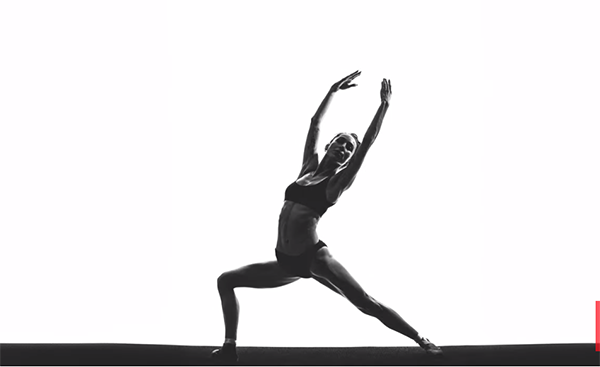
Images captured in silhouette convey a super dramatic look that’s impossible to ignore, whether you’re shooting portraits, landscapes, nature subjects and more. Today’s quick video provides a step-by-step breakdown from start to finish so that you can get started today.
Instructor Steve Selman is an accomplished pro who specializes in editorial, fine art, and fashion photography. He’s been employing eye-popping silhouettes in his craft for over a decade, and says, “today I want to crack the door on how I create them.”
Selman explains the concept like this: “I understand it by exposing a photo with a lighting source that is greater in the background of a scene than in the foreground.” Your source of illumination can be the sun or the moon when shooting in the field, or a simple indoor lighting setup that you can mimic at home.

In other words, it’s all about backlighting your subject, and Selman begins by unrolling a white seamless and then using a light on either side of this background, both pointing inwards and slightly down, to make this plain background really bright. You’ll see the type of gear he suggests.
Selman includes recommendations for camera settings, depending upon prevailing light and the intensity of your source of illumination. Once you’re all set up it’s time to concentrate on the subject, and this is where your sense of artistry comes into play. Selman puts it like this: “I like to achieve what I call “rim light” on the subject which is the refractive light emanating from the background on the perimeter of my subject.”
He also illustrates a few key considerations for composition and posing, one of which is to note how a subject creates negative spaces within their body. “What I mean are spaces between arms, neck, legs, and other parts of their body.”

Camera-to-backdrop distance is another key consideration. Selman explains that, “The closer the subject is to the light plane the more light will emanate onto the subject.” Conversely, “the further forward the subject is from the background the more contasty and darker the subject will be.”
Selman provides a few more important tips and techniques for creating what he calls “reveal and conceal.” Once you’re done watching pay a visit to his very interesting YouTube channel.
We also recommend watching the earlier tutorial we featured with a notable British pro who explains how to use Exposure (EV) compensation to control highlights and shadows for perfectly balanced landscape and nature photographs every time.
