24 Hours in Lisbon, Portugal
Lisbon, the largest city and the capital of Portugal, is one of Europe’s secret jewels. It has the charm of a coastal city with the added lushness of hilly terrain, sensational architecture – Gothic cathedrals, majestic monasteries and quaint museums – as well as lovely narrow cobbled back street lanes and some fabulous panoramic views. Its iconic swathe of red roofs and quaintly tiled walls often appear on social media as an attractive backdrop for the modern Instagrammer.
The city’s landscape and history comprise a historical ‘Age of Discovery’ that brought countless treasures from the New World, emotive “fado” music (head to Senhor Vinho restaurant for a lovely night out to fado sounds), bountiful seafood delights and late-night hotspots where you can dance ’til dawn… Lisbon has it all.
Must Stay
The Grande Dame of hotels in this town is the newly refurbished (to the tune of 15 million euros) Hotel Tivoli Avenida Liberdade conveniently situated just off the Avenida da Liberdade with convenient access to Baixa, the Barrio Alto, and Chiado. Rooms start from €163 for a double room per night based on double occupancy. Read our review of Tivoli Avenida Liberdade.
If you want to experience an incredible spa experience during your visit, consider the Hyatt Regency Hotel in Belem just outside the city. Read our review of Hyatt Regency Hotel.
Must Eat
The city is famous for its seafood. The humble sardine – a symbol of Portugal – is devoured hungrily by one and all. Often served as a bar snack, you can enjoy a plate at pretty much any bar or restaurant.
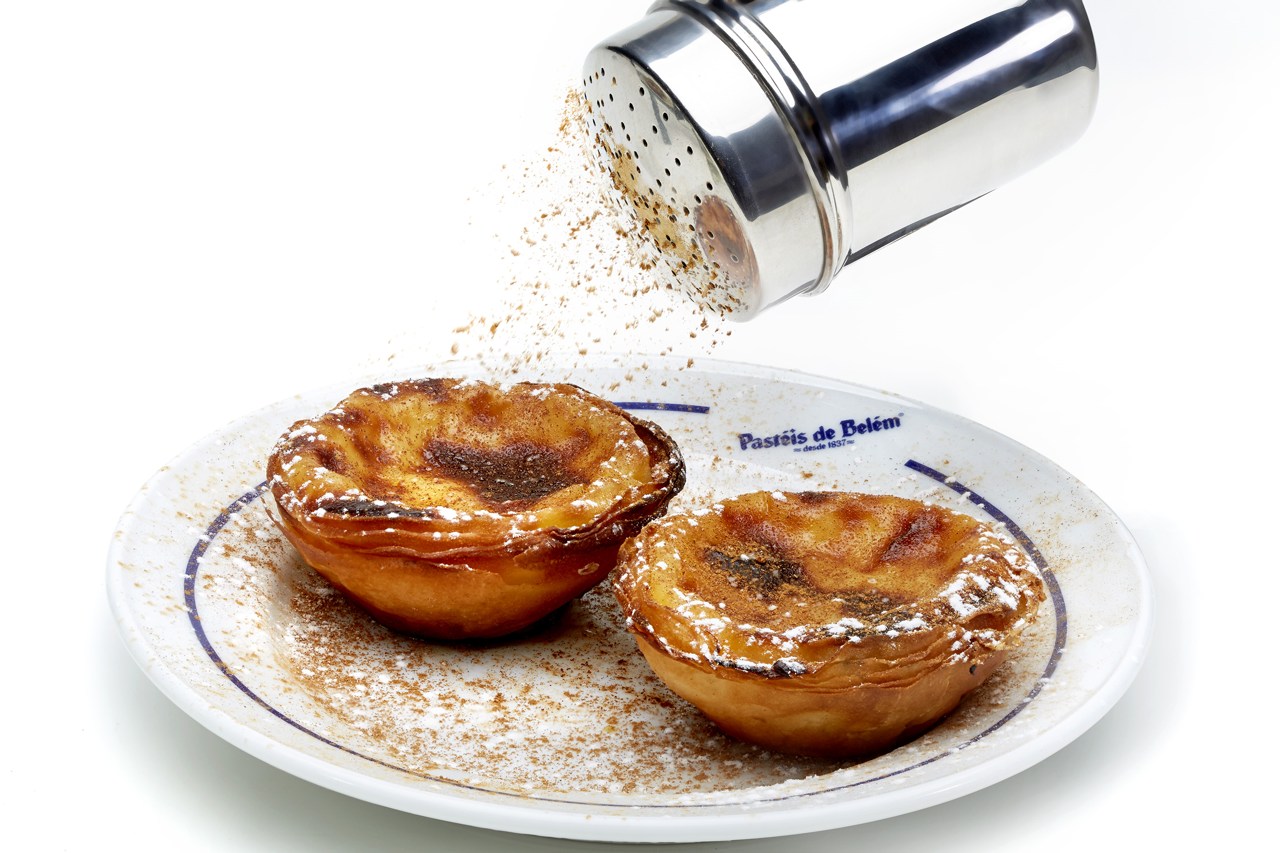
Lisbon is famed for its delicious custard tarts known as Pastéis de Nata. These sweet egg pastries are served in almost every café in the city, but the best ones come from the Casa Pastéis de Belém. This sprawling café is located in the waterfront suburb of Belém to the west of the city centre and they shift around 35,000 of these small yellow custard pies every single day. There are always queues. Try them when they are warm from the oven and covered with powdered sugar and cinnamon.

Pastéis de Nata
Another must-visit is the Museu da Cerveja. This is a restaurant cum brewery cum museum. You could get a table but it’s more fun to grab a bar stool and order a cheesy cod fish cake made with Serra cheese and marinated with coriander (or roasted octopus if you prefer) and a tall glass of Sagres beer.

Museu da Cerveja
While in town you should experience a traditional restaurant where you can hear the highly stirring and often melancholy Fado music (Portuguese guitar music), in an intimate space. For this OFaia located on a narrow, cobbled street at R da Barroca 54 56 is a must-visit.
If you fancy something fancy, then check out one of celebrity chef Olivier da Costa‘s restaurants. His restaurants are as flamboyant as he is. He also has a lush rooftop restaurant and Sky Bar – SEEN – on the top of the Tivoli Hotel also on Avenida da Liberdade that offers Portuguese cuisine and tremendous views.
For a fun night out head to Avenida da Liberdade to JNcQUOI Frou Frou. You will be serenaded by a drag queen in a gorgeously boudoir environment.
Must Take
Don’t forget to take a very comfortable pair of walking shoes with you when visiting Lisbon. The city was built on a series of steep hills – ideal when a growing town is trying to protect itself against invaders but not so good for modern-day tourists with tender toes. Those with mobility issues may find the slick cobbles and sharp gradients tricky to handle. Trainers or shoes with grippy soles and walking aids (if required) are advised.
Must Visit

Lisbon – Jeronimos Monastery (c) Alvesgaspar
At the height of Portugal’s Age of Discovery, King Manuel I built the Jerónimos Monastery (Praça do Império, Belem) to commemorate the voyage of Vasco de Gama and give thanks for his success. Today, the complex is celebrated as one of the finest examples of European Gothic architecture on the planet and has been classified as a UNESCO World Heritage monument. Take time to contemplate the cloisters and the tilework telling the Biblical story of Joseph.
Must Explore

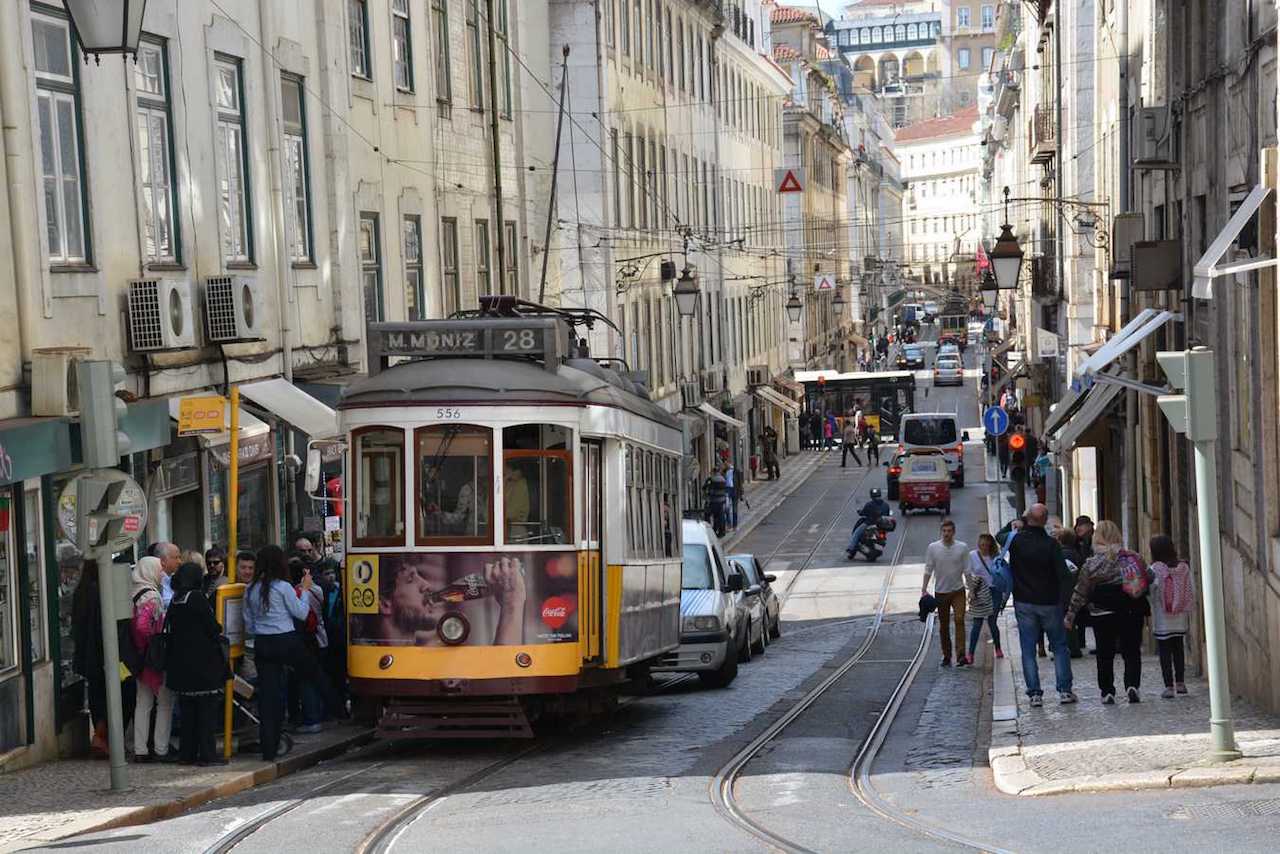
Lisbon – Tram 28 (c) Paul Arps
There is no main location to explore in Lisbon – everything is worth a wander. Rather, it’s how you do it that will make your stay interesting. Tram 28 is both a symbol of the city and an amazing way to see all the sights. It begins its journey at Praça Martim Moniz and winds its way through all the key neighbourhoods, including Barrio Alto, Mouraria and Graça and the winding medieval lanes of Alfama, for less than €4 per person.
There are also guided tuk-tuk tours. You can. pick one up around anywhere in central Lisbon but expect to pay around 70 euros for a couple of hours.
Tip: Don’t waste your money on expensive double-decker bus tours when you can see the sights for a fraction of the cost in an authentic antique streetcar. Just watch out for pickpockets as they are notorious on this route.
READ ALSO: Top 10 things to see and do in Lisbon
Must Shop
If you love to shop, then the district of Chiado is the one for you. Named after the square around which the district formed, Chiado is the midway point between downtown (Baixa) and the nightlife and club scene of Barrio Alto. Here is where you will find a plethora of one-off boutiques packed with Portuguese specialities.
Highlights include Luvaria Ulisses for butter-soft gloves in an array of colours (Rua do Carmo 87A), and A Vida Portuguesa (Rua Anchieta 11), the ultimate Portuguese purveyor offering a curated selection of Portugal’s finest products including soaps from Porto, embroidery work, basketry and more. This could be a good place to find something authentic to take home.
Must See The View

View of Lisbon from Castelo de Sao Jorge (c) Concierge.2C
The neighbourhood of Alfama is one of Lisbon’s most atmospheric, dotted with intimate bars, restaurants, and boutiques. Enjoy a day wandering the labyrinthine streets – just keep heading uphill to reach your final destination, the Castelo de São Jorge on Rua de Santa Cruz do Castelo.
Castelo de São was built by the Moors to protect the city from Christian crusaders. Today, it offers commanding views of the city and the Tagus River. At one time, the castle was also the royal palace for the Portuguese Royal family, however, the construction of a new palace on the banks of the Targus (where the Praça do Comércio now stands) in the 16th-Century combined with earthquake damage caused the building to lose favour and it was transformed into army barracks and a prison. Spend time wandering the grounds before heading inside the structure itself.
There is another great Miradouro (viewing point) to be had from the Graca Church and convent which sits atop Graça hill. You can reach it via the famous tram 28 – just hop off at the Miradouro da Graca stop.
Getting there
TAP Airlines operates frequent flights to Lisbon.
You may also like:
JNcQUOI Frou Frou restaurant review
SEEN rooftop restaurant review
Hyatt Regency Hotel review
The post 24 Hours in Lisbon, Portugal appeared first on The Travel Magazine.


