The Nikon Z6III sits about in the middle of their Z-series mirrorless camera lineup, but make no mistake! The Z6III is way more than a mid-range camera. Chockfull for high-end photo and video features, the Nikon Z6III is sure to be a favorite, durable creative workhorse for years to come.

Nikon Z6III Overview
At 24.5 megapixels, the Nikon Z6III falls just below to 45.7-megapixel Z9/Z8/Z7II series and above the APS-C format Z50II/Z30/Z fc models. In terms of value-for-dollar, in many minds it sits at the top. Megapixels do matter, but they are by no means the defining differentiator.

Shutterbug had the rare opportunity to borrow a Nikon Z6III and two lenses for an extended period of time. I shot the Z6III side-by-side with my personal Nikon Zf and Nikon Z fc. Although all three cameras have clear attractions of their own, the Z6III stood out as the camera I can easily recommend to all photo enthusiasts, be they beginners or experienced experts.

Key Features of the Nikon Z6III
Full-Frame 24.5-megapixel Partially-Stacked CMOS Sensor
EXPEED 7 image processor
Professional level video
4K 120p, Full HD 240p slow motion video
6K 60p N-Raw, 6K 30p ProRes Raw video
Pixel Shift Technology (up to 96 megapixels)
Pre-Release Capture (1 sec before, 3 after)
Exceptional low-light/high-ISO performance
5-axis, 8-stop IBIS efficacy
Nikon’s brightest viewfinder to date
Blackout-free, 5760k-Dot EVF
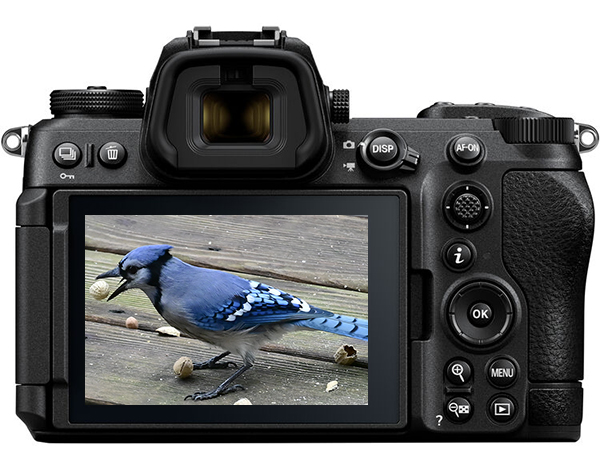
3.2-inch, 4-Axis tilting touchscreen LCD
Subject Detection with Deep Learning Technology*
Continuous burst (up to 20 fps Raw, 60 fps JPEG)*
(New) Camera-to-Cloud Direct Connectivity*
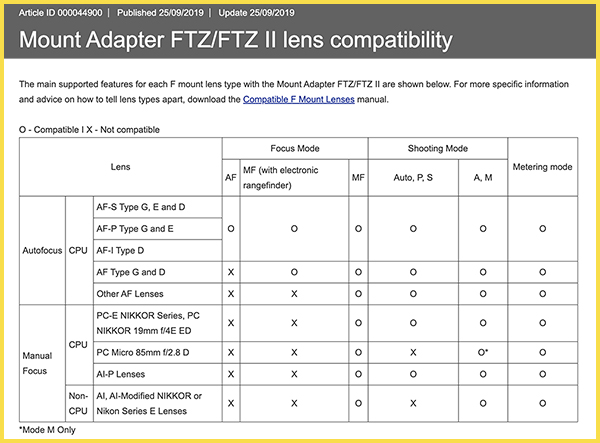
Expanded lens compatibility via FTZII adapter*
Powerful Nikon NX Studio editing software (free)*
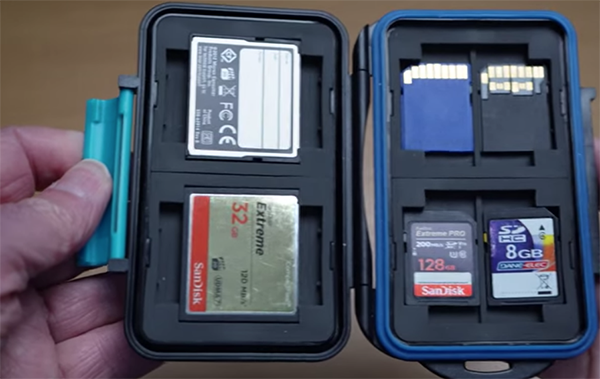
CFexpress Type B & SD memory card slots
EN-EL15c rechargeable lithium-ion battery (about 330 to 400 shots)
Buy directly from Nikon: Z6III (body only) is $2199.95
Buy directly from Nikon with Nikkor 24-70mm f/4 Zoom $2599.95
Recommended configuration: Z6III with 24-120mm f/4 $3099.90

*Subject Detection
The Nikon Z6III features 493-Point Phase-Detection AF, AI-Based Subject Detection that is about 20% faster than the Z6II. It can correctly recognize people, dogs, cats, birds, airplanes, cars, motorcycles, bicycles and trains. Probably other critters, too. Moreover, it can accurately detect human faces as small as roughly 3% of the frame.

*Continuous Burst Shooting
It’s a birder’s dream come true. Sports, kinetic action, racing cars—and my favorite, skittish birds—are easy prey with the Nikon Z6III thanks to its incredible, full-featured continuous shooting capabilities. Perform burst shooting of up to 20 fps (Raw) and up to 60 fps (full-frame JPEGs) or 120 fps (DX-cropped JPEGs), all supporting full AF/AE performance. With high-speed shooting of multiple frames, you’ll appreciate the Z6III’s built-in CFexpress Type B card slot.

*Camera-to-Cloud Direct Connectivity
Available with Nikon Z6III and Z50II, Nikon’s complimentary cloud service enables upload of full-resolution image files to preferred cloud storage sites directly from the camera. Additionally, users can download professionally-crafted Cloud Picture Control presets and update firmware straight from the cloud when necessary. Watch the set-up video.

*FTZII Adapter
The Nikon FTZII Adapter (as well as its predecessor the FTZ Adapter) allow attachment and full operation of a wide variety of legendary Nikon F lenses. Restrictions apply—see Nikon’s reference page.

*Nikon NX Studio
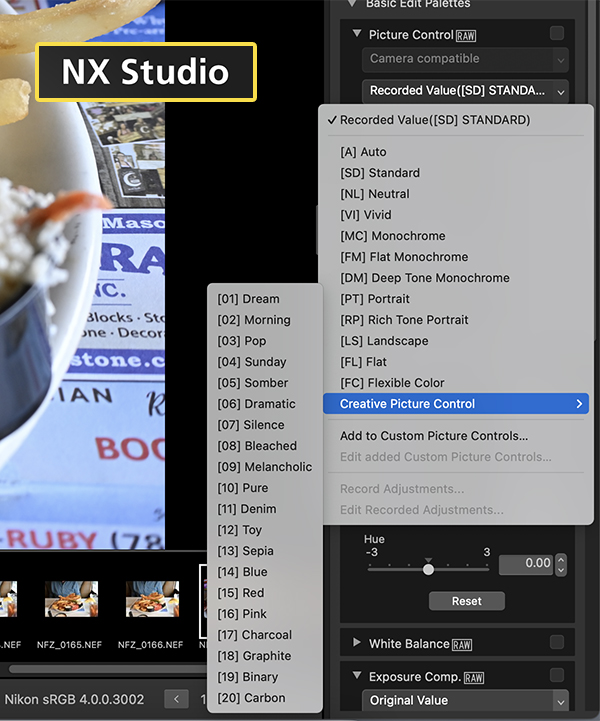
Nikon NX Studio for Mac and Windows PCs is a free, comprehensive image-processing suite optimized for editing photo and video images captured with Nikon cameras. In addition to browsing and processing Nikon NEF (Raw) image files, users can control most essential functions of exposure, color balance, white balance, etc., as well as many of Nikon’s built-in camera settings (Active D-lighting, Noise Reduction, Picture Control, and more). Watch the video. NX Studio also processes JPEG and TIFF image files. Good stuff.

Of particular delight to me, NX Studio enables the application of Nikon’s Creative Picture Controls from the safety of your computer—which is greatly preferable to committing to a special effect in the field and regretting it later.

High ISO Performance
The sensor in the Nikon Z6III has Dual-Gain ISO that improves overall low-light performance, especially in the shadow areas. With basic ISO settings of ISO 100 to ISO 51200 (expandable to ISO 204800 equivalent) there’s no want for numbers—but what about results? I’m always a skeptic where ISO ratings are concerned, and I can report that the Z6III is exceedingly good in low light, exhibiting minimal noise even at higher settings, and delivering legitimate, clean high-ISO image capture.

Construction
As everyone expects, the magnesium-bodied Nikon Z6III is built like a tank. It’s blessed with robust weather seals, and while it’s never a good idea to take any camera for a dunk, neither should you fret over a bit of rain or snow. IP Rating is unknown (or at least unpublished).
The Z6III is well balanced and feels great in the hand. It’s deceptively light in weight (23.7 ounces / 670 g) and measures 5.5 x 4 x 3.7 inches (138.5 x 101.5 x 74 mm). Compare that to the Nikon D850 DSLR which comes in at a hefty 32.3 ounces, 5.8 x 4.9 x 3.1 inches (and, frankly, is a genuine bargain at less than $2000 when purchased from Nikon. Price may be a limited-time offer.).

Main controls are intelligently located and intuitive to manipulate. The 3.2-inch touchscreen LCD offers 4-axis tilts so it’s easy to frame a shot from any contortion.
Nikon boasts that the 5760k-dot EVF is the brightest found on any of their mirrorless cameras, and while I cannot compare them all side-by-side, I have no reason to doubt—it’s stunning.

Image Quality
This is one area where Nikon cameras and Nikkor lenses always stand out. Images are amazingly sharp (which somehow seems trite to say) and richly saturated, with clean highlights and appropriately rich shadow areas.
The 5-axis image stabilization provides 8-stops of efficacy, so one can shoot at surprisingly slow shutter speeds without image-wrecking jiggle. This spec seems to be slightly understated by Nikon, but it’s a huge benefit, especially with longer lenses.

Tip: The FTZ/FTZII adapter is great because it provides full functionality with many Nikon F lenses—but it’s not cheap. Unless you plan to own a Nikon Z9 someday, buy a less expensive used FTZ instead of the latest FTZII. They work the same, but the FTZII is slightly reconfigured to accommodate the Z9’s formfactor.
And if you really want to have some fun, but an inexpensive dumb adapter for around $15 and explore the world of legacy Nikon glass. With dumb adapters, all functions are strictly manual, but so what? You can use dozens and dozens of genuine Nikon lenses—99.98% of which are excellent—for cheap.
Read more about adventures with dumb adapters here: Nikon Z Owners: Enjoy Affordable, Superb Nikon Brand Lenses Via An Inexpensive Adapter.

Conclusion
Did Nikon screw up? Does the Nikon Z6III have too many features for its price point? Things like that do happen. The Z6III costs about $1100 less than the Nikon Z8. For the extra dough, the Z8 gives you 45.7 megapixels instead of 24.5, but one could argue that aside from the higher resolution and some video features, the Z8 actually offers less. The Z6III has a slightly broader metering range, better audio, a fully articulated LCD monitor, a substantially better EVF (5.76 million dots vs 3.69), better AF, plus the Z6III weighs nearly 20% less (23.6 ounces vs about 28.9).
The Nikon Z6III is destined to an enduring model that satisfies long after new performance benchmarks are forged because it delivers all of the features any serious enthusiast could ask for (and then some) and is easy to operate.

Price & Availability
Available now. Buy directly from Nikon: Z6III (body only) is $2199.95
Buy directly from Nikon with Nikkor 24-70mm f/4 Zoom $2599.95
Recommended configuration: Z6III with 24-120mm f/4 $3099.90

Scorecard
Pros
· Fully featured at an attractive, affordable price
· Truly superb, bright 5,760,000-dot EVF
· Outstanding low-light capability and excellent image quality throughout
· Amazing burst capture speed and capacity
· Access to Nikon’s Camera-to-Cloud service
· Pro-level video features
Cons
· None detected (really)
Want to Become a Better Photographer?
Begin by taking more pictures. Carry a camera everywhere you go and shoot even when you’re 100% sure the picture won’t turn out. Review all of your images with a critical eye and share them with others – and that includes posting the best on our Gallery. Subscribe to our newsletter (see sign-up form on our homepage) and bookmark Shutterbug as a Favorite on your browser so you can check back often. We’re in this for the same reason as you – we love photography, and we’re learning more about it every day.
—Jon Sienkiewicz


