One of the “rules” outdoor photographers learn from the get-go is to avoid contrasty midday light. The idea is to shoot in early morning or late afternoon when colors and soft illumination is far more preferable. That’s good advice but we can’t always choose when we’ll come upon a beautiful scene, and there are ways to capture epic photos under harsh conditions.
This behind-the-scenes tutorial below British landscape photographer Nigel Danon reveals several pro tips will help increase your odds of success when the light is far from ideal. Danson is hiking up a trail with mountains in the background as he searches for some heather to photograph. Sunrise is long gone, and sunset is hours away, but he manages to capture some very impressive photos with a few tricks of the trade.
One simple approach is to wait until the sun passes behind a cloud, and your patience will often be rewarded in a number of ways. When this happens light immediately softens, contrast is significantly reduced, and colors become more vibrant as distracting shadows and small reflections disappear from the scene. It’s important to work quickly because the sun may reappear at any moment.
Choosing the right shooting position, like in the shade of a large tree, is another way to minimize harsh when the sun is high in the sky—especially when there are a few clouds in the distance to protect interesting background elements from unsightly light. Danson explains how bracketing your exposures can help achieve good results in scenes with the “massive” dynamic range that occurs when the foreground of the frame is in shade while the background is brightly lit.
Another cool trick is how Danson uses mixed light to “transition the viewer through a scene. He prefers to compose images in a way that the bright and dark areas are clearly divided—rather than having the entire photo mottled with patches of light and shadow.
Danson demonstrates several other very effective techniques for dealing with harsh overhead light. One of these involves the proper way to position yourself relative to the sun when photographing waterfalls, streams and other areas with water. If you do it right you can prevent gaudy reflections from killing the shot.
The focal length of your lens can also be part of the equation, and Danson provides a list of his preferred gear in the description beneath the video. His instructional YouTube channel is well worth visiting, especially if landscape photography is your thing.
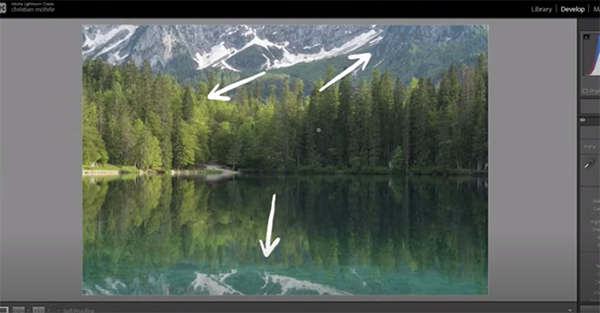
If you’re unfamiliar with Lightroom’s Intersect tool you’re in for a treat because the tutorial below from the PHLOG Photography YouTube channel explains how to use it to easily create “insanely complex” masks. And that means photos with accurate exposures, beautiful natural colors, and much more.
Instructor Christian Mohrle is a notable German landscape photographer and an equally adept image-editing expert who knows how to simplify seemingly complicated tasks. In this eye-opening episode he explains why his says the hidden Intersect tool is Lightroom’s “best masking feature” and demonstrates how to use it in less than 15 minutes.
Mohrle includes a link beneath the video so you can download his demonstration Raw file, follow along, and make the adjustments yourself as they’re explained, which is a great way to learn. He always begins with a few global adjustments to prepare a photo for the selective enhancements that follow.
As you can see, Mohrle photographed a pretty seaside scene that is significantly underexposed. His first step is to apply Lightroom’s new Noise Reduction and he walks you through the straightforward process that takes place in the Details panel when you click on Denoise.
Now it’s time to open the Basics panel and get the preliminary global adjustments out of the way. Mohrle’s goal is to warm up the tones while making the image a lot brighter. He raises shadows to bring increase detail, cuts exposure in the highlights to fix blown-out areas in the sky and uses the Temperature slider to begin warming up the tones.
Other preliminary adjustments include bumping up Texture to add sharpness to smaller details while dropping Clarity to create the softer look he’s after. After raising vibrance and saturation the basic modifications are complete, and it’s now time for the powerful hidden tool that really works some masking magic.
The trick begins with adding a simple Sky mask by clicking on Sky the option you’ll find within the masking panel. What follows is easier to understand by watching Mohrle demonstrate the technique, so we’ll refrain from summarizing how it works. Let’s just say that the method really is quite remarkable and easy enough for photographers of all skills levels to accomplish.
The lesson concludes with some straightforward color grading, a bit of judicious sharpening, and a quick cleanup in Photoshop. Compare Mohrle’s before/after images and you’ll be very impressed by the transformation.
You can find more great tips and tricks on Mohrle’s popular YouTube channel, so be sure to pay a visit and see what he has to offer.
Choosing the optimum frame rate (fps) is a no-brainer when shooting in the field, right? You use the fastest setting available for subjects in motion, and back it off with statics subjects. Well, there’s more to it than that as you’ll see in the tutorial below from the Backcountry Gallery YouTube channel.
Instructor Steve Perry is an accomplished pro, specializing in nature, landscape, and wildlife photography. In this episode he reveals his secrets for selecting the optimum fps in various situations. He puts it like this: “Leveraging it the right way can unlock a flood of extra keepers and sharper photos.”
Perry covers a lot of ground in just 12 minutes, so you may want to take a few notes. He discusses the best settings for wildlife photography, the implications for sharper images, and how to handle sorting your images when shooting at a fast rate. He also poses this question, “do you need a high fps for static subjects?”—and you’ll be surprised by his answer.
According to Perry, who has strong opinions on these matters, “with the current generation of cameras I’m a peg-the-needle guy when it comes to wildlife photography.” He says that he typically uses the maximum “no compromises” frame rate.
Perry admits that throttling the frame rate may be of concern to those whose cameras offering 20fps or more, but the advice in the video is equally appropriate for those with slower models. His overall emphasis is how to determine the maximum frame rate you can use “without making some sort of compromise in image quality.”
One important consideration is that some cameras require you to use a lower-quality file format when choosing the highest fps setting, i.e. Jpeg instead of Raw. In other cases you may have to shoot at a lower resolution than if you dialed back the frame rate. There’s also a concern when using mirrorless cameras that are subject to “rolling shutter”—which is why the mechanical shutter in those cameras is a better choice than the electronic shutter when photographing movement.
Perry goes into detail on these and other key issues, including the matter of setting the right fps for static subjects. He also notes a few pitfalls to avoid and how to achieve fast-and-precise focus for whatever task you confront.
Shooting at fast frame rates means you’ll capture a high volume shots, making it a chore to sort through the all the images on the computer. To that end Perry concludes the video with some very helpful tips for facilitating the culling process and getting you back out in the field as soon as possible.
After watching the video take a look at the Backcountry YouTube channel where you’ll find a wealth of great tips for shooting and editing wildlife, nature, and landscape images.