Pro Hack for Perfectly Exposed Nature, Wildlife, & Landscape Photos (VIDEO)
If you’re unfamiliar with an in-camera technique known as “Expose to the Right” (ETTR) this tutorial explains the concept and demonstrates how one of our favorite pros uses it to nail exposure every time and get the best possible image quality out of every shot. The pro hack takes less that nine minutes to explain, and it will prove invaluable for every image you shoot in the great outdoors.
Instructor Simon d’Entremont is a noteworthy nature and wildlife photographer based in beautiful Nova Scotia, Canada. He kicks of today’s episode with this question: “Do you find that your photos look noisy, lack clarity and don’t look sharp?” If so, you’ll learn how easy it is to increase quality and impact by understanding how ETTR works.
Before explaining this important trick, Simon describes a few problems that it’s intended to fix, and he begins with a quick overview of how exposure affects the noise performance of a camera. As he says, “noisy images lack dynamic range and often appear soft.” He reviews the difference between color noise and “read noise” from the circuits on your sensor.

Perhaps worse of all is what Simon refers to as “shot noise” that, unlike the aforementioned issues, can’t be eliminated by today’s advanced camera sensor technology. So what’s the fix? According to Simon it’s as simple as using ETTR so that the sensor captures more photons.”
Simon explains how to modify shutter speed and aperture to get the job done. As he says, “Longer shutter speeds increase the number of photons collected by collecting them over a longer period of time, as does a wider aperture by having a larger hole through which they can enter.”
The foregoing explanation makes it easy to understand why and how the ETTR technique is so powerful. One key factor is that image noise doesn’t increase or decrease proportionally as exposure is modified. This fact helps determine the best exposure settings to use, and the ultimate image quality you’ll achieve.

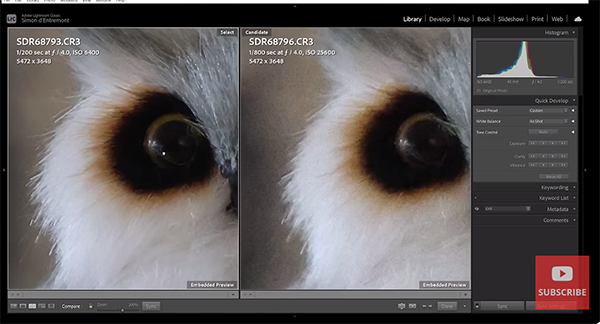
Simon illustrates all this in two interesting ways. First you’ll see the difference between two versions of the same shot and why one is significantly better than the other. But he also demonstrates how noise levels change from area to another within a single image.
Be sure to visit Simon’s popular YouTube channel where you’ll find numerous instructional videos for improving your nature and wildlife photography skills.
We also recommend watching the earlier tutorial we featured with another highly acclaimed outdoor shooter who demonstrates how to use Lightroom’s powerful Tone Curve tools to add intense colors in photographs with dull skies.


