
STOP Over-Sharpening Your Photos & Do This Instead (VIDEO)
We regularly preach the necessity of taking a cautious approach when it comes to post- processing. After all, your goal is to enhance an image with subtlety, rather than make it worse with heavy-handed adjustments that result in “overcooked” results.
Sharpening, or rather over-sharpening, is a common occurrence that falls into the category of errors that quickly deliver “crunchy” photos and reveal your lack of Photoshop or Lightroom skills. Do things properly and you’ll improve a soft image. But take things too far and you’ve just killed an otherwise nice shot.
There’s something inherent to virtually all sharpening techniques that has the potential for misuse, but here’s the good news from instructor Steve Arnold: “There is one easy step you can take to fix these problems and create perfect sharpened results every time.” Best yet, it takes him barely four minutes to explain how to complete this common task with precision.
Arnold is an Australian landscape pro and post-processing expert specializing in quick how-tos that are valuable for photographers of all skill levels, and in this episode he explains how excess sharpening can be worse than no sharpening at all. He describes the concept like this: “Sharpening works by finding the edges of elements in a scene, and then increasing the contrast of those edges.”
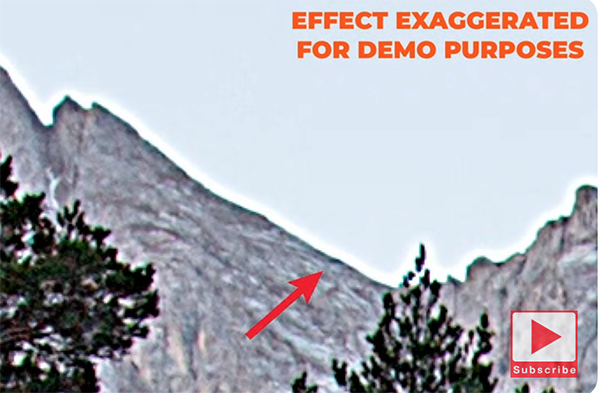
In other words, the dark side of each edge gets darker while the light side gets lighter. Arnold goes on to explain that most “regular” sharpening techniques enable you to control the number of pixels to be sharpened on either side of the edge, but there are two problems with this. First, “different objects in a photo respond differently to the same amount of sharpening.”
In the example he provides, rocks in the foreground look fine but leaves and branches in the trees appear super crunchy. The second problem is this: “When you brighten the edge in any photo you’re creating what’s known as a “halo,” and these ugly and unnatural artifacts “really look bad.”
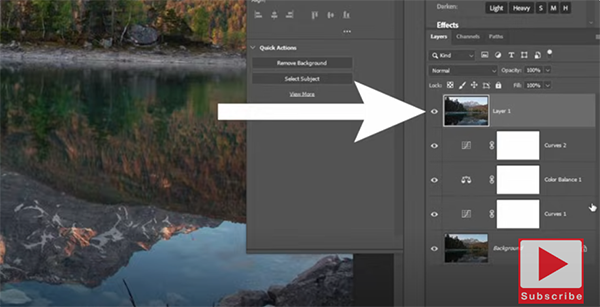
Arnold’s method actually helps you avoid creating halos in the first place, and it works wonders no matter what sharpening technique you use—including the High-Pass approach in today’s demonstration. He explains the foolproof method so clearly and quickly that we won’t bother summarizing it here. All you have to do is follow his instructions, and over-sharpened photos will be a thing of the past.
Arnold’s popular YouTube channel has many more instructional videos on common topics, just like this one, so be sure to pay a visit when you have time to explore.
We also recommend watching the tutorial we featured with another image-editing expert who explores other destructive post-processing habits that occur when you misuse Lightroom’s Texture, Clarity, and Dehaze tools to “improve” your photographs.


