How the Focal Length of a Lens Relates to Angle of View (VIDEO)
Do you understand the interplay between the focal length of a lens and angle of view? It’s an important relationship to understand, and this video from a German pro will bring you up to speed in the next seven minutes.
Rainer Hoffmann is an excellent photographer who specializes in travel and landscape imagery that has appeared in numerous publications, books, calendars and the like. He’s also a very experienced educator—conducting workshops, in-person classes, and numerous online courses for over 20 years.
He introduces today’s explainer like this: “The focal length of a lens is an important parameter, however it tells us nothing about what we’re really interested in when we use a specific lens. Therefore, the angle of view is more important.” There’s also a link in the description beneath the vide for downloading a helpful chart of typical focal lengths for different sensor sizes.

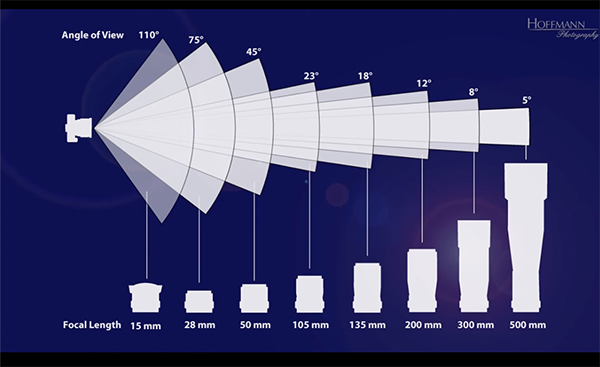
Hoffmann illustrates today’s lesson with excellent graphics that make both concepts very easy to understand. Unlike with angle of view, all lenses are marked with their focal in millimeters— either on the barrel or at the front. Zooms offer a range, while prime lenses are limited to a fixed focal length and tend to be much faster.
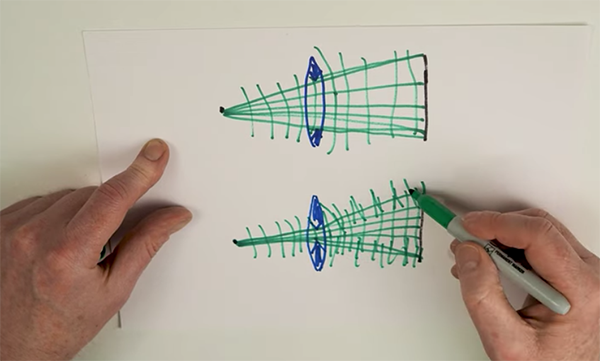
The lesson begins with some quick physics before moving on to practical matters and Hoffmann puts it like this: “Focal length is simply the distance from the central plane of the lens to the focal point (the point where all the light rays converge).” But Hoffman says that what we really want to know is how much of a scene will appear within the frame when we use any given lens.
Hoffman demonstrates why this is where angle of view comes into play, as does the sensor size of your camera. Thus, an image made with a 50mm on a full-frame camera appears significantly different from photos shot with the same lens on an APS-C or M/43 camera.

Fortunately there’s a simple relationship between focal length and angle of view: “A short focal length means a wide angle of view while telephoto lenses have a much narrower angle of view (expressed in degrees).” And, as you’ll see, here’s when sensor size factors into the equation.
The good news is that you needn’t member all the numbers and degrees, because all this will quickly become second nature once you get the hang of it. And don’t forget to download the helpful reference chart mentioned above. Then head over to Hoffmanns popular YouTube channel where there are many more straightforward primers available.


