Half the Frame, Twice the Fun! New Fujifilm X half
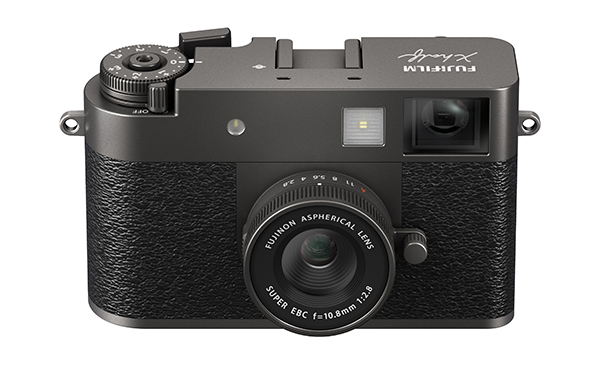
Fujifilm has launched a rocket that is likely to illuminate the sky for years to come. The new Fujifilm X half is a digital camera that captures images emulating those from a 35mm half-frame film camera. Featuring a 1-inch sensor, 10.8mm f/2.8 lens (32mm equiv), vertical orientation, Aperture Adjustment Ring, Frame Advance Lever and an abundance of other film-camera-like features, the Fujifilm X half appeals to an extraordinarily wide array of imagemakers.

Not Your Dad’s Half-Frame
The Fujifilm X half can easily hide beneath a standard 3 x 5 file card — it measures 4.2 x 2.5 x 1.2 inches — and it weighs less than 8.5 ounces with battery.
It has so many film-camera characteristics that you’ll be trying to figure out how to open the back to drop in a roll of Kodachrome.
Natively shoot images that closely match the physical and aesthetic appearance of those from a classic 35mm half-frame film camera, or dynamically stitch two halves into one normally-proportioned image. Frame stitching works in video mode, too.
After two simultaneous exposures have been captured you can reverse the order (image on the left becomes the image on the right) to form a combined “2-in-1” image that has a resolution of 7296 x 4864 pixels (about 35.5 megapixels).

The Fujifilm X half is replete with the classic, nostalgic, retro styling that Fujifilm is famous for, and it looks simply awesome.
Multiple Target Markets
The nostalgic, retro design and innovative engineering are excellent, as we expect from Fujifilm, but it’s the market targeting that makes the Fujifilm X half hellaciously remarkable. Kudos!

The new X model simultaneously appeals to multiple market segments: young snap-posters; content creators stepping up from a smartphone; those who savor a digital version of the once-popular 35mm half-frame film cameras; those who seek an extremely accurate virtual version of the analog camera experience; travelers and everyday photographers who want a super-compact camera but demand advanced features and full functionality. And to this list you can add the advanced creative types who want to combine two vertical images into one horizonal composition.

Personal Sidebar
I fall into the last category. Years ago I owned a Canon Dial 35mm half-frame camera. It was unique. It had a ring of CdS photocells that resembled the dial of a rotary telephone encircling the lens. Wind the knob on the bottom of the vertically-oriented body and a spring motor advanced the film automatically. I used it extensively until the spring broke for the third time. Anyway, I regularly composed so that two adjacent half frames could be printed as one full frame in a 35mm negative carrier. It took some patience but it was worth it. Of course, being a self-imagined cool kid I meticulously filed all four inside edges of the negative carrier to create a black, fuzzy border around every full-frame print. Sadly, the prints I made have gone with the wind. Of course, I can easily recreate this effect in Photoshop, but I miss the challenge and strict discipline of precise sequential composition. Now, with the Fujifilm X half, I can return to creating the compositions in the camera.
Fujifilm X half Key Features
10.8mm f/2.8 (32mm equivalent) Fujinon prime lens
17.74 megapixel 1-inch image sensor
13.3 x 8.8 mm sensor size
3648 x 4864 pixel resolution (single frame)
7296 x 4864 pixel resolution (2-in-1style)
TTL contrast AF with single, continuous & manual options
TTL 256-zone metering
PASM exposure modes
15 min to 1/2000 sec shutter speed range
-3.0 EV to +3.0 EV exposure compensation, 1/3EV steps
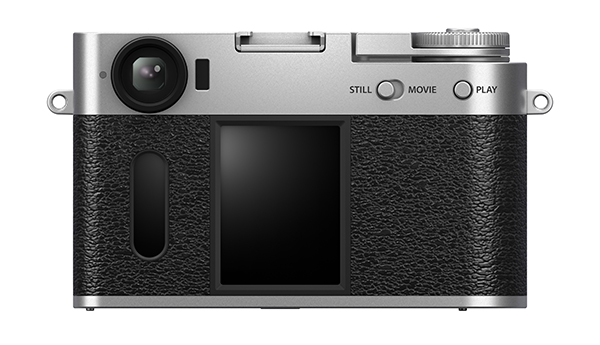
Vertical playback monitor & finder orientation
2.4 inch Touch Screen LCD, 0.92 million dots
Secondary LCD on back for Film Simulation control
Dedicated X half smartphone app
Direct print to select Fujifilm instax smartphone printers
Full HD video capability
Bluetooth, Wi-Fi & USB-C connectivity
SD/SDHC/SDXC memory cards
Long-life battery (up to 880 half-frame shots)
Measures 4.17 x 2.53 x 1.18 inches (105.8 x 64.3 x 30.0 mm)
Weighs < 8.5 ounces (240g) including battery and card

The Analog Experience
Without sacrificing the manifold advantages of being a digital device, the Fujifilm X half offers many features that reawaken the pleasure of experiencing an analog film camera.
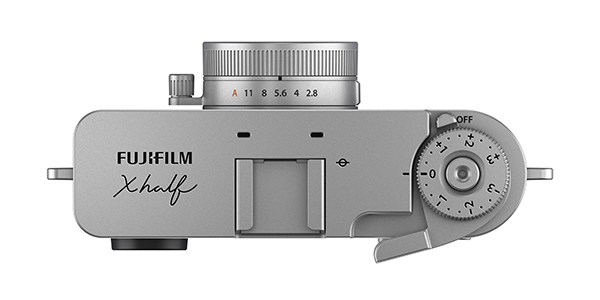
Aperture Ring
Rotate the ring that circumscribes the lens to change apertures
Film Camera Mode
(Could call it “Number of Exposures Simulation Mode”)
Set number of shots (imaginary film roll length) to 36, 54 or 72
Requires actuation of Film Advance Lever before taking next photo
View images only after finishing the “roll”
Physical Frame Advance Lever
Optionally require actuation of Advance Lever before taking next photo
Use with Film Camera Mode explained immediately above
13 Film Simulations
We all know what Film Simulations are
3 New Creative Filters (26 Total)
New film-camera-like filters: Light Leak, Halation and Expired Film
(They forgot the “Opps, I forgot to remove the lens cap” filter)
Optical Viewfinder
Not necessarily a plus, but definitely analog

Optional Grain Effect
Just for fun, experience the grain most film shooters tried to minimize
Optional Date Stamp Imprinting
Just like the “data back” camera models of yore

Pricing & Availability
The Fujifilm X half compact digital camera is anticipated in late June 2025 at the MSRP of $849.99 (USA price). For more information, please visit the dedicated Fujifilm X half website.
Sincere Warning!
If you want one of these, order it pronto. Given Fujifilm’s history of selling out of compact cameras, and the overabundance of cool features in the Fujifilm X half digital camera, place your preorder the minute you can.
Want to Become a Better Photographer?
Begin by taking more pictures. Carry a camera everywhere you go and shoot even when you’re 100% sure the picture won’t turn out. Review all of your images with a critical eye and share them with others – and that includes posting the best in our Gallery section. Subscribe to our free newsletter (see sign-up form on our homepage) and bookmark Shutterbug as a Favorite on your browser so you can check back often. We’re in this for the same reason as you — we love photography, and we’re learning more about it every day.
—Jon Sienkiewicz