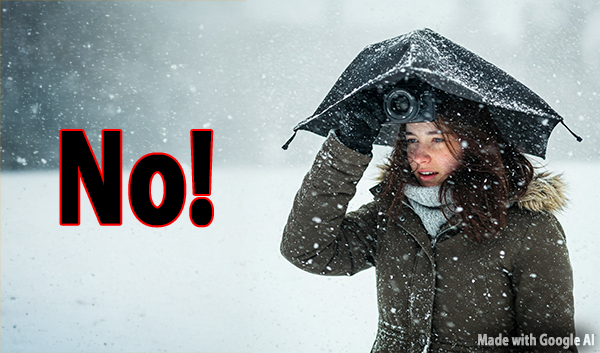
Give yourself 10 points for every one of these 13 common misdemeanors that your NEVER do.
For every transgression that falls into the “I do only it once in a while” category, give yourself 10 points anyway. What the hell; it’s spring, the time for fresh beginnings.
1. Never carry your keys, wallet or cellphone in your camera bag.
Having your bag full of camera gear stolen is devastating. But imagine if the keys to your house and car, wallet full of credit cards and ID — not to mention your smartphone — were inside that bag? Utter catastrophe.

Wary urban navigators keep their wallet deep in the front left pocket, keys in the front right pocket and cash at home.

2. Never fiddle with your camera without putting the strap over your neck.
Adjusting the settings or changing the lens on your camera is routine, but requires some level of concentration — and sometimes three hands. Eliminate the risk of dropping the whole shebang by keeping the neck strap where it belongs, around your neck.
3. Never fully believe what you read in a review written by an unverifiable source.
Think about the last 10 people you encountered at the grocery store. Those are the authors of the “reviews” you read online. Don’t disregard their comments totally, but do temper them with an enormous load of Morton’s iodized sodium chloride.

4. Never force together two components that resist connection.
If a lens doesn’t snap onto a camera body neatly, there’s probably a reason, and applying greater force will not resolve the situation. Ditto for filters, tripod heads, etc. If it doesn’t want to fit, don’t force it.
5. Never clean your lens with your shirt or facial tissue.
The perfumes and chemicals that make tissues more pleasant to use can damage the coating on a lens’s surface, or even scratch it. The other paper you find in the bathroom can be just as bad. Most of the time, a puff of air from a squeeze blower or the gentle swipe of a lens brush will do the trick. For stubborn fingerprints, use a clean, soft microfiber cloth. Unless there’s an emergency, never wipe a dry lens; instead, use a high-quality lens cleaning solution like Purosol or Zeiss.
For more lens cleaning advice, and to learn about the very best lens tissue (Kimtech Science Kimwipes) read: How I Clean a Camera Lens and What I Use.

6. Never leave your gear in the sunshine, especially not on the seat of a car.
The temperature inside a closed vehicle can reach 140° within minutes, according to NOAA, the National Weather Service. The passenger seat, if not shielded from the sun, might reach temps that fry electronics. To quote NOAA, “Look before you lock.”

7. Never hand a stranger a camera and ask them to take your picture.
With the exception of a server who’s working in the café where you’re dining, handing your camera to a complete stranger is inviting trouble. Buy a selfie stick if you must appease your Instagram followers.

8. Never point your camera or smartphone directly at the sun.
Personally, I think this advice falls into the same bucket as “never put your goldfish in blender,” or “never hand a black-chrome Leica M6 to a kid who’s eating buttered popcorn with his fingers.” But I mention it here anyway, just in case.
9. Never buy a camera only because someone else took a pretty picture with that brand.
It’s easy to be lured by one brand or another because it’s endorsed by a famous photographer. It could also trigger heartbreak. The situation reminds me of the priceless question some pundit asked years ago: “What brand of typewriter did Ernest Hemingway use?”
10. Never forget to carry a camera with you at all times (except, maybe, in the shower).
Yeah, okay, you always have your phone with you. Got it. And many smartphones produce amazing photos. Right on. That said, if you want to become a better photographer, carry a real camera with you at all times.

11. Weather-wise or Otherwise?
Weather-resistant construction is undeniably one of the most significant breakthroughs in the photo industry. Waterproof seals, placed at key junctions, protect an instrument’s innards from moisture as well as dust and environmental pollution.
The problem is not all “weather resistance” is created equal. And many consumers do not fully understand how vulnerable their camera or lens is.
Even if your gear is promoted as being weather resistant, never expose it to a harsh environment for an extended period of time, or anytime it can be avoided. It takes a surprisingly small amount of moisture to cripple a camera or lens. Worst part, sometimes it takes days for the damage to appear — because a drop or two of liquid contaminates a flexible circuit board inside and slowly causes destructive corrosion.
While you’re at it, do what I always do: pack a 30-gallon heavy-duty trash bag with your camera gear. When an unexpected cloudburst erupts, you’ll be ready to protect everything.
For an objective, science-based look at dust/moisture protection, check out: Is Your Weather Resistant, Splashproof, Waterproof Camera Impervious to Water & Dust? It’s a three-minute read where we delve into universally accepted IP Ratings.

12. Camera Straps
It’s understandable that camera manufacturers want to embroider their name on your camera strap. It’s advertising. It’s also a juicy signal to purse snatchers that you have an expensive prize on your shoulder.
Kudos to Fujifilm; they get it. Their famous logo is debossed into the wide strap in discreet black-on-black lettering (at least on the X-H1 I own). Why not ship cameras with Peak Design Anchor Links instead of a blazing billboard? If you want me to shill for your brand, give me a tee shirt or hoodie instead, size L please. More people will see it, and none of them will be interested in stealing me.

13. Oven Safe
I hope this story isn’t true. It’s not original with me, although I sure wish I were clever enough to think up stuff like this.
A twenty-something amateur photographer who lived in a New York City apartment for the first time always hid her Rolleiflex 2.8F in the oven when she left to run errands. What burglar would look in the kitchen stove for valuables, right?
Returning home from a quick trip to a bodega, and in a hurry, she set the oven to 400° to preheat before pulling a frozen pizza from the fridge.
You can guess the rest.
Krispy Kreme Klub — Members Only Content
Want to support more stories like this? Easy! Simply place twelve (12) Krispy Kreme donuts (any flavor) in an airtight bag and mail them First Class Priority to my — um — friend at this address: Ms Fifi La Fontaine, 3319 Ay Caramba Blvd, Apt. 23, Bedroom 13, Nevis, 619. Alternatively you can send a greasy paper bag full of $5 bills to my studio in Belize: Bunk 247, Compound C, Central Correctional Centre, Belize, 039-105. Cash only, non-sequential bills. Thanks.
Join the Shutterbug Community!
Sign up for an account—it’s easy and FREE. Subscribe to our FREE newsletter (find the sign-up form on our homepage) and bookmark Shutterbug as a Favorite on your browser.
Visit our Gallery section and spend five minutes or less uploading your best shots once a week. You might even become a Shutterbug Photo of the Day photographer!
In the Galleries, you’ll see the incredible work of thousands of photographers from around the world. We encourage you to add your own images to our ever-growing collection. It’s an excellent platform to connect with other photographers and share your knowledge and passion for photography.
(If you’re worried that submitting images to the Photo of the Day gallery might be complicated, it’s not. Check out these short 1-2-3 directions.)
—Jon Sienkiewicz
Images created using Google AI and edited using Adobe Firefly tools. Who cares? I know….
Find more articles written by Jon Sienkiewicz.
There are more that 550 to choose from.


