If you deal with more than a couple thousand images, you need a DAM, a Digital Asset Manager. Excire offers two solutions that fit the billing of “best ever.”
Excire calls their product a “photo management tool,” but since Excire Foto 2025 also handles video, I think the correct label is DAM: Digital Asset Manager. And unless your collection of imaging creations spans just a handful of folders, you DAM well need it.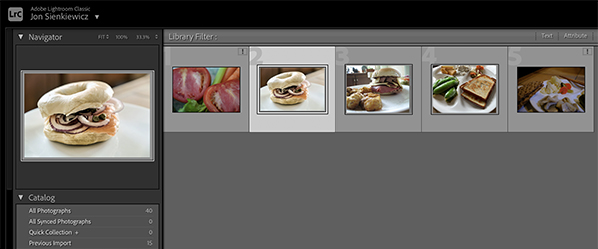
What Exactly is Excire?
Excire Foto 2025 is a standalone digital asset management utility that assists users in organizing, searching and accessing their images and videos. Excire Search is a Lightroom plugin with most of the same capabilities. Both leverage powerful AI technology to provide features such as text-prompt search, facial recognition, GPS search, and searching by the keywords you previously assigned. Excire also delivers potent culling functions based on parameters like sharpness, subject type and similarity.
Who Needs Excire?
Professional Photographers
Anyone who sells stock photos knows how hard it can sometimes be to locate the “just right” image for a client. Excire makes it a snap. And wedding pros, I’m not even heading down that road — you know the importance of image organization better than I do.
Family Photo Curators
If you have the sometimes stressful responsibility of being the archivist for your family’s photos, you’ll appreciate how easy it is to find the shot of Uncle Smirnoff exiting Ellis Island.
Once you begin scanning the household collection of old negs and slides, you’re faced with the challenge of remembering what went where. Again, Excire to the rescue.
Corporate Libraries
From what I’ve seen, most companies, large and small, have tons of images — executive portraits, product shots, corporate events, employees, etc. — and virtually no handle on how to find a specific asset when they need it. Note that Excire also offers special options for businesses so more than one employee has access.
Archives and Collections
Surely NASA and the Library of Congress have sophisticated digital asset location/retrieval systems, and a stable of engineers who maintain them. But smaller museums, historical societies, schools, clubs and business associations could doubtlessly benefit from the speed and power of Excire.

Prolific Amateurs
How many digital images do you have, including video clips? Hmm. How do you find anything? If you’re like me, it’s been “by guess and by gosh.” The efficacy has not been fantastic, let’s just say that. Excire has the potential to change my cataloging scheme in dynamic ways. I’m excited.
Getting Started — it’s Simple
It’s easy to get started using Excire Foto 2025 or the Excire Search plugin. The talented staff at Excire greets you with an email after you register and provides step-by-step instructions. It’s hard to make a mistake.
Excire (both flavors) installs on your Win PC or Mac the same way any other application installs. There’s a separate version for older Macs with Intel processors. You must enter your authorization code (one time only) and to do so requires an Excire account. It’s free and takes only a minute to set up.

Excire Search Plugin
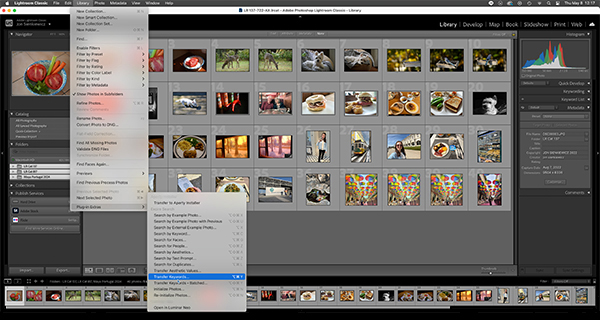
After installation, launch Lightroom Classic. Access Excire Search by clicking Library > Plugin Extras in the Lightroom menu bar.
Initialize the images you want to be able to search (a required step) to allow Excire Search’s AI-powered technology to analyze them. The process is strictly local; i.e., neither your images nor data are uploaded to the cloud. You can initialize the entire LR catalog or selected images in a batch. Note that Excire can access only the images that have been initialized.
After initializing the photos you can search using any of the following parameters: Keyword, Example Photo, Faces, People, Aesthetics, Text Prompt or Duplicates. Additionally you can transfer keywords that Excire Search assigns to the images in your Lightroom catalog.

Excire Foto 2025
Installation follows the same steps, but because it’s a standalone program, Excire Foto 2025 offers more features, and functions differently. Launch the app and you’re greeted by the Gallery View. After importing images into Excire, they are analyzed — same as with Excire Search Plugin — and again, neither your images nor data are uploaded to the cloud.
From the Gallery View page you can import images, view images, rate images, and search for images.

Excire provides seven tools for locating files:
– Find by text prompt.
– Find duplicates, identical and near-identical images.
– Find by GPS (based on GPS coordinates in image metadata).
– Find by specific keyword that you previously assigned.
– Find faces matching specified characteristics.
– Find people based on a sample image.
– Find photos similar to a sample image.
Since Excire Foto 2025 is a DAM, a Digital Asset Manager, and does not have direct editing tools. Instead it makes it easy to export to an external editor that you own, including Lightroom, Luminar, Capture One, ON1 Photo RAW and Adobe Photoshop. It also offers tools that simplify exporting images for printing or sharing.
Cost & Availability
Excire Search and Excire Foto 2025 are sold on a one-time payment (non-subscription) basis and include a license valid for both Mac and Windows PCs. The price of Excire Search is $129 and the cost of Excire Foto 2025 is $199. You can save by buying the Excire Bundle that includes both for $299. Order and download directly from Excire.
Join the Shutterbug Community!
Sign up for an account—it’s easy and FREE. Subscribe to our FREE newsletter (find the sign-up form on our homepage) and bookmark Shutterbug as a Favorite on your browser.
Visit our Gallery section and spend five minutes or less uploading your best shots once a week. You might even become a Shutterbug Photo of the Day photographer!
In the Galleries, you’ll see the incredible work of thousands of photographers from around the world. We encourage you to add your own images to our ever-growing collection. It’s an excellent platform to connect with other photographers and share your knowledge and passion for photography.
(If you’re worried that submitting images to the Photo of the Day gallery might be complicated, it’s not. Check out these short 1-2-3 directions.)
—Jon Sienkiewicz
Find more articles written by Jon Sienkiewicz.