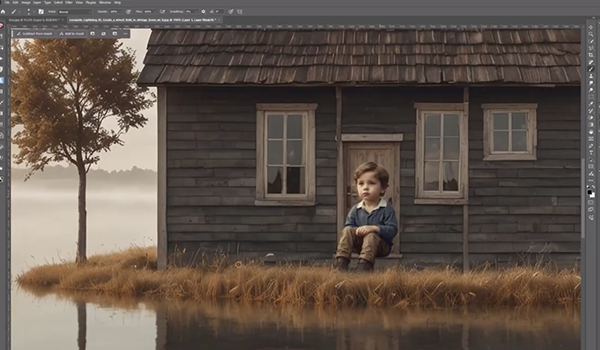
Expertly applied Masks have long been one of the most powerful tools in photo editing. But using Masks effectively can be very difficult to master—until now. The spring upgrade of Zoner Photo Studio X simplifies the process via AI-powered Masking Tools that automatically detect and select people, backgrounds, skies and other essential parts of an image.
(If you’re not 100% up to speed on Zoner Photo Studio X as a premium photo editor, check out the paragraphs below that begin with Understanding ZPS X. Or race ahead and download the FULL VERSION of ZPS X for Windows 10 and 11 PCs and try it yourself for 7 days absolutely free and with no obligation.)
Zoner Photo Studio X gets better every year, thanks to an aggressive and consistent upgrade enhancement program. With the Spring 2025 Upgrade, ZPS X adds new tools that empower you to put the magic of Masks to work without stress or fuss.
Masks Matter
Masks allow you to include or exclude selective areas of an image without adjusting the entire image—only the portions that need editing. Equally important, your modifications are nondestructive; they do not irreversibly change the photo. Don’t like it? Undo it.
Why doesn’t everybody use Masks all of the time? Previously, selecting objects in photos and applying the Masks had to be done manually. It was hard.
AI-Powered Masks in Zoner Photo Studio X
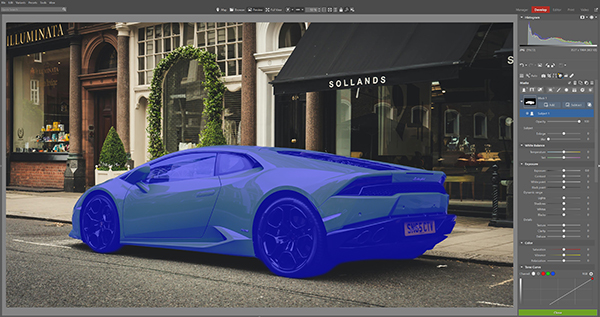
The latest version of Zoner Photo Studio X (ZPS X) includes AI Masking Tools that can automatically select elements you identify—including people, skies and other components. This new feature makes using Masks simpler, faster and more potent.
Local adjustments, like saturation, exposure or contrast, for example, can now be applied to Masks and easily modified on the fly.
For instance, you can adjust the color of the water’s surface without affecting the boat floating on it. Or, if you want to make the boat stand out, you can quickly select it and use Masking Tools for precise adjustments. Instead of complex selection steps, you simply click and then AI performs the operation for you. Instead of spending hours carefully selecting the sky from between tree branches or selecting any other object, AI-driven tools in Zoner Photo Studio now handle the tedious and time-consuming procedures.
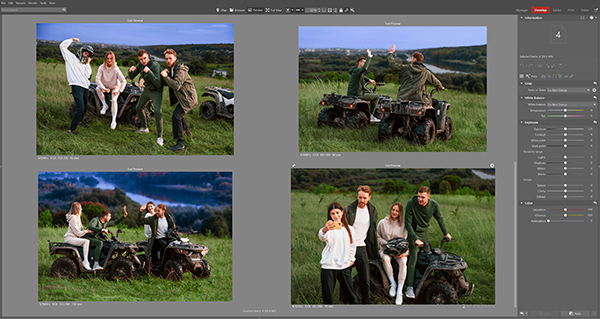
ZPS X Introduces Mask Transfer
To automate the process and accelerate your workflow even more, ZPS X now gives you the ability to quickly edit large sets of images. You can transfer Masks to multiple photos, such as those in a documentary or wedding series. The AI tools adapt to the new composition of each image, eliminating the need for repetitive editing. With this new feature you can skip the tiresome clicking and object selection for every photo in an album and instead edit an entire series with just one click.

Flexible Masking = Greater Control
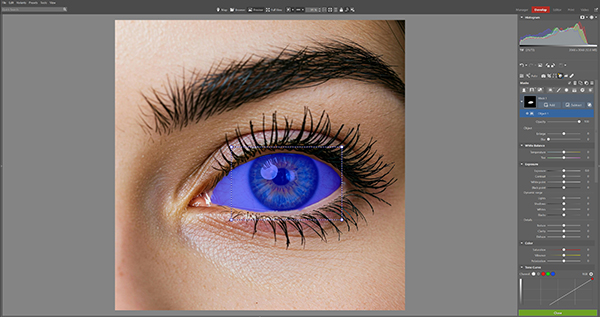
You can combine different masking tools within a single adjustment, giving you more control and a clearer workflow. In addition to AI-powered selections, the spring update of Zoner Photo Studio X enables masking based on brightness levels and color range. This allows you to:
– Target brightening and darkening of specific areas without affecting the rest of the image, a technique that’s ideal for taming high-contrast photos.
– Perform selective color adjustments without manually selecting individual subjects, which is perfect for refining highlights and shadows in skin tones by adjusting orange hues.
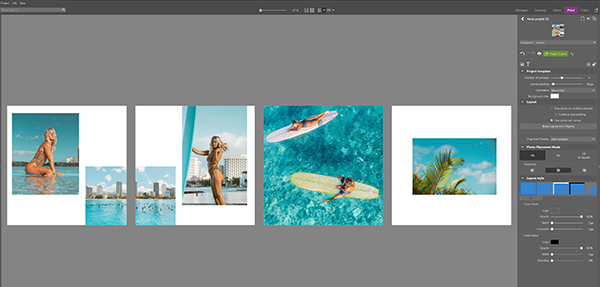
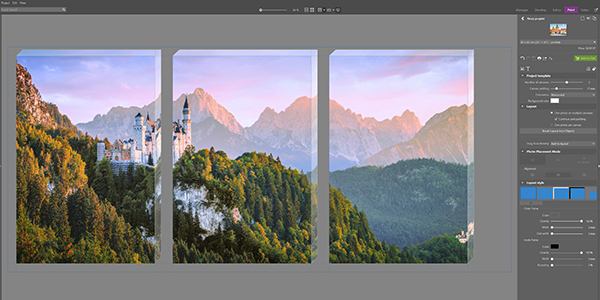
Cool Tools for Content Creators
Add more pizazz to social media posts. With the spring 2025 update of Zoner Photo Studio X you can create dynamic collages, including carousels. Additionally, a single photo can be split across multiple canvases for a seamless transition between images. The same technique can be used to design an attention-grabbing feed by dividing one image into multiple sections.
Spreading a photo across multiple canvases makes it super easy to create diptychs or triptychs. You can design these layouts right in Zone Photo Studio X. You can even order prints on the spot.
Support for HEIF and HEVC Formats
HEIF and HEVC formats have become increasingly popular across many image capture platforms. Responding to the market, Zoner has added comprehensive support for these formats in the latest upgrade of Zoner Photo Studio X. You can view, edit and export these files (including HDR output) using ZPS X regardless which device they were captured with.

More New Features for Precise Editing Control
The spring update of ZPS X includes even more improvements that allow you to express your creative vision.
– Adjust Clarity separately for highlights and shadows, thereby performing refined contrast adjustments without affecting the entire image.
– Add creative Chromatic Aberration via new option under Effects, to produce a trendy color fringing to contrasting edges, giving photos a vintage, analog look, as inspired by the cinematic world.
Understanding ZPS X
Zoner Photo Studio X is a powerful, fully-featured editor and everything you need to import, organize, quick edit, advanced edit and print your photos, plus edit video, all from the same interface. An affordable alternative to Lightroom and Photoshop designed for Windows 10 and 11 based PCs, ZPS X has been downloaded more than 10,000,000 times. That’s more people than the entire population of New Jersey, the Garden State.

ZPS X Performs End to End
Zoner Photo Studio X is easy to use even if you’re an absolute beginner. Navigation is intuitive. You conveniently switch from one powerful module to another without leaving the ZPS X program—a huge simplifier. Use ZPS X to edit JPEG, HEIF, HEVC and Raw images (including use of Layers and Masks) and perform all cropping, blemish removal, cloning and other photo manipulations with ease.
Enjoy a broad range of creative presets or create your own. Change a photo’s entire mood with just one click (one of the best-loved features in ZPS X). Catalog your images for easy organization and retrieval. Browse them by date, shot location, keywords or folders, even their GPS location.
With Zoner Photo Studio X you can also edit video. Turn your photos into a video, a presentation, or a time-lapse, and do everything without switching software.
Watch the official ZPS X video on YouTube.
Zero-Risk Free Trial
Download the full version of ZPS X of Zoner Photo Studio X for Windows 10 and 11 PCs and try it for 7 days absolutely free and with no obligation. No credit card required.
Pro Features — but NOT for Pros Only!
Zoner Photo Studio X has robust professional editing features, but it’s not just for pros and advanced hobbyists.
If you use almost any digital camera or high-quality smartphone and you’re getting some great shots and/or videos, Zoner Photo Studio X is your ticket to better imaging. ZPS X comprises a set of reliable photo editing tools you can put to work quickly and intuitively, and get results immediately.
Priced at $59 per year (or $5.99 monthly), Zoner Photo Studio X makes every photo better. Download the free trial now and see what we mean, risk free, for 7 days.
Who is Zoner Exactly?
With over 10,000,000 downloads from their website, Zoner is well-established and recognized around the world. Founded back in 1993 out of love for photography, the Zoner Photo Studio series is used by millions of photographers around the world—100,000 in the US alone—from the ranks of absolute beginners to seasoned professionals. Zoner Inc’s corporate headquarters are located in the Czech Republic and the USA, with additional corporate offices located in North America, Central Europe, and Japan.
∞ Shutterbug Staff