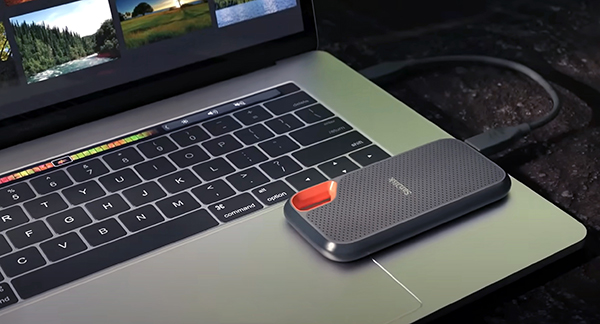
Fast, super high-capacity SSD (Solid State Drive) storage devices have become essential tools for content creators, videographers and studio photographers. Storage drives that are immensely portable and durable, like the 8TB* Sandisk Extreme® Portable SSD, provide the ideal platform to store, back up and help preserve precious data while on location in the field, in the studio and at the workstation.
Photographers and video creators worldwide trust Sandisk memory products to safely store their irreplaceable image files. For more than 25 years, Sandisk engineers have continued to drive industry-leading innovation and set new standards for capacity, performance, endurance and reliability.

The 8TB* Sandisk Extreme Portable SSD is a dependable high-speed portable storage drive that fits in your pocket and helps protect your data even under the most trying conditions. With a USB 3.2 Gen 2 interface that connects through USB Type-C™ (with a USB Type-A adapter included as well), it offers expanded compatibility, connecting to smartphones, laptops and tablets. Best of all, it’s from Sandisk, a brand photographers everywhere have relied on for decades.
The Speed You Need
The 8TB* Sandisk Extreme Portable SSD is solid state and uses NVMe™ (Non-Volatile Memory Express) protocol that features blistering fast speeds of up to 1050MB/s Read and 1000MB/s Write.** If you’re tired of lagging upload and download speeds, this is for you.
Small Pockets? No Problem!
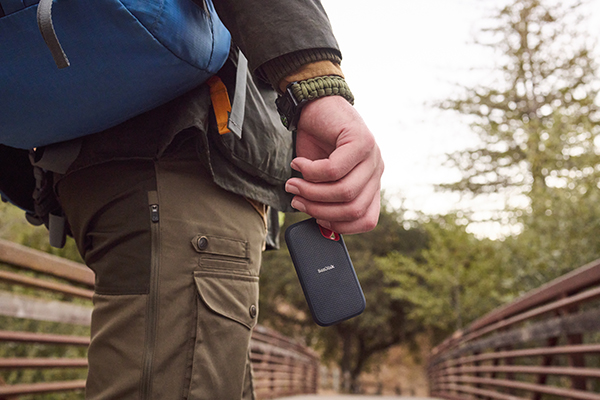
Measuring a scant 3.97 x 2.07 x 0.38 inches (100.8 x 52.55 x 9.6 mm), and weighing only 1.76 ounces (52 grams), the 8TB* Sandisk Extreme Portable SSD is smaller and lighter than a standard deck of playing cards.
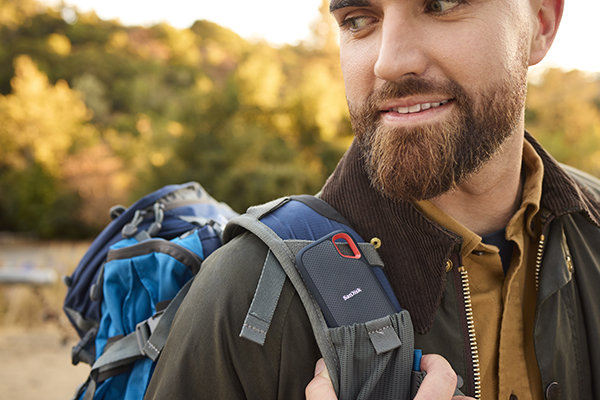
Additionally, for easy everyday carry, it features a sturdy carabiner loop so you can attach the drive to a belt or backpack — or attach your own safety lanyard.

Designed with the Safety of your Images in Mind
Sandisk’s reliability and data security legacy pays off big, in many ways. Unlike traditional spinning hard drives that are more susceptible to impact disruption, the 8TB* Sandisk Extreme Portable SSD features solid-state construction with no moving parts. It can withstand a drop of up to three meters (about 118 inches)1 and is further protected by a durable silicon shell that offers a slip-resistant surface and added protection to the drive’s exterior.
Furthermore, this compact high-capacity drive is thoroughly tested to be reliable. Sandisk performs hundreds of hours of rigorous testing to help make sure your drive is worthy of your best work — so you know your priceless files are in good hands.

Defy the Elements
Boasting an IP65 Water/Dust Ingress Protection rating2, the 8TB* Extreme Portable SSD is highly resistant to dust and can withstand water projected in powerful jets against the enclosure from any direction, as per IEC Standard 60529.
Data Security is Indispensable
You can password protect your files to help ensure privacy and security. Even more important, 256-bit Advanced Encryption Standard (AES) encryption, a method that protects data using technology that’s built into the device hardware, helps protect your data from malefactors.3 Virtually uncrackable even by supercomputers, 256-bit AES encryption is widely considered one of the most secure encryption methods available and is trusted by major publicly traded companies, governmental agencies and banks.
5-Year Limited Warranty4
The 8TB* Sandisk Extreme Portable SSD is covered by a 5-year USA limited warranty.4 Be sure to visit sandisk.com for full warranty details.

Grab & Go Emergency Readiness
Disasters are unpredictable, and many fail to prepare properly – or at all. But no one’s world is always safe, all of the time. Sandisk recommends the 3-2-1 backup strategy: three copies of your data; two different media types; one off-site copy. Back up critical images, video files, important documents (and other data you simply cannot afford to lose) on a Sandisk Extreme Portable SSD and keep it in a place that’s easily accessible in an emergency – so you can “grab and go” should the necessity arise. Stay panic-free during power failures, virus attacks and even natural disasters, because you have an extra copy of what matters most, stored on a drive designed for reliability.

Compatibility
Sandisk Extreme Portable SSD 8TB* is compatible with USB Type-C devices, including a range of smartphones, laptops and tablets.
Software Requirements
• iOS 13 or later
• Android™ 11 or later
• macOS 11 or higher
• Windows® 10 or later

Order Today, Directly from Sandisk
Order your 8TB* Sandisk Extreme Portable SSD from the Sandisk Online Store, priced at MSRP $599.99.
Special Sandisk Week Deal: February 24 – March 2, priced reduced to MSRP $489.99.***
Sandisk Extreme Portable SSD 8TB*, Black: SDSSDE61-8T00-G25
Ordering from Sandisk assures guaranteed authentic products, free standard shipping on eligible orders of $50 or more, and free 30-day returns (see website for limitations).
One Final Thought
The Sandisk Extreme Portable SSD 8TB* is crafted with content creators in mind. Whether you’re a photographer, filmmaker, content creator, or simply a computer user who wants superb reliability, high speed performance and layers of data protection, all in a tiny 2 x 4 inch package that can go anywhere with you, this is the drive that deserves to be in your pocket.
∞ Shutterbug Staff
* 1TB=1,000,000,000,000 bytes. Actual user storage less.
** Up to 1050MB/s read speed; up to 1000MB/s write speed. Based on internal testing; performance may be lower depending on host device, interface, usage conditions and other factors. 1MB=1,000,000 bytes.
- Based on internal testing.
- IPEC 60529 IP 65: Tested to withstand water flow (30 kPa) at 3 min.; limited dust contact does not interfere with operation. Must be clean and dry before use.
- Password protection uses 256-bit AES encryption and is supported by Windows 8, Windows 10 and macOS v10.9+.
- See www.sandisk.com/wug.
*** Offer valid on qualifying products bought online through the Sandisk Store. Sales quantities are limited to a maximum of 10 units per customer. Offer is only valid while supplies last. This offer may not be combined, used in conjunction with or used in addition to any other promotion or offer. Retailers, Resellers and Distributors are excluded from this promotion. The offer is not applicable for any prior purchases and may not be available in all regions of the world. Delivery must be made within the contiguous United States, excluding addresses in Hawaii, Alaska, Puerto Rico and other U.S. territories. Sandisk reserves the right to change or discontinue this offer at any time without notice. This promotion is valid between February 24, 2025 and March 2, 2025.


