In North America, the most commonly-known birds are probably the Rock Dove, Mallard, and Ring-billed Gull. The Ring-billed Gull is also one of the most photographed birds in the world, being #21 in eBird’s library with over 120,000 photos! But did you know that the Ring-billed Gull was once fairly rare?
Even if you don’t dread sitting behind a computer for hours, editing images from a shoot, there’s no reason not to streamline your workflow with fast-and-easy techniques that deliver superb results. That’s topic of this tutorial, specifically with regard to processing portrait images.
Instructor Lizzie Peirce is a photographer and video producer based in Ontario, Canada with a portfolio of beautiful portraits. She admits, “I’m not a Photoshop pro which is why I’m so excited about today’s video,” that explains the straightforward retouching tools she relies upon to achieve great edits in a hurry.
Peirce explains her process like this: “I typically spend most of my time editing in Lightroom, and then I head over to Photoshop to do any retouching with Frequency Separation and a few other tweaks with the tools and technique I understand.” Peirce also employs several plugins that she describes near the end of this 11-minute lesson.
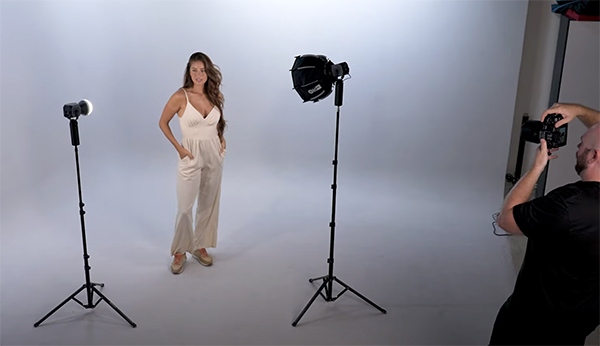
The first step in editing a portrait of her friend Lauren is to be decisive in culling images from the session and narrowing down her “selects.” As she says, “selecting your all-time favorites from a shoot will incredibly speed up the process because they’ll be far fewer images to edit.” So be as “brutal” as possible in eliminating images that are duplicates or don’t quite make the grade.
Once her best shots are imported into Lightroom, Peirce explain why and how using presets further accelerates the process. Here there are two basic options: purchase a set of presets or make a few of your own. And she offers several of her presets that you can find in the description beneath the video. You’ll see the effects that a few of these provide.
Another timesaving tip is to take advantage of Lightroom’s Auto adjustments that often do a great job. At the very least, they’ll provide a great starting point that can be quickly refined with a few manual adjustments.
Peirce says that once an edit is completed to your satisfaction, “you don’t want to start from scratch on the others,” which is why she recommends syncing those edits onto other similar images from the same session. Depending upon the photos in question, you can synchronize all the adjustments made to the first shot or specify which ones should be copied over.
The lesson concludes with her Frequency Separation technique and the aforementioned plugins that she uses. There’s much more to be learned by paying a visit to her instructional YouTube channel, so don’t forget to do that.
Money is pretty tight these days and that can be a big problem for photographers afflicted with Gear Acquisition Syndrome (G.A.S.)—especially those in need of a new (old) digital camera. But take heart, because this video from the oddly named FoxTailWhipz YouTube channel reveals five discontinued models that perform far above their pay grade.
These are the top picks from photographer David Harig who provides a mini review of his favorites. They’re all discontinued interchangeable-lens cameras, either mirrorless or DSLRs, and are available at various price points ranging from $150-$200 on eBay or from respected dealers. Harig includes links in the description beneath the video.
Harig’s bottom line is this: “These cameras can all take great-looking photos, and most record good video, for beginners or anyone on a budget. He goes into quite a bit of detail on all five, discussing both their strong points and any limitations. If you already own lenses from one of these manufacturers, that brand may be the best place to start.
Harig kicks off the video with the Sony A5000 that can be purchased used for around $190. This is a mirrorless camera that was released in 2014, and for a 10-year-old model using the Sony E-mount it still has a lot to offer. It features an APS-C size CMOS sensor with 20MP resolution. While the A5000 is somewhat limited for video recording, it performs admirably when shooting stills. There’s a wide variety of compatible lens from Sony and third-party makers.
Next up is the Nikon D7000 which is at the top of the $200 range, and it’s the oldest model in the list—introduced back in 2010. But don’t let its age dissuade you because Harig says it “packs a crazy amount of pro-level features” that he describes in detail. It’s a robust DSLR using the reliable Nikon F-mount, has an APS-C crop sensor that captures really nice 16MP images, and (unlike mirrorless cameras) it features a bright optical viewfinder.
Harig’s third pick is the Pentax K-r, available used for about $150 that outperformed more expensive cameras when it became available in 2010. It’s also a crop-sensor DSLR, but it’s very compact for its class, shooting 12MP Raw files—the lowest resolution on this list. Yet Harig insists that you can capture great images for many purposes with a good 12MP sensor. On the downside he explains why you should probably skip this one if video is your thing.
Be sure to watch the video until the end, because there are two more cameras to consider—both with laudable capabilities. One is the Canon T4i DSLR, and the other is the small-and-powerful Olympus E-PL5 mirrorless model that will accept a bunch of vintage glass by using an inexpensive adapter.
Harig’s YouTube channel is a great source of videos on cameras and photo gear for photographers who don’t want to break the bank. So be sure to take a look, especially when you’re shopping for a deal.
Have you ever noticed unsightly color fringes along the edges of objects in your photo’s? If so, join the club. Also known as Chromatic Aberration, these artifacts are a sure way to spoil an otherwise nice shot.
Fortunately, there’s an effective one-minute fix as you’ll see in the Lightroom tutorial below. Instructor Roy van der Wens is a self-taught Belgian pro who applied his fashion photography skills to become one of the most acclaimed wedding photographers in the Netherlands. This lesson is a must-see because it provides a quick solution to a common problem that you’re likely to encounter more than once or twice.
Roy describes the problem like this: “Chromatic Aberration occurs when various colors of light focus at different points, yielding color fringes around edges in your photos.” This often occurs when shooting in high contrast situations with very bright backgrounds. That’s why these ugly artifacts often appear around buildings and trees against extremely bright skies.
According to Roy, this problem is particularly acute “when you use a low f/stop with zoom lenses.” Now that you understand the enemy it’s time to open a problematic image in Lightroom and learn Roy’s “perfect solution.” Roy shot the demonstration photo in Italy—a nice landscape scene with a tall tower atop a building in the foreground.
You’ll notice horrible fringing around the tower as soon as Roy zooms in on the shot. So what to do? The first step is locating the Lens Correction tools within Lightroom’s editing panel. Roy then clicks on the Manual tab to expand another panel that contains what Roy refers to as the “magic” weapons for battling Chromatic Aberration.
Roy demonstrates the correct way to move one or more simple sliders until the fringing magically disappears and you’re left with a clean shot that looks absolutely great. Just take a look at Roy’s before/after examples and you’ll be totally convinced as to the power of this super-easy technique.