Our review of the Nikon Z 135mm f/1.8 S Plena is fully updated! This review was a collaboration between Libor Vaicenbacher, Spencer Cox, and Nasim Mansurov. Today’s update not only includes lab tests, but also a head-to-head shootout between four of Nikon’s top Z-series portrait lenses.
Nikon just announced a major firmware update for the Nikon Z8, bringing it some highly-anticipated features from the Z9 and Zf cameras. The headlining features are a dedicated bird-detection autofocus option, the addition of Auto Capture (borrowed from the Z9) and a Pixel Shift shooting mode that allows capture up to 180 megapixels (borrowed from the Zf). There are also a variety of smaller things added in Version 2.0, including more custom options when assigning buttons, a new “Rich Tone Portrait” Picture Control, and additional shutter sounds.
Ask several accomplished portrait photographers to name the key component of an image, and you’ll likely receive the same response: “It’s the eyes.” Making the most of these beacons of personality often requires a bit of straightforward post processing, and that’s what you’ll learn how to do today.
The following tutorial comes to us from the Lou Imag’in YouTube channel and demonstrates a simple Photoshop technique for getting the job done to perfection—even if you’re inexperienced at portraiture or editing images in Photoshop. Maybe you’re photographing a models indoors, making environmental portraits with available light, or shooting causal images of family or friends. Whatever the task, this easy approach will boost the quality of your results.
The instructor named Lou is a professional photo retoucher and experienced travel photographer who also shoots the occasional people picture. In barely three minutes she walks you through a simple Photoshop technique for deepening the gaze and making a model’s eyes POP—all in a very natural looking way.
In fact, Lou’s method is so simple that only one adjustment layer is required to accomplish this essential task. The process begins by zooming in on the image and navigating to Photoshop’s Curves panel. Then you find the brightest area of the eyes (other than a reflection) and drag that spot on the Curve upwards.
Next Lou locates the darkest portion of the eyes and does the opposite; namely dragging that point down. Now it’s time for a Mask, and you’ll why and how to make it invisible. Lou then chooses a Brush with 20% Opacity and paints inside the eye—taking care to avoid any lashes or skin surrounding the eye.
This enables you to boost contrast, color, sharpness, and other parameters of the eye—all without affecting other portions of the shot. Lou advocates taking a very subtle approach, to maintain a realistic look, so you may have to zoom in on the before/after images to appreciate the effectiveness of the final result.
Remember, with portraiture “the eyes have it,” and despite the subtlety of this approach it can make a big difference in the impact of your portrait photos. After watching this lesson head over to Lou’s instructional YouTube channel where there’s much more to learn.
There are a variety of reasons that unnatural color casts may appear in in your outdoor photographs, and when they do they can really spoil a shot. Fortunately, whether you’re dealing with unwanted blue, green or magenta tones, there’s a straightforward way to eliminate them in in Lightroom.
Instructor Neil Borg is an accomplished pro specializing in travel and landscape photography, so he’s experienced this problem more than one or twice. He introduces today’s episode like this: “I’ll guide your through the fastest and easiest way to banish color casts from your precious shots. I’ve got you covered.”
Borg notes that color casts are quite common—especially when experimenting with new techniques, using ND filters, or shooting long-exposure imagery. And if you choose the wrong White Balance Setting in your camera, color shifts can easily occur.
The demonstration photo was captured from the shore of a lake in New Zealand. As you can see, the image is sharp and nicely composed, and there’s no problem with the exposure. Unfortunately, as Borg notes, “there are magenta hues that are sort of taking over the whole scene.”
Borg begins the rehabilitation process in Lightroom’ Calibration panel. As he explains, “this panel allows us to, first and foremost, shift the tint from either towards the green or towards the magenta. It also allows us to calibrate the primary colors of red, green and blue.” He then demonstrates how to make these preliminary adjustments.
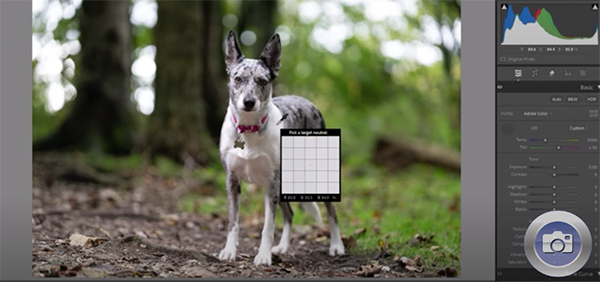
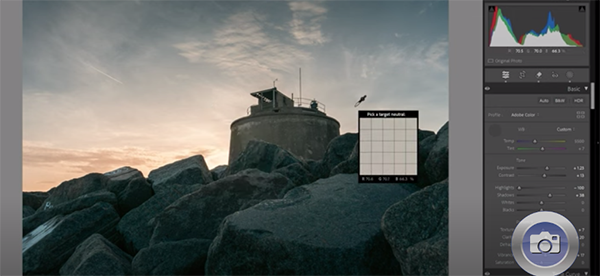
Now that the image appears much more realistic, the next step is correcting White Balance. He selects a pure white area in a cloud and uses this as his point of reference. Then by clicking on this spot, the Color Balance immediately shifts toward the blue. Borg also has a quick method for refining the affect.
Now we’re getting really close, and Borg makes a few basic adjustments “just like I would when editing any other photo.” He straightens the shot, makes a Profile correction, adds a subtle vignette, and makes enhancements to exposure and other common variables.
The transformation concludes by employing masks to make a few selective adjustments to specific portions of the scene. Now he has a final result for which he can be justifiably proud. Borg’s popular YouTube channel has other simple lesson like this one, appropriate for photographers of all skill levels. So be sure to pay a visit and explore what’s available.