Real estate photographers face challenges unique to their industry, but the potential for high volume and revenue growth is outstanding. What are the obstacles and, more importantly, how can modern AI technology—plus hard work and talent—overcome these barriers and lead to greater success and much less stress?

If you’ve already heard a lot of good things about Imagen AI photo editing from your peers and want to dive right in, sign up for their real estate photography today and get 1,000 free edits. Imagen is the leading AI-powered post-production solution designed to give photographers full control over their edits, ensure consistent results in the photographer’s editing style, and save significant time and money. Here’s why you need it.

The Challenges of Real Estate Photography &
Why it Requires a Different Approach
Your clients—Professional Realtors—have exceedingly strict requirements. Unless their demands are met, you risk losing their business. Fast turnaround, measured in mere days and sometimes even hours, is imperative. At the same time, accuracy and consistency are essential.

Every project requires multiple images, indoor shots in mixed lighting, and outdoor shots with maximum curb-appeal. Consequently, every session requires a high volume of editing—and precision. And as the volume increases, the stakes climb even higher. As a professional photographer, your work product is your brand. Every frame you present makes a statement about your skills and commitment to quality.
Because of the time and cost involved, particularly during the post-processing phase, some real estate photographers turn to outsourcing. This option is often fraught with perils of its own, including output consistency and sustained reliability. Not to mention that outsource expenses can really add up fast.

Meet a Pro Who Knows: Dionel Lake
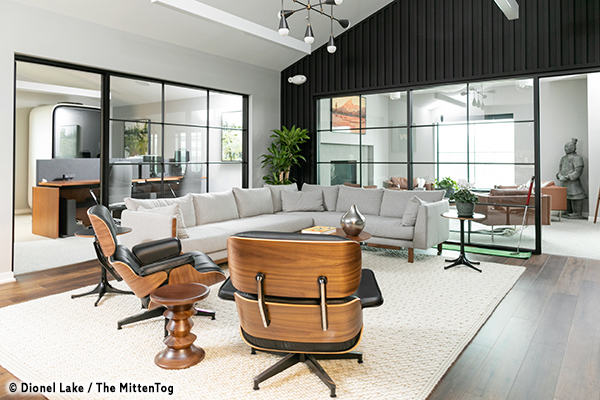
Dionel Lake is the owner and leading photographer of Michigan-based The MittenTog. She’s mastered the art of capturing spaces with a keen eye for detail and a love for the unexpected. Her work is vibrant, colorful and full of life, much like the people and places she photographs.
For her real estate photo editing, Dionel relies on Imagen.
“Imagen has been a real game-changer,” she told us. “Imagen’s AI editing tools are great for batch photo processing and maintaining consistency across large sets of images.”
We’ll hear more from Dionel later.

Introducing Imagen
Imagen’s property photo editing platform delivers the speed of AI with the control and consistency every professional real estate photographer needs. It’s like having an expert-level assistant that performs post-processing exactly the same way you do. Imagen learns your style and creates your personal AI Profile. It learns at every step and works with you without impeding your creative flair. Unlike outsourcing, you get consistent results and have complete control.
Watch the official Imagen video here.

Increased Client Satisfaction
“High-quality photos are crucial in real estate listings, often serving as the first impression potential buyers get of a property,” Dionel continued. “I photographed a property that had been on the market for months with little interest. After updating the listing with my photos, the property received multiple offers within two weeks and sold above the asking price. This is a testament to the power of professional photography in real estate.”
Imagen Streamlines Workflow
Save time without jeopardizing quality by using the AI assistant that works exactly the way you do. Says Dionel, “Imagen has completely revived my ability to keep up with a heavy workload of 5-6 sessions per week while still having time for my family.”

Just Getting Started? Or Looking to Expand?
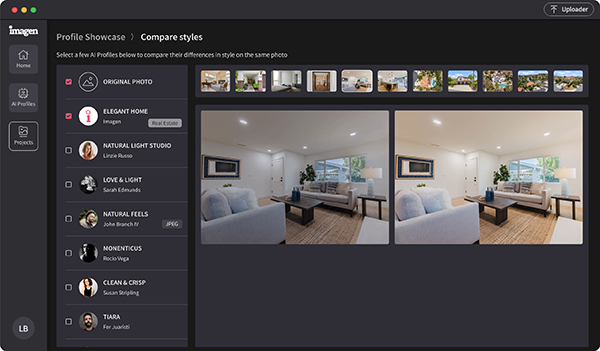
When you’re just starting out, expanding your portfolio, or just in a dry spell, you can draw from Imagen’s premade profiles that have been learned from successful professionals. Premade profiles like “Elegant Home” offer a solid foundation, customizable to fit your vision over time. In this sense, Imagen is “move-in ready” in real estate lingo.

Imagen Has Special Tools Optimized for Real Estate Photographers
Unlike some machine-based solutions that lump all pro photographers into one basket, Imagen understands the specialized needs of real estate photography professionals and provides powerful features specifically designed for greater success with less stress.
HDR Merge: Automatically identifies differently exposed photos in the same bracket sequence and merges them into a single perfect shot.
Perspective Correction: Fixes distorted photos by adjusting camera angles and correcting perspective for a polished look.
More Tools Coming Soon
Window Pulls: Maintains authentic interior lighting while preserving exterior views for an elegant finish.
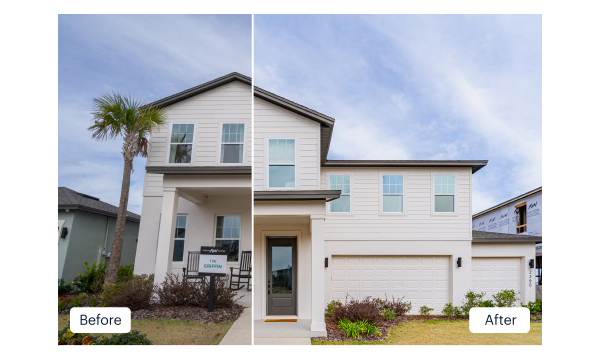
Sky Replacement: Instantly enhances exteriors with vibrant, natural skies to boost visual appeal.

Success in Action – A Real Estate Photographer’s Experience
Above and beyond the cost savings, workflow improvements and increased consistency, Imagen empowers photographers to display their very best creative efforts.
“Imagen enables photographers to explore thoughtful property photo framing and lighting techniques, allowing the character of each space to shine through beautifully crafted, editorial-style images,” Dionel says. “This creates an experience that’s both visually engaging and true to life, inviting buyers to imagine themselves in each unique space. Moreover, providing excellent customer service and delivering consistent, high-quality results lead to word-of-mouth referrals.”

Why Imagen is the Smart Choice for Real Estate Photographers
By slashing editing time by up to 96% and streamlining the workflow under a single platform, Imagen empowers photographers to focus on their art and their business, instead of tedious workflows.
Imagen’s machine-learning technology lets photographers feed the AI with their past final edits to create Personal AI Profiles that are then applied to future projects. By recognizing the specific parameters of every photo individually, Imagen is able to edit entire projects in the unique style of the photographer and deliver them within minutes.
Join the ranks of thousands and find out for yourself. Sign up for Imagen today and get 1,000 free edits.
∞ Shutterbug Staff


