This isn’t an ad. Nope, it’s a how-to that gives you the ins and outs of using lens mount adapters to inexpensively engage some of the best glass ever made—easily and cheaply.
We’re amazed that not everyone knows this. Nikon Z owners can adapt legacy Nikon F-mount optics—made by Nikon, and state-of-the-art when they were originally introduced—that work in Manual Focus Mode and Aperture Priority or Manual Exposure Mode—and they’re a genuine steal compared to the price of modern optics. It’s very easy and very affordable. A huge plus: while many don’t realize it, the image quality is exceptional, even when compared to current lenses.
Conventional Wisdom
Most Nikon Z fans know that a huge variety of current and recently discontinued Nikon APS-C (DX) and full-frame (FX) lenses work with some level of automation on Nikon Z-series mirrorless cameras with a Nikon FTZII or Nikon FTZ adapter as the link in the middle. You can download Nikon’s FTZ Lens Compatibility Manual here. The quick reference chart is below.

The Nikon FTZII Adapter costs a bit less than $250, but you may be able to score a secondhand copy of its predecessor, The FTZ adapter, for under two bills. The FTZ works exactly the same as its successor, the FTZII; the only change is removal of the tripod mount to accommodate Nikon Z9 cameras. Both have the electronic contacts necessary for communication between lens and camera.

Lesser Known Option
That said, you can buy a strictly-manual adapter (Manual Focus, Manual or Aperture Priority exposure mode) for around 15 bucks. One example is this one from Rainbow Imaging. (BTW, over the years I’ve purchased a ton of stuff from Rainbow and have never been disappointed.) These “dumb” adapters do not have electrical contacts.

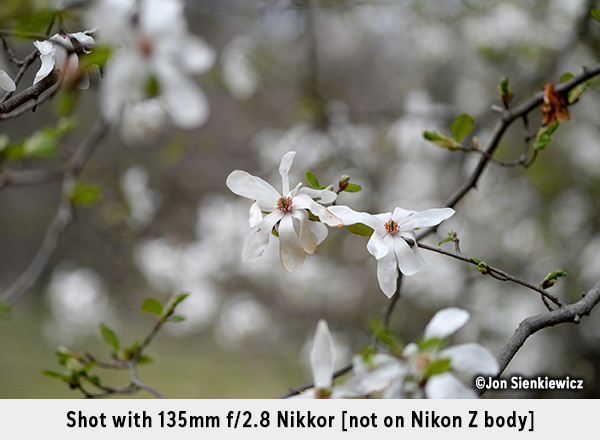
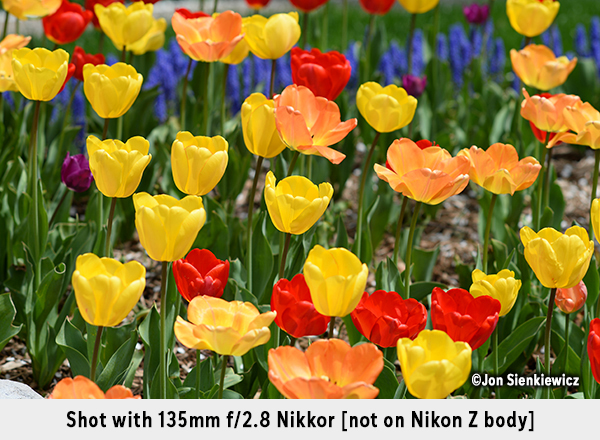
The lens bargains are phenomenal. You can build quite an optics arsenal for very little dough. For example, you can buy a used Nikkor 135mm f/2.8 lens in Nikon F-mount for less than $100 on ebay at this very moment. On a full-frame Nikon like a Nikon Zf or Z6III, it captures the world the same way any 135mm lens does. But on an APS-C model, like the Nikon Z fc, it becomes a 200mm f/2.8 equivalent because of the crop factor (more on that in a moment). How cool is that?

Nikon 135mm f/2.8 Ai telephoto and non-Ai of the same focal length side-by-side. Incidentally, this was shot with a Nikon 24-50mm AF zoom, another used treasure I bought cheap ($65). ©Jon Sienkiewicz
Incredibly, the Ai version of this classic 135mm f/2.8 Nikkor is only 3.1 inches long and it’s as sharp as a handful of carpet tacks. I know—because I bought one. It’s used, sure, and it’s manual focus. But hey! It was made by Nikon. It’s a real Nikon lens and it’s just one example of the fantastic deals that are available to those who know what to look for.


Nikon has been manufacturing fantastic lenses for more than 90 years, so it’s no surprise that thousands of them are available secondhand in camera shops, through online auctions and in the closets of unsuspecting relatives.

Other Lens Mounts Beckon
Of course, Nikon Z owners are not limited to Nikon-brand lenses or even lenses in one or another Nikon mount. Nearly any interchangeable lens from an SLR film camera can be adapted. There’s a wide, wide world of Pentax (M42) thread mount lenses, for example, that can be employed using an inexpensive adapter. Ditto Minolta MD and MC Rokkors, Canon FD and FL, and Olympus OM.

Nikon Z fc, 50mm f/1.4 Pentax Super Takumar and Fotasy M42-NZ adapter. ©Jon Sienkiewicz
Pros and Cons
Buying used lenses to adapt to your Nikon Z body requires some homework and a few tips. The homework is on you; here are the tips.
The Upsides
Bargain basement prices are the biggest upside, but following closely in second place is the phenomenal variety. Thousands upon thousands of high quality lenses were manufactured for SLR film cameras, so the choice is virtually endless.
Additionally, some lenses come only in the quasi-universal Pentax (M42) thread mount. For example, I own a TTArtisan 100mm f/2.8 Bubble Bokeh lens (read my review here) that’s available in M42 exclusively. The multitude of manual T-mount lenses, including many nice mirror lenses and some strikingly disgusting long-tube telephotos, can be adapted as well.
The third huge advantage: if you’re lucky enough to own more than one brand of mirrorless body, you can move the lens from camera to camera simply by buying the appropriate adapter. Shoot Nikon Z but also own an aging Micro 4/3s? No problem, just buy two adapters.
Finally, and old-timers will all relate to this, you can bring new life to the legacy lenses you thought you’d never use again. Got a Leica screw-mount lens collecting dust on the old Leica IIIf you have in the cabinet? Put it back in service with a $15 adapter. You’ll be startled by just how damn good some of those old lenses are.
Unique and Semi-Exotic Nikon Lenses
If you want to stay within the Nikon lens family (and I don’t blame you) there is plenty of great glass being sold on the cheap. How about a Nikkor 24-50mm AF Zoom? I paid a paltry $65 for one. And then there’s the entire Nikon Series E lineup. I have all but one of them and they are—they’re worth a column of their own, so I’ll write about them someday.

The Telephoto Effect
Because of the smaller APS-C size of the sensor in a crop-frame Nikon Z fc or Z50/Z50II, a 135mm lens is the equivalent of 200mm. The aperture stays the same, by the way. So you can have a 200mm f/2.8 (equivalent) Nikon lens for under a hundred dollars. A 80-200 becomes 120-300mm, a great range for outdoor sports and wildlife photography.
Note that the lens-factor effect also applies to wideangle lenses, but in a potentially negative way. A 28mm becomes a 42mm (1.5X factor on Nikons, 1.6X on Canon for instance). That’s bad news for wideangle fans. However, a 35-70 zoom becomes a snappy 52-105, and that’s a very useable zoom range for portraits, et al. The crop factor for Micro 4/3 is 2X, so a 35-70 zoom equates to a 70-140, a very useful range.
If you carry a full-frame (DX) Nikon Z, full-frame lenses behave normally. But if you attach an FX lens designed for APS-C cameras, your camera will default to the smaller format. You can override it, but you’re very likely to get severe vignetting in all four corners of the image. I override it sometimes—what the hell—for a cool tunnel effect.
Less Can Be Much More
When a full-frame lens is used on a crop-frame (APS-C size sensor) camera, only the center area of the lens is used—and that’s always the sharpest and most highly corrected part. Lenses (of any brand) are sometimes criticized for unsharpness and/or light falloff at the edges and extreme corners. The APS-C size sensor is too small to use those portions, so those flaws are off the table.

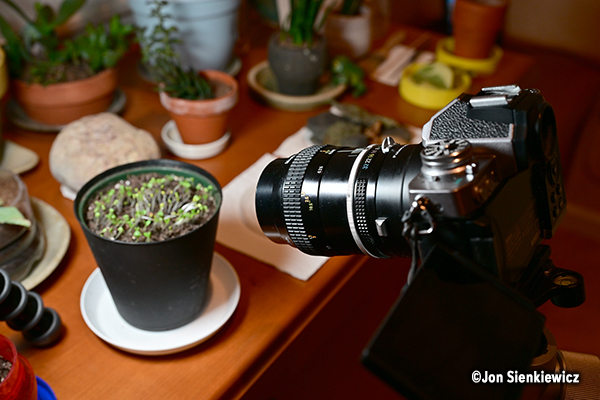
Genovese Basil seedlings. Nikon Z fc, 55mm f/3.5 Nikkor via Fotasy NF-NZ adapter. ©Jon Sienkiewicz
High Quality Construction & Amazing IQ
Build quality for legacy Nikon and other major-brand lenses—by and large—is fantastic. Both of the 135mm f/2.8 lenses I own (an Ai and non-Ai) are solid, heavy and feel great in the hand. My other used Nikon lenses are solid and reliable as well. This particular Ai happens to be smaller, but that varies with focal length.

Genovese Basil seedlings being photographed with Nikon Z fc, 55mm f/3.5 Nikkor via Fotasy NF-NZ adapter. ©Jon Sienkiewicz
The Downsides
Manual Focus can be a chore; however, until the groundbreaking Minolta Maxxum 7000 appeared in early 1985, we all focused all of our lenses on all of our cameras. So what’s the big deal? I’ve heard people complain that modern DSLRs are difficult to focus manually. For those critics, I guess they must be. But Nikon Z cameras use an Electronic Rangefinder with many legacy lenses (check compatibility chart and manual) that allows me to confirm what my eyes (corrected to 20/20) discern. A green dot glows in the eyelevel finder of a Nikon Zf when correct focus is attained. Focus by eye and catch the ghostly green light in your peripheral vision. Bingo! Autofocus is much faster, don’t get me wrong, but manual doesn’t mean inaccurate.
Besides, cameras with the Focus Peaking feature allow even tired old eyes to focus accurately.
Aperture Priority or Manual Exposure
You can’t use Shutter Priority or Program Mode with many legacy lenses. In fact, if you’re not using a genuine Nikon FTZ/FTZII adapter, you can’t use S or P at all on your Nikon Z camera. Personally, I prefer Aperture Priority, so it’s not a handicap for me. For you—that’s for you to decide.
No Metering With Some Lenses
Check the chart. Some lenses require you to shoot in Manual Exposure. But I resolved this issue by buying a used Gossen Luna Pro for $30 from Roberts Camera (alias UsedPhotoPro). I get super-accurate meter readings from this classic German incident meter. Anyway, using Manual Exposure is good for your liver.
Read this recent Shutterbug story for meter guidance, “Handheld Light Meters: When, Why & How to Use Them (VIDEO).”
Potential Perils of Buying Used Lenses
Unless a lens is mishandled or stored improperly, it’s very unlikely to break—especially if we are talking about manual focus lenses that were made 35 or so years ago when plastic was used only for lens caps.
Sadly, some old lenses become mold farms. Lenses that have been stored for 25 years in a biologically active leather case are likely to contain fungus that can appear as a thread, an artistic spider-web-like pattern, a ball of dust or simply an overall foggy veil that would make Jack Frost proud. On eBay you’ll see some listings that say “haze” which is a hyperbolic way of saying that the mold is thin but could cover an entire internal lens surface. If the listing contains any of these words, don’t waste your time. Moldy lenses mean heartbreak—unequivocally.
Examine secondhand lenses carefully. Check the screw heads—the groves should be clean and sharp. If they’re marred or defaced in any way, that’s a sure indication that an amateur repairman went after the lens with a pocketknife and glue gun.
Defects that I generally overlook include bubbles (for sure), internal dust (in small amounts), minor scratches on the front element (but not if the scratch is on the rear element) and normal external cosmetic wear. Loose or overly tight focusing helicoids are problem issues, too, but one cannot detect these defects from a photo in an online listing. It doesn’t hurt to ask the seller.

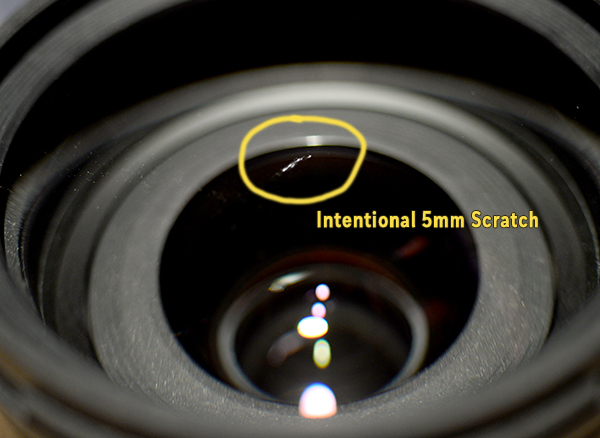
To learn more about the possible disruptive effect of a scratched front element, read my column from 2017 where I chronicled my intentional gouging a 5mm valley in the front element of a brand new Tamron zoom to evaluate the degree of image degradation. You might be surprised.
Dented filter rings, in and of themselves, are usually tolerable. But how did the dent get there? Impact sufficient to dent a filter ring often jars internal elements slightly loose. That’s not good. Unless you’re looking at an incredible bargain—like a 24mm f/2 Nikkor for $100—take a pass on the dinged rings.
Another no-no for me is oily and/or sticky aperture blades. The oil will never go away by itself, and lenses in this condition generally are not worth the cost of repairing.
Where Should Nikon Z Owners Start?
For those who drive DX (APS-C) models, start with an ancient Nikon 50mm f/2 lens. That should set you back somewhere between $30 and $50 in clean, fully functional condition. As of this morning there were about 300+ available on ebay. Add $15 for the adapter and you have one hell of a low-priced portrait lens that’s the equivalent of a 75mm f/2. If you’re living large, opt for a classic Nikkor 50mm f/1.4. They cost a bit more but the bokeh is worth it for people pictures.
Equally attractive option is the 135mm f/2.8 Nikkor chronicled above.

Zoom-NIKKOR 80-200mm f/4.5 lens, serial number 2462xx on Nikon Z6III photographed with a Nikon Z fc and 50mm f/1.4 Super Takumar (Pentax) lens via Fotasy M42-NZ adapter. Similar 80-200mm Zoom-Nikkors are available on ebay with Buy Now pricing starting around $50 including shipping. Might be the biggest photo bargain ever on ebay. ©Jon Sienkiewicz
Nikon FX (full-frame) Z-series camera owners want to consider a fast prime, wideangle zoom or—get ready for this—one of my absolute favorite dark horses—an old 80-200mm f/4.5 Nikkor push-pull zoom. Don’t laugh. I see several on ebay in the $50 range, and from firsthand experience I can assure you they’re sharp and contrasty. The push-pull operation (i.e., one single ring is used for focusing and zooming) is fast and fun once you get the hang of it. Laughing? Look at the pic below, shot at a Sommerset Patriots (NY Yankees minor league affiliate) baseball game in 2019 with an often overlooked 80-200mm f/4.5 Nikkor. Image is unedited except for resizing to fit our 600 pixel wide format. Got a lens that can top this?

Shot with ancient (by all standards) 80-200mm f/4.5 Nikkor on Nikon Df Camera, 1/1000 second at f/8, ISO 400, Aperture Priority exposure mode, handheld, in 2019. ©Jon Sienkiewicz
Both Nikon FX and DX shooters, as well as users of any other mirrorless camera, will enjoy the high image quality and versatility of an old, really old, 55mm f/3.5 Micro Nikkor. Back in the day when the Nikon Photomic FTn reigned supreme, this macro lens was widely considered one of Nikon’s sharpest for closeup work and for general photography. The lens focuses to one-half life-size (i.e., 1:2 reproduction ratio) by itself and life-size (1:1) with the sometimes included extension tube. As of this writing, there are nearly 100 offers on ebay (including the equally great 50mm f/2.8 Micro Nikkor) with prices starting at less than $100. If you got the scratch, look for a luxury 105mm f/4 Micro Nikkor; they are superb and supremely versatile on any mirrorless camera.


Conclusion
Buy an adapter and go hunting for some classic glass. You will not regret it.
I’m not vain enough to believe that this column will motivate zillions of readers to buy up all the good used Nikon glass. But I do know that prices are creeping upward as interest and demand grow. If you plan to pick up a bargain, do it soon and enjoy it thoroughly. But don’t outbid me or I’ll never speak well of you again.
—Jon Sienkiewicz


