Pentax K-01 — Most Underrated Camera of All Time?
Introduced in 2012, the Pentax K-01 was met with widely discordant yelps of either disbelief, unconditional infatuation, technical condemnation, or irresolute “meh,” — depending on the reviewer — and was ultimately booed off the stage. Too bad. It’s awesome. And we think it just might be the most underrated camera ever.

Ahead of its time, or just another typically Pentax affirmation of their nonconformity?
Born in the brain of world-renowned designer Marc Newson, the Pentax K-01 (that’s “Kay Zero One” if you didn’t know) followed closely on the heels of the equally quizzical Pentax Q series of super-tiny digital cameras. Available in yellow/black, black/silver or white/black, its body is thicker than a brick, and its SMC Pentax-DA 40mm f/2.8 XS lens is about the size and thickness of a poker chip. Later, a fourth colorway, blue/white, was introduced in the Japanese domestic market.
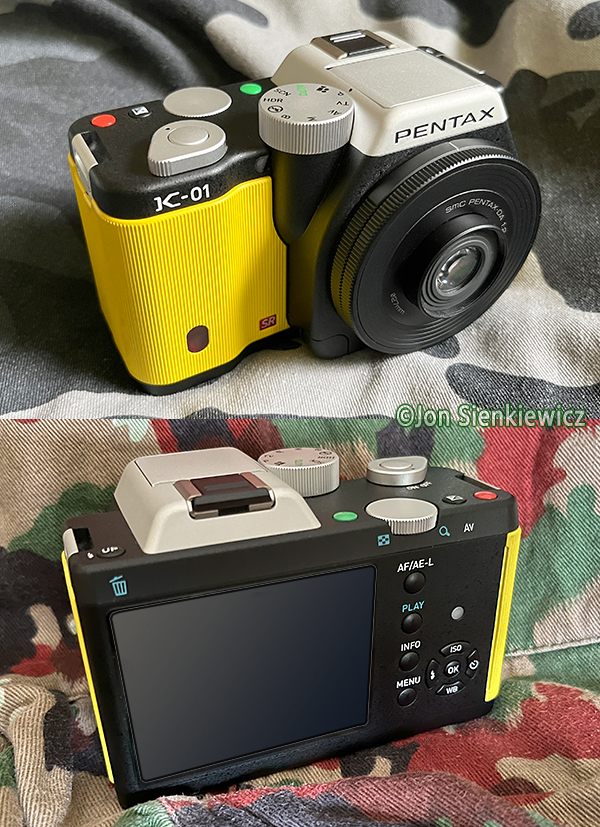
On the inside, the Pentax K-01 contains the same 16-megapixel APS-C size Sony CMOS sensor found in the contemporaneous Pentax K-5, a traditionally styled DSLR. The Pentax K-01’s chubby girth enables it to accommodate the focus requirements of virtually all Pentax K-mount lenses (DA, DA L, D FA, FA Limited, KA- KAF, KAF2, KAF3, etc.), a blessing to all Pentaxians. And the long list of features rivals some modern mirrorless models.
Just look at these features. And remember this was 12 years ago. Does your brand new mirrorless camera have all of these capabilities?

Key Features & Specifications
Avant-garde Marc Newson design
16.28-megapixel (effective) APS-C size sensor
SMC Pentax-DA 40mm f/2.8 XS lens
40mm lens design includes 5 elements in 4 groups
Protective oleophobic fluorine coating on lens
Automatic lens aberration compensation (w/Pentax lenses)
Accepts nearly all Pentax lenses (except Q, 645)
In-body image stabilization (SR “Shake Reduction”)
User-programmable Red and Green buttons
3-inch LCD monitor is nearly 100% field of view
Top shutter speed 1/4000 sec (longest is 30 sec)
High speed burst shooting 6 fps
Choice of four aspect ratios
Dust Removal (DR) function
1024 segment metering plus center-weighted and spot
Excellent, accurate autofocus
Focus Peaking (can be magnified 2X, 4X or 6X)
Pentax PRIME M image processing engine
In-body Raw image conversion

Key Features & Specifications (cont.)
Raw option available even after JPEG capture
Easy Multiple Exposures (2 to 9 shots)
Intervalometer for still and video
Dynamic Range Expansion
Six White Balance presets
WB is adjustable ±7 steps on A-B axis or G-M axis
Pentax’s Color Temperature Enhancement (CTE)
Sensitivity up to 25600 (quite high 12 years ago)
Pop-up flash
High Dynamic Range (HDR) selectable on external dial
Custom Image Modes (including Bleach Bypass, Fine Sharpness)
19 creative Digital Filters available during image review
19 Auto Picture and Scene Modes
Full HD video recording
Stereo microphone and 3.5mm mic jack
HDMI port
500+ shots per battery charge (540 without flash)
Writes copyright info and/or creator’s name to metadata
Approximately 4.8 x 3.1 x 2.3 inches (121 x 79 x 59mm)
Weighs about 19.8 ounces (560g) with battery and SDXC card
Why the Pentax K-01 is Great
I own a Pentax K-01, a yellow one to be sure, and I really like it. I’d write “I love it,” but my rule is to never love anything that cannot love you back. People included. I could quickly name three highly regarded photo industry luminaries who share my feelings; they confirmed such in recent conversations.
Here’s why I like the Pentax K-01 so damn much.
1. Attractive Unconventional Design
I like it. Some people don’t. Then again, some folks can’t handle dark beer, pickled cauliflower and vinegar on fries. In many ways it’s very un-cameralike, and it other ways it’s a brilliant reimagining of a familiar design.

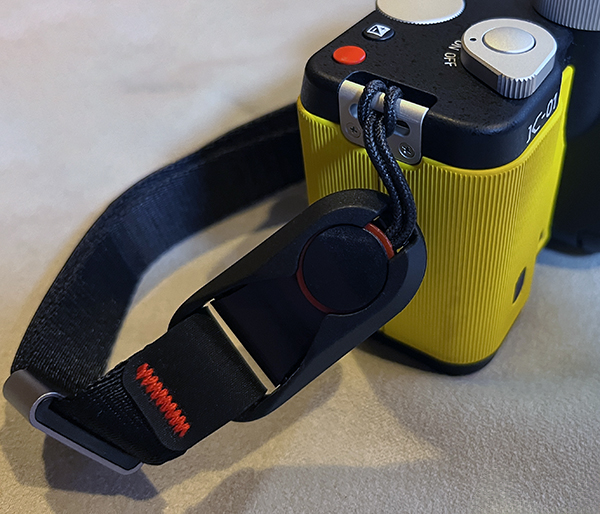
No small feat, it won a Red Dot Design Award in 2012. Quoting Red Dot, “The control elements of the K-01 digital camera follow the concept of reduction and clarity in terms of design, arrangement and function. They are ergonomically positioned, and two of the key buttons have different colours (sic) for instant and sure recognition. The slightly curved, ergonomic grip with a protective rubber body exudes warmth and provides stability when the camera is being held.”

2. Superb Overall Performance
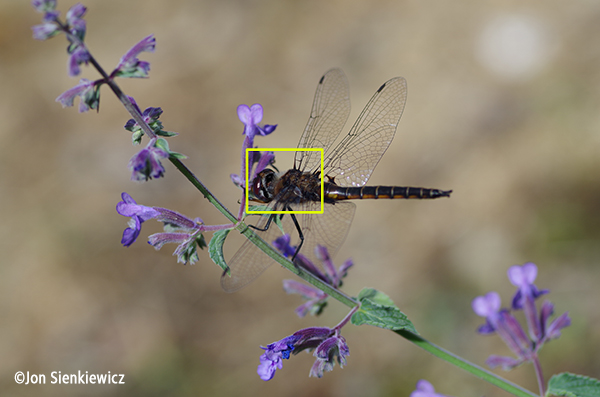
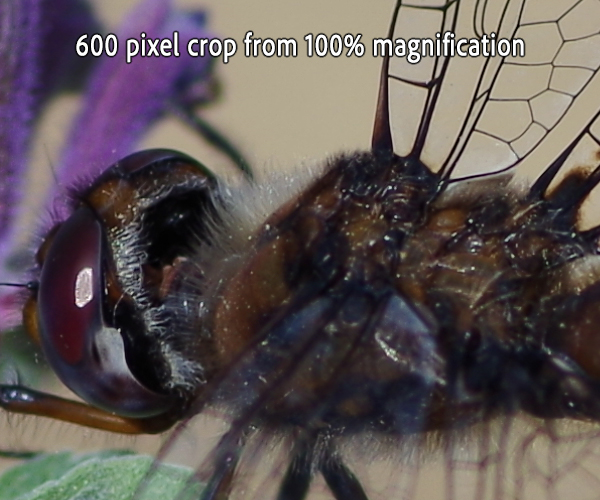
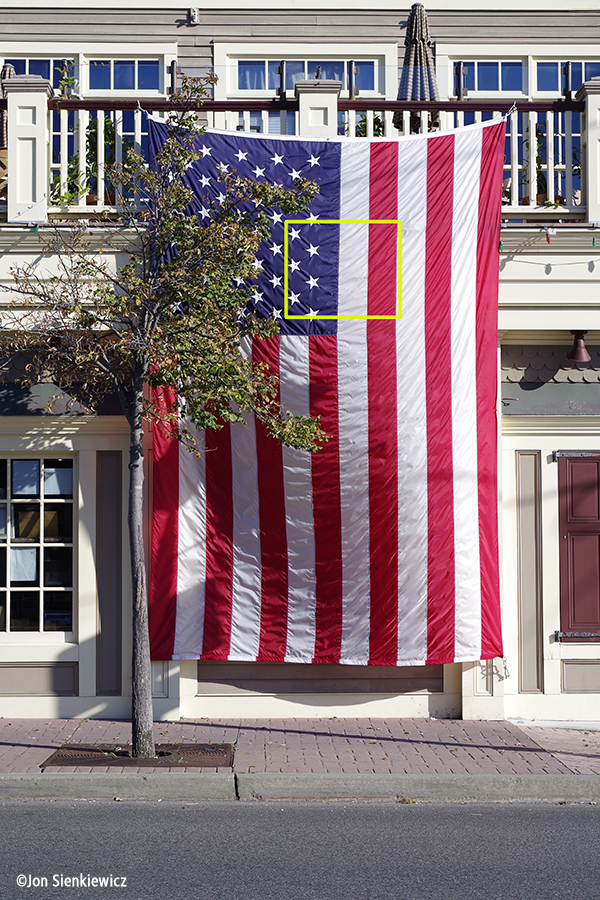
I’ve enjoyed superb results from the Pentax K-01. Images are crisp, colors snappy, focus accurate and dynamic range excellent. If it didn’t deliver consistently outstanding results, I wouldn’t use it, no matter how cool it looks.
All of the images in this story were taken with my yellow Pentax K-01 (except the shots of the product itself). I think the pictures speak for themselves, even though they’re all just 600 pixels wide.
3. Extensive Lens Compatibility
Hang damn near any Pentax lens on it (not big Pentax 645 or quirky-small Q lenses) and you’re in business. I do not have a huge collection to draw on, but I have successfully used Pentax macro, fisheye zoom, tele zoom, fast normal and traditional kit lenses, and have never had a single issue. And of course the pancake-flat Pentax 40mm f/2.8 XS lens that comes standard, which is truly remarkable in every way (until you try to find a 27mm polarizing filter).
4. Fun to Use
The Pentax K-01 is fun! The body is more than a tad plump, so it’s like holding a Big Mac, not a single-ply cheeseburger. The built-in digital filters are fun to play with, and applying them to recorded images is a great way to kill time at the airport when your smartphone dies. It’s also a conversation starter — how many yellow digital cameras have you seen?

5. All of the “Little Things”
Of lesser importance, but still immensely cool, Pentax’s proprietary Color Temperature Enhancement (CTE) provides extra emphasis of the predominant color of a scene, thereby enhancing the cool blues of the ocean, the warm shades of autumn, or the green faces of your envious pals when they’re pining for your Pentax K-01, for example.
I don’t always shoot Raw (not by any means) but I appreciate Raw files at post-processing time. Shoot a great image in JPEG format with a K-01 and you have the option to save the Raw data as well. The result is the same as shooting Raw + JPEG. The Raw buffer must have enough room for this option to be offered, however, so it’s not an every-time thing.

Programmable function buttons are terrific, but it’s sometimes hard for me to remember which button does what. The Pentax K-01 has bright red and green buttons that are impossible to miss and easier (for me at least) to remember. The green button can be set to activate file format selection, preview, focus peaking, custom image and digital filter selection. The red button is programmable to choose movie recording, plus all of the functions that the green button can do.

The Not So Good Stuff
On the downside, the Pentax K-01 does not have an eyelevel viewfinder. That’s a hindrance on some sunny days, but to their credit, Pentax partially ameliorated the problem by enabling brightness and color adjustment of the LCD monitor. And the LCD can be magnified 2X, 4X or 6X during focus peaking.
The rubberized flap that covers the compartment that houses the SD card slot, HDMI port and PC/AV port is — let’s face it — flimsy. I’m very careful with it, but still I worry.
Additionally, if you compare the AF speed of this 144-month-old camera to one of more recent design, you’re going to be disappointed. So don’t use it to shoot horse races or charging rhinos.

If you use a bright yellow Pentax K-01 like mine, some people are going to laugh, and some children might extend a grubby little index finger and ask if it was made by Fischer-Price. To me, that’s all part of its attraction. If you want to fly under the radar with a highly capable camera, a yellow K-01 is for you. I can walk through crowded and/or sketchy streets in any city and no one takes me or my camera seriously. Except maybe in Milwaukee — be extra careful in Wisconsin, lest someone mistake your Pentax for a wedge of cheddar.

Want to Buy a Pentax K-01?
You can buy mine for $10 million, or possibly find one a bit cheaper on ebay. I’ve seen Pentax K-01s at auction at prices ranging from $200 to $600 (body only) and with some sort of lens for a bit more. If you buy a K-01, do your damnedest to buy a 40mm f/2.8 Pentax Poker Chip lens with it. You need that compact lens to fully enjoy the user experience.
Want to Become a Better Photographer?
Begin by taking more pictures. Carry a camera everywhere you go and shoot even when you’re 100% sure the picture won’t turn out. Review all of your images with a critical eye and share them with others – and that includes posting the best on our Gallery. Subscribe to our newsletter (see sign-up form on our homepage) and bookmark Shutterbug as a Favorite on your browser so you can check back often. We’re in this for the same reason as you – we love photography, and we’re learning more about it every day.
—Jon Sienkiewicz
PS: If you want to buy my Pentax K-01 for $10,000,000 (plus $9.95 shipping & handling), please send unmarked cash or stamps (no checks) to: Occupant, Bungalow 3, Red Shell Road, Half Moon Bay, Cayman Islands, 03C-47. Allow 8 to 10 weeks for processing, weather permitting.


