How a Grey Layer Helps Sculpt Light and Shade When Editing Photos (VIDEO)
Here’s an outside-the-box Photoshop tutorial from an Australian photographer who specializes in post-processing techniques that add imagination and creativity to her whimsical imagery. The video begins with this simple question: “Why use a Grey Layer (we’ll stick with her Aussie spelling) in Photoshop?”
There are several reasons for giving the trick a try, whether you’re after special effects or aiming for a conventional look. Instructor Sandy D devotes this episode to one specific application; namely, using the Brush tool in combination with a Grey Layer for Dodging and Burning in Photoshop.
Sandra describes this uncommon technique that works so uncommonly well by explaining that a Grey Layer enables you to work non-destructively when processing an image. She says this about the task at hand: “When I Dodge to add light in certain areas or Burn to dull other areas I always work on a Grey Layer

In less than 11 minutes Sandra describes the steps required for this straightforward approach that’s been part of her workflow for several years. A Grey Layer can be added at point in the workflow, but Sandra prefers first finishing the basic adjustments before moving on to Dodging and Burning and introducing the layer.
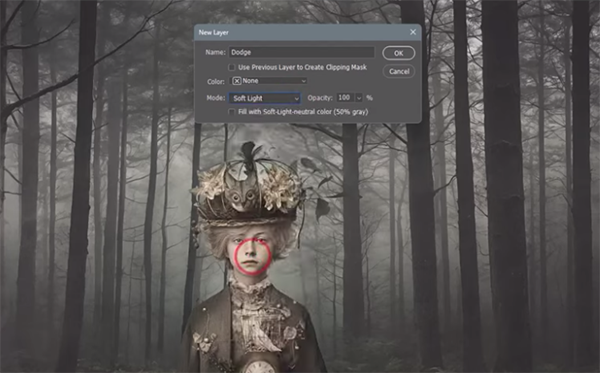
Sandra demonstrates how to set up the Grey Layer by clicking on the Layer tab atop the screen, choosing New, and then selecting the Soft Light option from the Blend Mode dropdown menu that appears. Now your new Grey Layer appears in the panel on the right of the screen.
Once everything is properly configured Sandra walks you through the simple process of employing a Brush to add light to her subject’s eyes and the foliage in the foreground, while slightly brightening the background as well. Then she reveals a few important settings, like dialing back Opacity.
The next simple step is adjusting Brush size so that it’s neither too large nor too small for the specific area you intend to adjust. Then the painting process is quick, easy, and precise.
While most image-editing techniques are designed to direct the viewer’s eyes to a specific point in the frame, Sandra says the goal of this particular technique is quite the opposite: “It’s all about getting the viewer’s eye to bounce around the image.” When the last time you heard that?
Sandra’s inspirational YouTube channel is full of videos that will challenge your vision and creativity. So step outside your comfort zone and take a close look.
And don’t miss the tutorial we featured recently with another post-processing expert who demonstrates how to make beautiful b&w conversions, including those that give photographs a vintage look.