Half-Frame Battle: Pentax 17 vs Ilford Single-Use
When Ricoh Imaging introduced the enthusiastically received Pentax 17 half-frame 35mm camera (read our review), our sporadically analytical mind asked: “How does it compare?” Immediately, the plan for this hardscrabble shoot-out coalesced.
And In This Corner…
We pitted the Pentax 17 against an Ilford single-use camera in a totally impartial, unbiased head-to-head shootout.
The Pentax brand enjoys a rich and storied legacy of 35mm excellence that spans over 100 years. They recently bolstered their place in history by releasing a 35mm half-frame camera at a time when digital photography overwhelmingly dominates the marketplace.
Ilford was founded in 1879 in the UK city of the same name and is highly regarded as a premier manufacturer of 35mm film. Ilford film is preferred by many black & white aficionados and well deserves its accolades.

Place Your Bets
Well, the combatants weren’t exactly evenly matched. The slugfest was more like a beefcake raccoon vs a skinny chipmunk fighting over half of an overly ripe Ballpark Frank in the aftermath of a Jersey Shore cookout. The raccoon had mass and momentum on its side, but the chipmunk was fast and nimble, and was known to pack tiny brass knuckles on occasion. Or so it’s been reported.
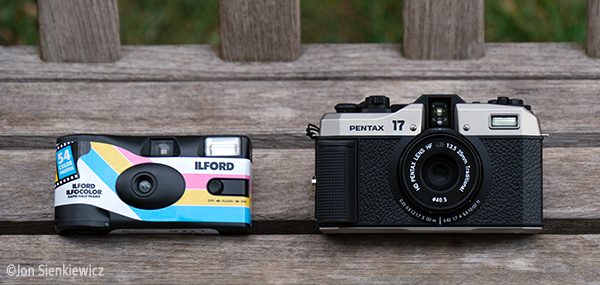
The Pentax 17 has a 25mm f/3.5 lens, seven (7) AE modes and six (6) focus zones. Retail price is $499. You can read our review here.
The Ilford Ilfocolor half-frame single use camera, purchased from B&H Photo, has a 31mm f/11 fixed-focus lens and a single shutter speed: 1/125 of a second. It cost less than $20.
In both cases, the film was ISO 400 color print type. Although both candidates had built-in flash, it was not used except once or twice by accident.
Theoretically, in bright light the results should be fairly equal, or so we speculated.
The File Faceoff Arena
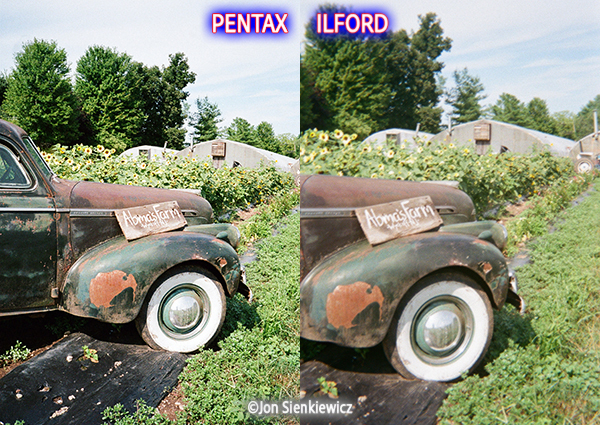
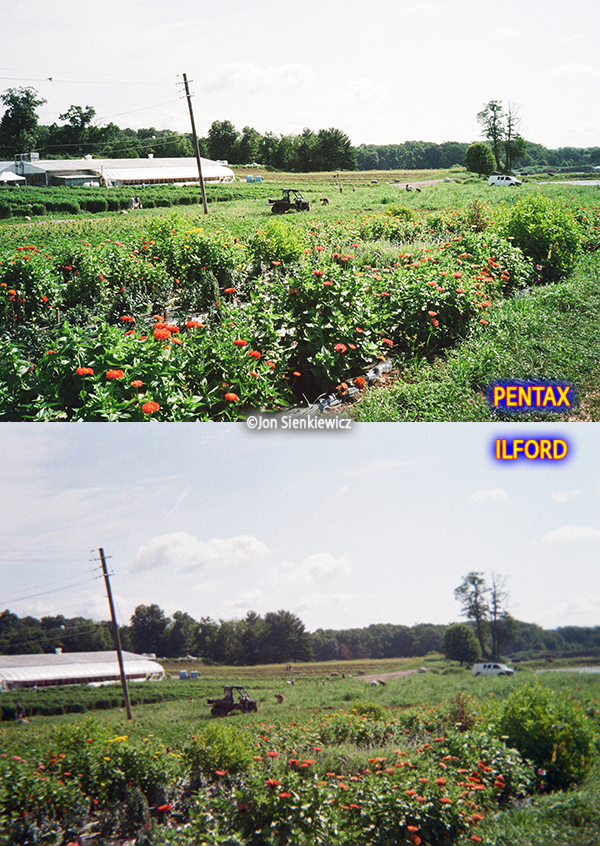
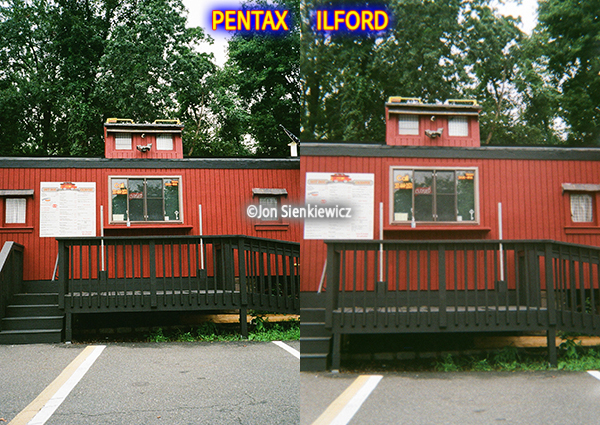
The half-frame shootout was carefully conducted in various villages and townships in Northeastern New Jersey. As much as possible the photographer (and author of this piece, me) tried to shoot each scene identically with both cameras. Because of differences in specifications, this was not always possible, and many pairs of images were discarded because they were deemed invalid.
Shoutout to Amba’s Farm in Wyckoff, NJ, for allowing us to include a shot of the rusty old sedan with whitewall tires.
Film developing and scanning was performed by Roberts Photo Lab in Indianapolis, Indiana. Roberts is highly recommended, BTW, because of their fast service, meticulous handling and competitive prices.
Pictures are Worth 1,000’s of Words
The winner? Judge for yourself from the five image comparisons posted herein. We give the Pentax 17 a clear victory based on sharpness, saturation, appropriate contrast and overall image quality. In fairness, one camera costs $500, the other, $20.
Learn More About Shooting Film
For a comprehensive look at getting started in film photography, read this: Start Shooting 35mm Film — Here’s a Complete Guide.
Check out our recent story, Shoot Film? Here are 5 Labs that Develop & Print, for more information about having your film processed.
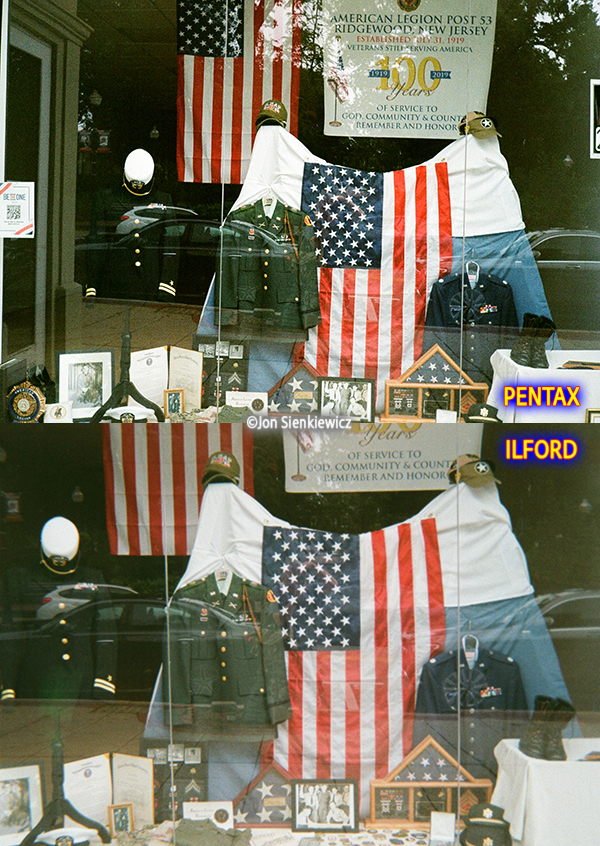
Our Main Takeaway
The Pentax 17 is demonstratively better, but no matter what path you take to film photography, it’s well worth the effort. Shooting film requires a different mindset compared to digital. There is no immediate gratification—you cannot preview and delete images as you go. You must be mindful of every variable like focus setting, available light and composition limitations. Film grain is a factor. When shooting half-frame you must be constantly aware of the default portrait orientation vs landscape. It requires much thinking, more than required with the relatively mindless point-and-shoot digital camera and/or smartphone photography.
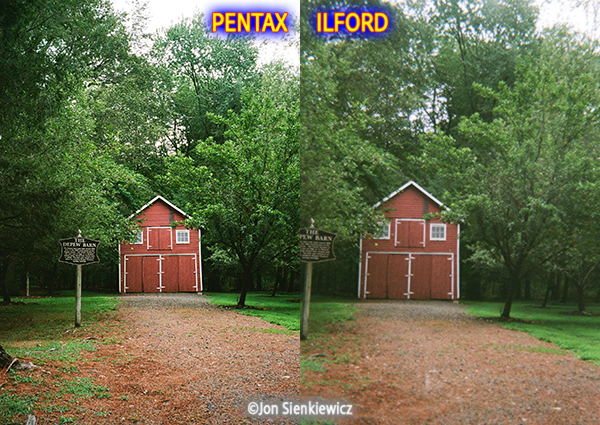
More than any of that, though, it’s fun. It’s exciting to see—for the first time—scans of the images you shot days or weeks ago. Whether you buy a spanking-new Pentax 17, dabble with a single-use recyclable, buy a stalwart used analogue SLR from the 70s or 80s, or resuscitate that dusty rangefinder your dad had on the top shelf in the closet for all those years, get your hands on some film and have some fun.
Want to Become a Better Photographer?
Begin by taking more pictures. Carry a camera everywhere you go (this PENTAX 17 is a great candidate!) and shoot even when you’re 100% sure the picture won’t turn out. Review all of your images with a critical eye and share them with others – and that includes posting the best on our Gallery. Subscribe to our newsletter (see sign-up form on our homepage) and bookmark Shutterbug as a Favorite on your browser so you can check back often. We’re in this for the same reason as you – we love photography, and we’re learning more about it every day.
—Jon Sienkiewicz


