What do you mean you’ve never cleaned your lenses and the dirty sensor in your camera? After all, some of us spend a small fortune on cameras, lenses, and important photo accessories, and regular maintenance is part of the game. As one pro says, “It definitely behooves us to do everything in our power to try to extend the life of our gear as much as possible.”
It’s true that some photographers avoid sensor cleaning because they’re afraid of screwing things up. But with some affordable supplies and the knowledge you’ll learn today, this task is both safe and a no-brainer. The same goes for lenses, tripods and other accessories that you rely upon every day.
In less than 16 minutes you see how landscape photographer Mark Denney goes about the spring cleaning that he repeats in summer, autumn, and winter, and often more frequently as needed—especially before an important trip. He walks you through the satisfying step-by-step process so you can set your fears aside.
It’s virtually impossible to capture great quality images with a grimy lenses, and that’s where this important tutorial begins. Denney recommends that you carefully examining the lens barrel to make sure it’s free of dust and debris before turning your attention to the front and rear glass elements. Doing this is quick and easy with the help of a rocket blower or a soft brush.
It’s also easy to clean the lens elements, and experienced photographers often do this several time during a shoot, especially when in the field where dust, rain, fingerprints, and other contaminants are a constant concern. Denney explains the importance of blowing off elements before taking subsequent steps, otherwise you may rub dirt into the glass and cause irreparable damage.
Spiffing up the camera’s sensor is a bit more involved, and it’s a task you should do at home in a clean environment. The first thing to determine is whether or not the sensor actually requires cleaning, and Denney explains how to do that. If you decide to proceed, hold the camera face down, so any dust and debris doesn’t push further into the body as you follow his advice.
It’s important to keep the camera body pristine too, making sure there’s no dirt on or beneath all the buttons and dials. LCD panels are also deserving of attention using the proper materials and procedures to avoid scuffs and scratches to the surface.
Denney also discusses how to care for tripods and other accessories so that they operate smoothly and efficiently and live a long life. Once your gear is bright and clean, be sure to follow Denney’s advice for taking regular preventative measures. That way your next round of cleaning will be even easier.
We constantly preach the importance of selective, rather than global, adjustments when editing photos. Even though this approach takes a bit more time and effort it provides maximum control for enhancing different portions within a scene independently of one another.
But hold on: The tutorial below from the PHLOG Photography YouTube channel demonstrates a powerful Photoshop hack for making all your Raw adjustment locally to enhance specific areas with the frame—just like when using masks. Before clicking the “Play” button download the sample file using the link beneath the video so you can do this yourself as the technique is explained.
Instructor Christian Mohrle is an acclaimed German landscape photographer based in Germany. He begins this episode by quickly making a few basic adjustments to his HDR drone shot to prepare it for the game-changing magic that follows. The first step is switching the profile from Adobe Color to Adobe Landscape. This boosts base saturation and brightens up the darkest areas of the scene.
Preliminary modifications continue in Photoshop’s Basic panel where Mohrle uses simple sliders to slightly adjust White Balance, carefully drop highlights, open up shadows, and introduce a bit of Texture. He also drops Clarity and Dehaze, while increasing Vibrance for a more colorful look. At this point the image still needs some work.
Before demonstrating his timesaving Photoshop hack for completing the transformation locally Mohrle quickly walks you through the steps he’d use for taking the conventional masking and color grading approach. Along the way he compares this method to the unique trick that follows.
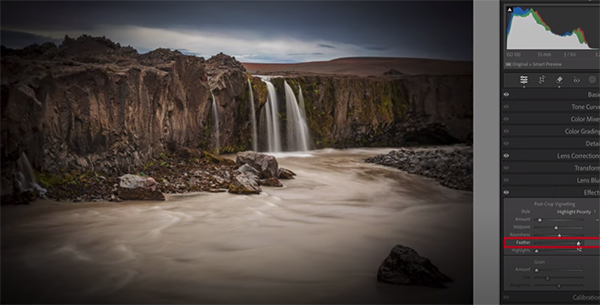
He begins the magical workaround by clicking Control J to create a duplicate layer. Then he taps the Filter tab atop the screen and selects the Camera Raw Filter option that appears in the dropdown menu. Doing this brings you back to Photoshop’s Camera Raw editor where Mohrle walks you through the local-style enhancements.
At this point it only takes about three minutes to complete the job—significantly faster and with equal precision than the standard approach he demonstrated earlier. Check out the before/after images and you’ll be convinced.
After watching the video and adding this hack to your Photoshop bag of tricks, pay a visit to Mohrle’s YouTube channel where there’s much more to learn.
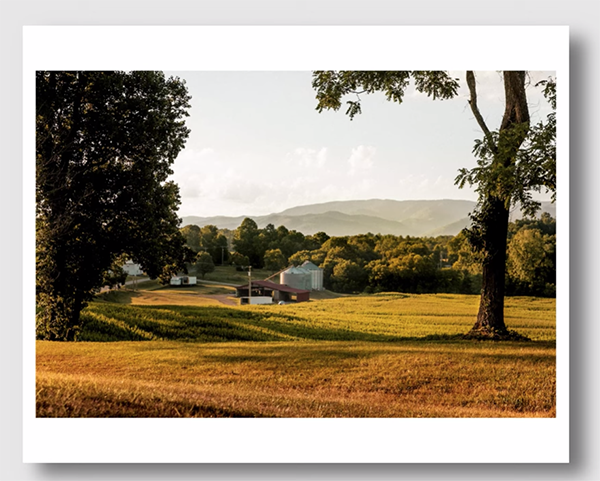
Well-composed landscape photographs are often difficult to achieve—especially in scenes with several important elements. Sure, there are a variety of common guidelines, like the Rule of Thirds and the importance of leading lines, but you’re undoubtedly familiar with those.
Today’s tutorial goes in a different direction with five composition secrets “that you’ve never heard of before” from an accomplished pro who says, “learn my step-by-step framework and you’ll start improving your landscape photography compositions today.”
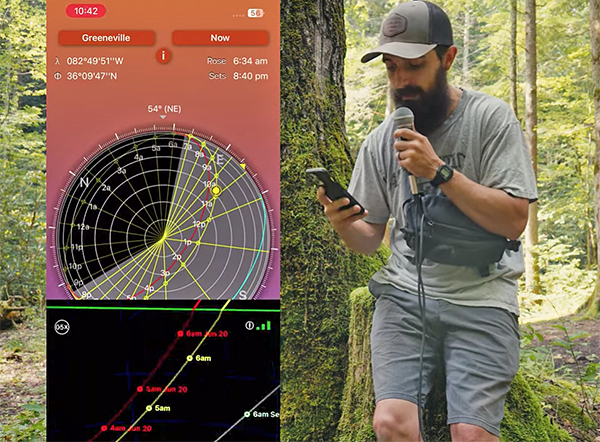
Instructor Dave Morrow is a full-time wilderness photographer who spends nine month a year living in a tent and chasing light, so he knows whereof he speaks. His says he uses these technique daily, and so can you whether you’re deep in the outback or closer to home. This behind-the-scenes episode takes place during a five-day excursion as Morrow hikes through mountainous terrain.
Morrow provides a link to his free PDF Guide that you can download to your camera and have it handy while shooting in the field. The first thing he does when arriving on location is to carefully scrutinize what he sees, based upon “an algorithm I have in my mind” that helps him decide where to begin. Based upon the following rules he developed himself, Morrow then says either “heck yeah” or “no.”
Once Morrow determines the optimum center of attention in a scene he then looks for a complementary foreground element on the opposite side of the frame. This enables him to capture images with compelling balance that guides a viewer’s eyes through the frame. As he explains, “If everything is just on one side of the image there’s no point in having the other side of the scene in the photo.
He calls this “the offset technique” and it’s very helpful for creating a dynamic sense of scale. As you’ll see, this approach is even more effective when you’re able to include complimentary colors in the two main zones of an image. Then you’ll achieve what Morrow refers to as a “square color harmony.”
Morrow also demonstrates a super simple “interestingness grid” that’s responsible for many of his most compelling images. You don’t need to overthink this one, because it’s intended to be a rough and versatile guideline. This one is sort of like a modified Rule of Thirds with a bit more sophistication.
At this point you’re barely halfway through the great tricks you’ll learn. And once you understand all six they’ll become part of a composition algorithm in your brain too!. Morrow’s instructional YouTube channel is full of helpful tips and tricks like these, so be sure to pay a visit and see what’s available.
Ever watch a hawk glide effortlessly across the sky, taking in its surroundings with sharp eyes? That’s what it feels like to pilot an easy to fly camera drone. But here’s the kicker: you don’t need wings or talons – just a little guidance and the right gear.
The freedom of flight is no longer exclusive to our feathered friends. With drones, we can capture breathtaking aerial views that were once only possible from an airplane window seat. From budget-friendly beginner models perfect for indoor flights to professional-grade options packed with high-tech features, there’s something out there for everyone.
In this article I will talk about easy to fly photography drones in terms of ease of use, photo/video quality and other unique features.
Easy-to-Fly Camera Drones for Beginners
Diving into the world of drones can be exciting, but also overwhelming. Especially when you’re a beginner.
The good news is, there are easy-to-fly camera drones designed just for beginners. These starter drones offer an excellent balance between affordability and functionality, making them perfect practice drones before upgrading to more advanced models.
A Look at Beginner-friendly Drones
If you’re looking for budget models that don’t skimp on features, here’s what to consider:
Flight time: An important aspect when choosing a drone is its flight time. Longer flights mean more fun and opportunities to capture stunning aerial photos.
Ease of use: Beginner drones should have user-friendly controls and intuitive interfaces. Some even come with obstacle detection capabilities or collision avoidance sensors which let newbies fly without worry about crashes.
Camera capabilities: This refers not only to video quality but also photo resolution – after all, one main reason people buy drones is to take breathtaking shots from above. The best ones even offer FPV (First Person View) mode where users can experience flying from the drone’s perspective through their remote controller screen or VR goggles.
Beyond these key considerations though lies another crucial factor – personal comfort level. This guide on selecting your first drone explains why it’s so vital.
DJI Mini 3
The DJI Mini 3 stands out in the drone market with its lightweight design and top-tier camera capabilities. Despite its diminutive size, this drone still offers superior performance.
Design of DJI Mini 3
Weighing less than a pound, the DJI Mini 3 is an ideal choice for beginners seeking easy-to-fly drones. Its compact form makes it incredibly portable but don’t let that fool you into thinking it lacks power. The light weight makes it less likely to hurt an operator or bystander than larger drones.
This beginner-friendly drone offers up to 38 minutes of flight time, giving photographers ample opportunity to capture stunning aerial photos and videos. Flight time can even be extended to 51 minutes if you purchase an Intelligent Flight Battery Plus.
Thanks to its 12MP camera sensor, image quality remains crisp even at high altitudes.
Besides being an excellent performer, the DJI Mini also boasts intelligent flight modes includign Quickshots which make flying more fun while ensuring safety. The obstacle avoidance sensors are especially handy for avoiding accidental collisions when maneuvering through complex environments or tight spaces indoors.
To top it all off, controlling this drone is made easier with a user-friendly remote controller paired via Wi-Fi connection allowing real-time video transmission straight from your smartphone’s screen.
The drone is wind resistant up to 38 kilometers per hour (level 5) which is also why we included it in a listing of easy to fly drones. The last thing you want is losing control due to wind picking up during your flight.
The key selling point of any camera-drone lies in two aspects – how long can it fly and what kind of images can we expect? With a staggering max altitude reaching far above many other toy drones on the market today coupled with stellar photo/video output, there’s no question why experts review this model favorably across the board.
Ryze Tello Drone
The Ryze Tello, a budget-friendly toy drone, offers surprising value with its easy-to-use interface and solid image quality. Despite its name, the Ryze Tello is much more than a mere toy drone – thanks to its partnership with professional drone giant DJI, it packs plenty of features in an incredibly small and lightweight package that makes it ideal for both beginner and indoor use.
Tello Features and Performance
Despite its low price point, Tello doesn’t skimp on features. It has a 13-minute flight time thanks to its high-performance battery technology.
What sets the Ryze Trello apart is its ability to capture clear aerial photos using its 5 MP sensor camera despite being classified as a toy drone by many enthusiasts.
Its EZ Shots allow beginners to record pro level videos and share them via their smartphone to social media. Videos can be shot at a respectable HD720.
You get a set of propeller guards to keep beginners from damaging the propellers on branches and other obstacles.
This is a super light drone at just 2.8 ounces, which makes it safe even in the event of a crash into a person. Having owned one of these, I can vouch for its small size- it is literally smaller than my hand.
This isn’t just another fancy flying gadget; it was designed specifically with beginner pilots in mind. Its user-friendly interface makes learning how to control and maneuver very straightforward—no need for any prior experience.
If you’re new to drones but want something reliable and fun right out of the box – then look no further than the Ryze Trello. With this model under your belt (or rather up in sky), your journey into photography will be off on exactly the right note.
Holy Stone HS720E Drone
The Holy Stone HS720E stands out among beginner drones with its impressive specs and safety features. This drone offers an exhilarating flying experience thanks to a maximum range of up to 1600 meters.
One key feature that makes the Holy Stone HS720E easy for beginners is its long-lasting battery life. It provides up to 26 minutes of flight time, allowing you ample opportunity to perfect your piloting skills or capture stunning aerial photos.
Moreover, it’s equipped with advanced obstacle avoidance sensors which play a crucial role in collision prevention. These sensors make sure that even novice pilots can fly this drone without worrying about unexpected crashes or damages.
Besides the robust safety measures, what truly sets the Holy Stone apart is its excellent image quality. The onboard camera sensor produces high-definition footage that would impress even seasoned photographers.
The intuitive remote controller designed for the Holy Stone simplifies operations making it one of the best choices for beginners looking to get into FPV drone flying. With a little practice on this user-friendly interface, any newbie pilot will be able to navigate complex environments effortlessly and safely.
A Closer Look at Specifications
Diving deeper into specifications reasons why many choose this model include max altitude capabilities and intelligent flight modes such as follow me and waypoint mode – both are superb additions considering its price point.
This drone like much more expensive drones offers person tracking, which makes it much easier for beginners to use since the drone can lock onto and follow a target. It also includes Follow Me, Tap Fly, and Point of Interest fly modes for beginners.
The 4K camera with image stabilization allows even a beginner with jerky motion to achieve stable footage. It even has an auto return to home feature which for a beginner can often mean the difference between losing a drone once it disappears behind an obstruction and not.
Note: While all these factors contribute towards making it an ideal choice for novices wanting more than just toy drones; remember no single drone fits all needs perfectly so always consider personal preferences before purchase.
Potensic Atom SE Drone
If you’re seeking a drone that’s compact yet feature-packed, the Potensic Atom SE is worth considering. This lightweight drone at less than 249 grams is ideal for beginners and offers an excellent balance of performance and affordability. If you crash it will not do damage like a larger drone.
One standout aspect of this flying gadget is its 12 megapixel still and 4K video camera sensor. This allows it to capture high-quality aerial photos and videos – perfect for those who love photography but are new to drones. It also has ShakeVanish technology which helps new pilots with steady footage, in addition to being level 5 wind resistant.
The video quality isn’t the only impressive feature; another major drawcard is its flight time. With up to 31 minutes on a single charge, there’s plenty of time for you to explore your surroundings from a bird’s eye view before needing to land.
The SurgeFly flight control system includes several flight modes including a beginner one. This mode assists beginners and prevents things like high speed flying available on the sport mode. Other modes include Follow Me, Waypoint Flight, and Circle Flight.
It range is an impressive 13,000 ft, which will ensure you do not lose control of your drone even if you make some newbie navigation errors. Not only that, it will fly back on its own if it runs low on power.
Why Choose The Potensic Atom SE?
The small size makes it convenient for travel, allowing budding photographers or videographers on-the-go easy transport without sacrificing functionality. It also has intelligent flight modes which make controlling it easier than ever.
This flying wonder not only comes with obstacle avoidance sensors ensuring safe flights but also collision avoidance mechanisms adding an extra layer of safety during operation – because we know how heartbreaking (and expensive) crashes can be.
An Ideal Beginner Drone
No doubt about it, getting started in drone photography can feel daunting. But the friendly interface offered by the Potensic Atom SE, coupled with its robust features set within such a small package, certainly lessens any learning curve.
So if you’re just dipping your toes into the world of drones, or need a reliable, compact companion for your adventures – Potensic Atom SE might be exactly what you’re looking for.
Autel EVO Nano Drone
The Autel EVO Nano drone packs professional-grade features into a compact design, perfect for both beginners and experienced pilots. Its small size doesn’t compromise its performance, with impressive specs that rival more expensive models.
This lightweight drone boasts an excellent image quality of 50 MP. With this resolution, you can capture stunning aerial photos with remarkable detail and clarity. The Autel EVO Nano also has a maximum flight time of up to 30 minutes – longer than many drones within the same category.
DJI Air’s Rival?
In terms of capabilities and size, the Autel EVO Nano is comparable to DJI Air. However, it holds its own by offering tri-directional obstacle detection sensors for safe navigation even in complex environments.
The inclusion of these collision avoidance sensors makes flying indoors safer as they help prevent accidental crashes or bumps into walls or furniture. Now isn’t that nifty?
A User-Friendly Flying Experience
To make things easier for beginner flyers but still fun for pros alike, the Evo Nano offers intelligent flight modes like follow me and waypoint navigation. This feature allows users to set predetermined paths on their smartphone app which lets them focus more on capturing great shots rather than piloting.
If your battery runs low or signal gets weak while flying high above scenic landscapes, the return-to-home function ensures your drone lands back safely at its take-off point. Talk about peace-of-mind.
Autel Specs
This drone is under 250 grams making it safer to fly. It can track moving objects eliminating the need for manual piloting. It features one button takeoff and landing, which are the critical times when many drone crashes happen. It has a very user friendly app made for beginners to drones.
FAQs
What is the easiest drone to fly with camera?
The DJI Mini 2 ranks as the easiest drone to fly, thanks to its user-friendly interface and solid flight stability.
What drones are easiest to fly?
Drones like the Ryze Tello and Holy Stone HS720E are known for their ease of use, making them perfect for beginners.
Is it easy to fly a drone camera?
Flying a camera drone can be simple with practice. Beginner-friendly models have intuitive controls that help you learn quickly.
What is the best beginner drone with follow me?
The Potensic Atom SE stands out due to its “follow me” feature combined with an affordable price tag and compact design.
Conclusion
Controlling a drone isn’t complex; it’s easy when you have the correct equipment. The joy of piloting easy to fly camera drones is unparalleled and now it’s within everyone’s reach.
From the DJI Mini 2 with its lightweight design and exceptional image quality, to the fun-packed Ryze Tello offering affordability without compromising on flight experience – we’ve explored them all.
The Holy Stone HS720E packed with safety features, Potensic Atom SE’s compact size ideal for indoor flights, or Autel EVO Nano that gives professional-grade features in a small package – each has something unique to offer.
No matter what your skill level might be, there’s an option out there just waiting for you. So go ahead! Choose one that fits your needs best and let those wings soar! Click the following link to learn tips for drone photography.