Want Outdoor Photos with Perfect Color? This LR Trick is All You Need to Know (VIDEO)
Are you having problems getting the tint right between green and magenta, or between yellow and blue tones? Well, join the club. It’s all about achieving proper White Balance during post processing—a popular and transformative topic of concern to amateurs and pros alike.
We’ve discussed the power of Lightroom’s Color Balance tools in the past, but this tutorial from James Feaver is simpler than most, with a quick and very effect three-step process that anyone can master in less than five minutes. Feaver is a freelance landscape pro who posts twice-weekly videos for beginning Adobe users who want to take advantage of his finely honed image-editing skills.
Here’s the problem Feaver intends to solve now: “A lot of photographers struggle with finding the right White Balance, especially when shooting with the Auto setting, because this can be incredibly challenging.” That is, unless you understand the straightforward method he demonstrates below. By modifying your workflow as Feaver recommends, this is one challenge that you can cross off your list.
There’s even a way to make a “preemptive strike” when shooting in the field if you have a “gray card’ in your bag. This simple accessory is almost foolproof for precisely defining White Balance to achieve correctly neutral tones. It’s admittedly another gadget to carry, but Feaver demonstrates how it will also prove valuable when sitting behind the computer and working with Lightroom’s Eyedropper tool.
The Histogram is another versatile Lightroom tool that Feaver says is underutilized for this particular task. That’s because the Histogram doesn’t just show us the exposure, it also illustrates the mixture of red, green, and blue tones within an image. Therefore, “All you to do to get the White Balance right is to match up the red, green, and blue peaks in the graph using the Tint and Temperature sliders.” It can be as simple as that.
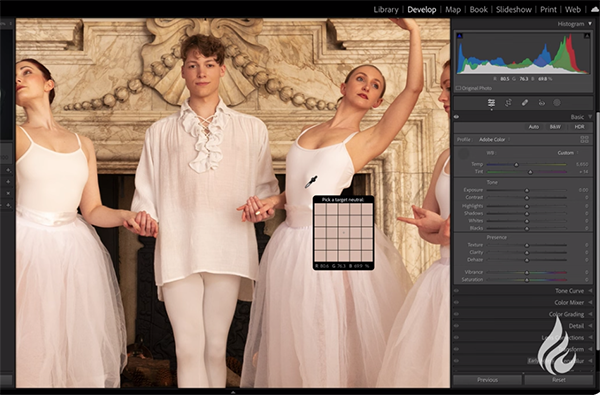
The third trick involves the use of Lightroom’s oft-ignored color Picker tool, and Feaver demonstrates how this one factors into the equation. Keep in mind that “perfect” White Balance may not be what you want if unique effects are what you’re trying to achieve. But Feaver’s advice will help you do this too.

Feaver’s instructional YouTube channel is full of helpful lessons like this one, so be sure to pay a visit.
We also suggest watching the tutorial we posted not tong ago from another post-processing expert who explains how to transform dull midday photographs by adding a spectacular sunset effect in Lightroom.