Disable These Photoshop Settings NOW for a More Efficient Workflow (VIDEO)
We occasionally provide expert advice on configuring the Photoshop workflow so that it meets your specific needs, and this typically involves revealing hidden features or activating settings that are disabled by default. The tutorial below from the Dansky instructional YouTube channel takes the opposite approach; namely, suggestions for turning off certain settings that one pro says will just slow you down.
Instructor Daniel White is an image-expert whose videos are both informative and fun because they typically include a bit of sarcasm. He introduces today’s episode like this: “To make the Photoshop experience a lot simpler and more streamlined there are a bunch of settings to turn on, and some you definitely need to disable. This lesson is devoted to the latter.
White first turns his attention to settings recently added by Adobe that are active by default, and he explains why he recommends turning off the Show Transform Controls option. Keep in mind that all of his tips are subjective, but you’ll see why he finds this particular setting so distracting. He also provides a simple keyboard shortcut for toggling it on and off.

There are two other settings in the same dropdown panel that White says are equally useless and distracting, and these are called Show Layer Bounds on Hover, and Show Hover Bounds from Layers. By nixing all three aforementioned settings you’ve already begin cleaning up the mess.
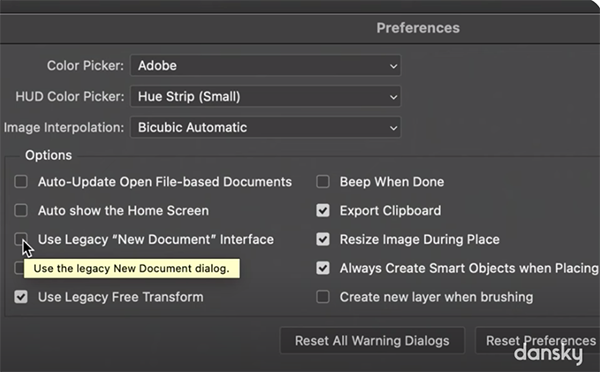
White moves on to “a bunch of settings in Preferences that you need to change,” beginning within the General list of options. You’ll see why he disables the Use Legacy Free Transform setting. Another timesaving tips is turning off “Auto Show the Home Screen, and the awkwardly labeled Use the Legacy New Document Dialog options for reasons he explains.
At this point you’re less than halfway through White’s list, but this one-time task is both easy and well worth your effort. So take a few notes, sit down at the computer, and make some or all of the changes White recommends for accelerating Photoshop and improving the results you achieve.
On a similar note, don’t miss the tutorial we featured earlier from another post-processing expert who demonstrates how to take advantage of a game-changing Lightroom technique that most experienced users can’t live without.