Nikon Z photographers who want a lightweight telephoto zoom have only a handful of options. Two of the most interesting choices are Nikon’z own Z 24-200mm f/4-6.3 VR and the Tamron 70-300mm f/4.5-6.3 Di III RXD – which is Tamron’s first official autofocus lens for the Z system. If you’re on the fence, which one of these lenses should you get? Here’s what you need to know.
Experienced landscape photographers understand the importance of simplifying complicated vistas so that viewers aren’t confused by a myriad of elements within the frame from foreground to background. In that sense, a great photo is one that helps direct one’s eye through the frame.
Artists, graphic designers, and illustrators often think of “visual hierarchy” as they work, and as a photographer you should do the same. In simple terms this means asking yourself, “What’s the most important element in my scene,” and capturing the image with that in mind. Or as photographer Mike Smith puts it, “To make an effective image you want to structure it so that what you see as important is seen by the viewer as important” when looking at your work.
On rare occasions, simple cropping is all it takes to simplify a confusing scene. Typically, though, more thought is required to make sense out of the chaos you see through the viewfinder. Once you’ve identified the key subject of the scene, there are several effective ways to give that element more emphasis and weight.
In the tutorial below British landscape photographer Mike Smith provides a helpful checklist for getting the job done. He demonstrates how to use scale, color, size, and other attributes to accentuate the key area in a photo and capture images that others don’t find confusing.
Iconic Hungarian-American photojournalist Frank Capa once remarked, “If your photos aren’t good enough, you’re not close enough,” and that’s an apt lead-in to Smith’s discussion of scale. The point here, according to Smith, is basically this: “Our brains assign a high level of importance to things that are bigger than others.” He then provides a few shots taken from the same camera position to illustrate how this works.
Smith also demonstrates how to use color to move an object up the hierarchy of importance to capture a viewer’s attention. In this case he uses of photo of a castle bathed in late-day golden light. This image works because both the sky and water in the foreground have dark bluish tones that make the yellowish castle really stand out.
The thoughtful use of contrast is another tool you can use the create a heightened sense of importance. If you have difficultly discerning subtle variations in contrast, Worth suggests switching the camera to b&w. By doing that subtle differences between areas in the frame become readily more apparent.
Worth offers several more great tips for emphasizing the key element in a photo, including the importance of proper alignment among elements, and how exposing for a silhouette can be super effective with the right light. The bottom line is this: carefully scrutinizing a scene and following Smith’s advice is more likely to yield better images than would a bunch of more exotic gear.
If you’re new to shooting in Raw and need some help color grading your images, the tutorial below from the PHLOG Photography YouTube channel is just what you need. Even if you’ve done this before, there are likely a few tips and tricks that will speed up your workflow and deliver superior results.
German landscape photographer Christian Mohrle is a very adept instructor and in this episode his demonstrates a straightforward method for editing Raw files for great color. Best yet, his approach delivers spectacular results for photographers of all skill levels. Be sure to download the demonstration image using the link beneath the video so you can make the enhancements yourself as they’re explained.
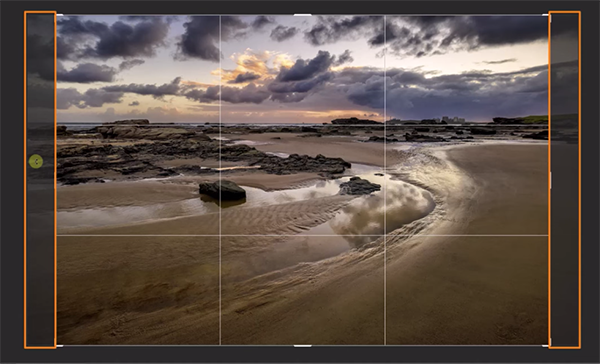
Mohrle begins with some very basic Raw adjustments for achieving a good base image for the refinements that follow. He jumps into Photoshop’s Raw editor and changes the profile from Adobe Color to Adobe Standard to lessen contrast and slightly brighten the darkest areas in the frame. He then moves to the Basic panel for a few other enhancements.
Because his goal is to use a warm color grading style, his modifications begin by applying a Golden Hour look. He also fixes the blown-out areas of the sky to achieve greater detail, slightly tweaks shadows for the same reason, and adjusts the blacks for a “dreamy effect.”
Now that the exposure looks pretty good, Mohrle refines the image further by adding a bit of texture and sharpness, while dropping Clarity and Dehaze. He also raises Vibrance slightly (which he’ll increase further later), and now it’s time for local adjustments to specific portions of the scene.
Mohrle employs several simple Masks, beginning with a Color Range Mask and a linear Gradient over the left side of the sky. These enhance blue tones for more impact and add Contrast to accentuate the clouds. He also uses multiple Radial Masks on the right side of the sky to introduce a bit of glow. You’ll see how to rotate the masks to match the direction of the light. Bringing up the blacks and further dropping Dehaze in these areas further enhances the glow effect.
After modifying Hue and increasing Saturation it’s time to add more Masks to various areas of the image. By doing so Mohrle enhances color, exposure and other key variables in the foreground and mid-range of the shot, and he walks you through every step in the process.
With the color grading complete, Mohrle directs his attention to Photoshop’s Details tab for some very careful sharpening. Here he describes the Radius settings he prefers for this particular task.
At this point the eye-catching transformation is almost complete. The final adjustments include further enhancing the glow for an “Orton Effect,” a bit of Dodging, and the use of a Gradient Map to wrap things up.
Experienced landscape photographers often make an artistic decision before setting up a shot, and it’s one less-experienced shooter often ignore; namely, whether to capture the image in color or black a white. The decision you make can have a huge impact on the photos that follow.
The behind-the scenes video below from British pro Ian Worth discusses how to decide whether to shoot in color or b&w (or make a conversion during the editing process. He then provides several important tips for getting the job done if b&w is your choice. As you’ll see, the characteristics of a scene greatly factors into the equation.
There are distinct advantages to both color and b&w photos, and Worth demonstrates how they evoke different emotions. Worth explains that “with color photography my aim is to capture a natural look that mimics how I see things with my own eyes.” When it comes to b&w imagery, however, he says “that presents a completely different reality.”
Worth says a big benefit of shooting in b&w is that is allow you break free of conventional restraints. And unlike with color images, b&w photos often thrive on days when there’s a clear blue sky. That’s because “the simplicity sometimes help to balance a composition that might otherwise be dominated by texture.”
Technical matters aside for a moment, Worth says “learning to see in b&w” is a key ingredient for making great monochrome images. Once you develop that perception, other factors like composition, exposure, and camera settings tend to fall in place. Worth says his first step when shooting b&w imagery is to “examine the interplay between light and shadow within a scene.”
Color photos often include contrasting colors that help make the shot. With b&w, however, Worth says “the scene should have its own inherent contrast based upon tones, textures and shapes.” The example he provides is an image of a green field with a blue sky, that makes a nice color image. In b&w, however, those two colors look virtually identical and are rendered a mid-gray–devoid of any contrast between the tones.
Worth discusses several other important considerations for shooting attention-grabbing b&w photos that are easy to employ. As you’ll see, many of these techniques involve making the best use of texture, light, shapes, and shadows.
While watching the lesson pay close attention to how Worth says he visualizes various scene scenes, because his manner of “seeing” is a big part of the process. Then head over to his YouTube channel for more helpful tips and tricks for shooting and editing landscape photographs.