Change Your Camera’s Picture Profile Settings for Landscapes, Wildlife, Portraits & More (VIDEO)
Have you stumbled across a setting in your camera’s menu called “Picture Styles” or “Picture Profiles” and wondered what they’re all about? If so, you’ve come to the right placed today because choosing the best option for the task at hand can make a big difference in your results.
Instructor Simon d’Entremont is a professional Canadian photographer specializing in landscape and wildlife imagery who’s very generous about sharing the secrets to his success. In this 10-minute video he demystifies the concept of Picture Profiles and reveals why both Jpeg and Raw shooters should understand how they work and how to change them.
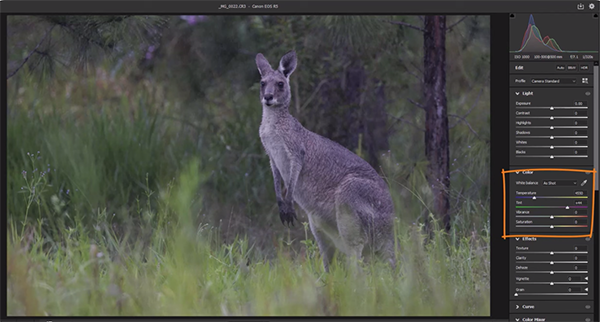
Simon begins by describing the fundamentals of Picture Styles, explaining that when shooting Jpegs (unlike with Raw files), the camera makes several adjustments on your behalf, like noise reduction, contrast, sharpening and saturation. As he says, a Picture Style is simply “the group of these adjustments made by the camera to improve the look of the image” before you do any editing yourself.
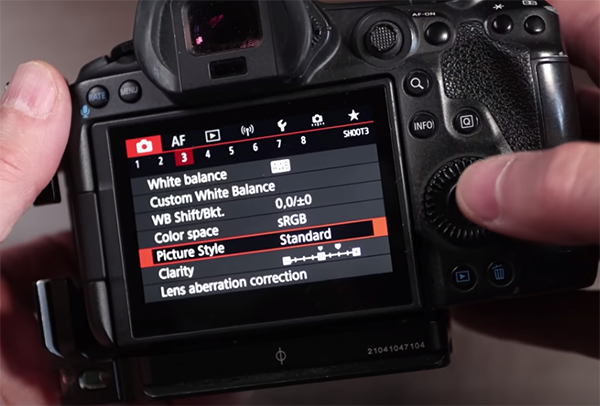
The nomenclature changes from brand to brand. For example, Canon calls these “Picture Styles,” Nikon refers to them as “Picture Controls,” Sony describes the settings as “Creative Styles,” and Fuji uses the term “Film Simulation.” The point is that you can change these profiles from the default setting, typically called “Standard,” by going into the camera menu and choosing among several options.
The most obvious reason you should care about all this is if you regularly shoot Jpegs, because the aforementioned processing decisions made by the camera are dictated by the Picture Profile in use. And here’s the key: Each profile is designed to be more flattering to certain types of photography than others.
Simon describes the attributes of Picture Profiles that work best for landscape photography, as compared to those better suited for portraiture and other genres. He illustrates this point by comparing the same image shot with a different profile, and the results are quite clear.

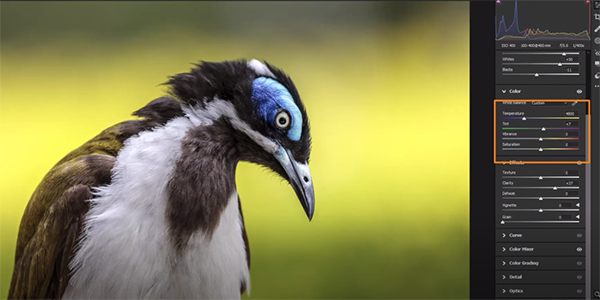
He also explains how to tweak various in-camera profiles by using simple sliders in the menu to fine-tune the look of a photo. Simon then discusses a couple more reasons why Picture Styles can be very important for your particular style of shooting.
The lesson concludes with an interesting discussion about how Raw shooters can adjust their Picture Profiles to have a more accurate histogram for capturing better images shot in trickly lighting scenarios without blowing out highlights or crushing shadows. There’s much more to learn on Simon’s very popular YouTube channel, so be sure to take a look.
And speaking of in-camera adjustments, don’t miss a recent tutorial we posted with the best iPhone Camera settings to use, and a bunch of pro shooting tips.