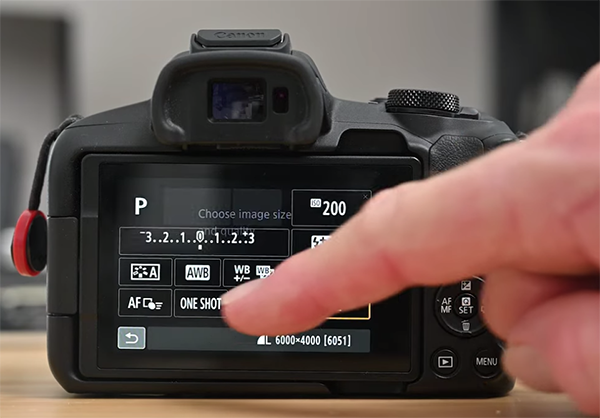
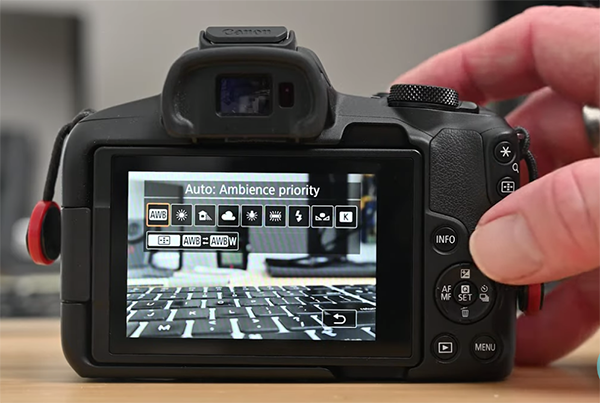
Let’s face it: We all aspire to “shoot like a pro,” regardless of how we make a living. And whether or not that’s a realistic goal, it doesn’t hurt to expand one’s skills as much as possible for the best possible photos.
One way to emulate true professionals is to employ some of their shooting and editing tricks, and there’s a bunch of the latter in the tutorial below. In barely 18 minutes you’ll learn what one pro calls, “13 Lightroom cheat codes you must activate in 2023.”
As Denney explains, “there are a ton of cheat codes tucked away inside of Lightroom, and I’m still uncovering new ones from time to time.” Hopefully this lesson will reveal at least a few that you don’t already know. We suspect that’s the case, and the result will be a faster and more efficient editing workflow,
Shutterbug readers appreciate Denney for his calm, straightforward, and reassuring approach. The baker’s dozen of ”essential” tips and tricks in this lesson don’t appear in any particular order, so jot down a few notes so you can refer to your cheat sheet as needed.
The first trick involves enabling Solo Mode, and if you’re an organizational “neat freak” it may be your favorite. The benefit here is that is greatly simplifies multi-step edits when you have a long list of tools and panels visible on your screen. By clicking on Solo Mode, however, Lightroom collapses everything but the section you’re working on for a clean and simple workspace.
Sound interesting? We’ll there’s another dozen of equally helpful tips in this video, so take a look, make a list, and process your images more efficiently so you can get back out in the field and do what you love most.
If you appreciate this tutorial we’re sure you’ll like the one we posted earlier, explaining how to use what another expert calls “Lightroom’s best secret tool.”
When most of us got started in photography we were told to “always shoot with the sun at your back.” That advice was reasonable for beginners interested in capturing simple images with a “Kodak Moment” look.
Now that your skills have expanded and you’re looking to make photos with a more compelling look, it’s time to try the opposite approach; namely, shooting against the light. Doing this will result in very impressive images, as long as you processing them properly.
Backlit photography is a particularly interesting technique for outdoor portraiture. At first your images may appear too contrasty with dull colors, and your model will likely be underexposed. But the tutorial below explains how to fix all that and more with a few clicks in Photoshop.
Instructor Justin Laurens is a professional portrait photographer and a retouching expert, and he explains how to get the job done in less than 13 minutes. While this episode involves enhancing portrait photos, you can also use his tips for other types of outdoor subjects.
As Laurens says, “outdoor backlit portraits can make for some dreamy, visually striking and cinematic-looking images because of the way the halo or rim light makes your model pop out of the background and appear three dimensional.” The main challenge with editing high-contrast images like these is understanding how to “relight” the model and the background to create a vibrant and realistic portrait.
Laurens walks you through a step-by-step method he uses regularly which involves adjusting exposure to correct overly bright highlights and crushed shadows, but that’s only half of the battle. Equally important is his color grading method for really making the photos pop.
We urge you to watch until the end, after his transformation is complete. That’s because Laurens wraps up the lesson by explaining how to replicate your edit and use it to batch-edit multiple photos in seconds.
Are you looking to transfer pictures from your computer to your iPhone? If the answer is yes, you have come to the right place.
There are various ways of doing this image transfer. Different methods involve the use of different software or hardware. I have tried and tested many approaches.
I will share the best ways to transfer pictures from your PC to your iPhone. I will include both free and paid methods. Let’s get started.
Generally, photos can be transferred from a PC to an iPhone using the following ways: with iTunes, without iTunes, with USB, wirelessly without USB, and using a cloud service. I will describe all these methods.
With iTunes
When you think of transferring images from PC to iPhone, the iTunes software will come to the mind of most people. While many feel that iTunes is only available for iOS and Mac platforms, the iTunes software is also available on the Windows platform. You can download it from the Microsoft store for free.
The steps to transfer pictures from PC to iPhone using iTunes are given below.
1. First, you need to connect your iPhone to your computer using the appropriate data cable.
2. Now, open iTunes on your PC.
3. You will be able to see your iPhone on iTunes.
4. You can see a mobile icon on the left side of iTunes. Click on this icon for accessing the settings on your iPhone. You can see the “Photos” option now. Click on it.
5. Now, you can see the “Sync Photos from” option. Make sure that the checkbox on this option is ticked. There will be three options, All folders, Selected Folders, and Include videos. For photo transfer, you need to select either the All folders or Selected folders option. You need to put all the photos for transferring to a particular folder and select this folder from the drop-down menu on the right side. If you are interested to move the video files, you can select the include videos checkbox too.
6. Once you have set the appropriate folder, you can click on the “Done” button. After that, click the “Apply” button. Now, iTunes will start copying the pictures from the folder in your PC to your iPhone.
When you use iTunes to transfer images, it will overwrite the existing saved images in your iPhone, which are inside the same folder. At the end of the sync process, iTunes will ensure that the image folder on your iPhone is an exact replica of the files and folder on the PC. If you already have some pictures in this folder on your iPhone, they will be erased.
Without iTunes
If you are interested to transfer pictures from PC to iPhone without using the iTunes software, you need to install another additional piece of software.
One such software that I tried and tested is CopyTrans Filey. You can install the CopyTrans Filey application on your Windows PC for image transfer. You can get this software for free if it is for personal use. This software is available only on the Windows platform.
The steps are given below.
1. Connect your iPhone to your PC using the data cable. If you want to do the image transfer wirelessly, you can tick the check box “Use WiFi” and click “Let’s go”. I recommend using the USB data cable method for fast file transfer.
2. Once your iPhone files get displayed in the CopyTrans Filey software, you can navigate to the desired folder where you want to copy the photos.
3. You can see a blue rectangle in the CopyTrans Filey software that tells you to drag and drop files. You can select all the desired image files from your computer and drag & drop them into this rectangle for copying. You also have the option to choose the files manually for transferring. Once the copying process is complete, you can see all the copied image files listed inside the folder in this app.
4. Now, if you check your iPhone, you will be able to see a folder called “iTunes Files.” All the copied pictures will be inside this folder.
This application is capable of doing more actions than just image transfer. You can use it to transfer other types of files like pdf, docs, music files, etc. You can also use this software to delete unwanted files from your iPhone. It will help to create some extra storage space on your iPhone.
Transferring Images Wirelessly (Without USB)
If you dont want to connect your iPhone to PC via the data cable for image transfer, you can use the Wireless interfaces in both of these devices.
There are many who love to use the wireless image transfer method. For wireless transfer, you can use any of the cloud storage services. They include iCloud, Google Photos, OneDrive, and Dropbox.
Image Transfer using iCloud
If you want to use iCloud as your wireless image transfer option, you need to install iCloud on your PC. After installing iCloud on your PC, you need to turn on the iCloud Photo Library. Once you enable this option, the photos on the PC will get uploaded to iCloud. When you connect your iPhone to WiFi, the photos in iCloud will get synced to your iPhone.
The exact procedure is given below.
1. Open the iCloud application on your computer.
2. You can see the Options button here, which will be next to “Photos”. Enable the iCloud Photo Library option here.
3. Make sure that the “Upload New Photos and Videos from My PC” option is always ON in the iCloud software.
4. If you click on the “Change” option here, you can see the option to select the photo folder that you want to share with iCloud. All the pictures in this folder will get shared through iCloud.
5. Go to Settings on your iPhone.
6. Select the iCloud option from the settings.
7. You can see the Photos option when you scroll down.
8. You can see the toggle option in the iCloud Photo Library here. Once you enable it, all the photos will get synced to your iPhone.
If you don’t want to install the iCloud software on your PC, you can go to the iCloud.com website and follow the same procedure for image transfer.
Image Transfer using Google Photos
You can also use Google Photos to transfer pictures from PC to iPhone and it is completely free.
2. You need to log in to Google photos with your Google account. If you don’t have one, create one.
3. Now, you need to create an Album in Google photos. All the images that you want to transfer from PC to iPhone need to be uploaded to this Album. Choose the “Upload” option to upload images.
4. Next, you need to install the Google Photos app on your iPhone. You can download the Google Photos app for free from the App store.
5. You need to sign in to the Google photos app with the same Google account that you have used to upload the pictures.
6. Once you log in, you can see the Album and the pictures. Download these pictures to your iPhone.
Image Transfer using Microsoft OneDrive
You can also use Microsoft OneDrive to transfer photos from PC to iPhone. They provide free storage space of up to 5GB. If you require more storage space, you need to go for any of their paid subscription plans.
The steps are given below.
1. You need to set up Microsoft OneDrive first on your PC.
2. Once the setup is complete, you can copy all the photos that you want to transfer to your iPhone to the OneDrive folder.
3. Next, you need to download and install the OneDrive app on your iPhone. After installing, you need to sign in with the same OneDrive account that you have used on your PC.
4. Once you sign in, you will be able to see all the pictures in the OneDrive folder that you have shared through your PC. You can download these pictures to your iPhone.
Image Transfer using Dropbox
Many photographers use Dropbox for storing images and also for sharing soft copies of the final images with clients. If you are also using Dropbox, you can use it to transfer the images from your PC to your iPhone.
The procedure to transfer images to iPhone using Dropbox is given below.
1. You need to install Dropbox on your PC first (if you don’t have one).
2. You need to create an account on Dropbox first if you are using it for the first time. If you already have one, you can sign in using these details.
3. You can see the upload files option inside Dropbox under My files. You can use it to upload images from your PC to your Dropbox account.
4. After uploading all the images that you want to copy to your iPhone, you can install the Dropbox app on your iPhone.
5. Open the Dropbox app and sign in with the same account details. You can see all the shared images under the My files section. You can download all these pictures to your iPhone.
Dropbox is a paid software. They offer different subscription plans for both individuals and professionals. They do offer a 30-day trial option with some of their subscription models. Feel free to check it out if you are interested in trying Dropbox for image transfer.
Conclusion
Even it might at first seem like an impossible task, transferring photos from a PC to and iPhone is actually quite easy provided you follow the steps exactly.
The first serious lens that I ever bought as a photographer was one of Nikon’s 105mm macro lenses. It might as well have been glued to my camera. Landscapes, cityscapes, and of course macro photos – 105mm was my go-to focal length for everything. Even though I’ve moved on from those days, it’s safe to say that 105mm macro lenses remain close to my heart. That’s why I was so excited to review the Nikon Z MC 105mm f/2.8 VR S Macro, one of two macro lenses so far for the Nikon Z mirrorless system, and a beauty of a lens.