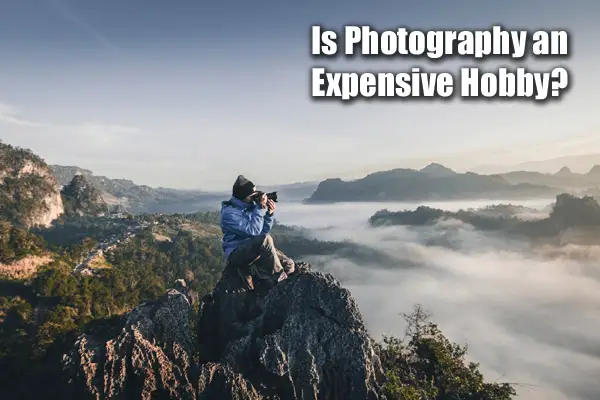
Mother Nature bestows the human eye with spectacular beauty. As I drive along the Oregon coast, I can’t help but notice the crashing surf as it pounds against the sea stacks at sunset. I feast my eyes upon majestic mountain ranges of rugged splendor. I admire the rolling hills of prairie farmland and sandstone arches that decorate the Southwest. And these are but a few of the glorious features of her natural grandeur. While these incredible testaments to nature certainly amaze even a casual viewer, Mother Nature also works her magic on a much smaller scale. To the discerning eye, natural beauty appears everywhere. It just needs to be noticed. Look past the obvious and you’ll be surprised how many images you can create that are made of patterns, shapes and lines.
Become An Observer
While driving north on route 191 at 40 mph, the Grand Teton is magnificent. Unfortunately, this is the way too many visitors to the park see the range. But as photographers, we know better. We get there at sunrise, stay until sunset and photograph the majestic peaks in splendor-filled light. But how many of us stop to look north and south at the other amazing peaks? How many look down at their feet to see if something photogenic lurks near their toes? Many of us go in the fall to catch the aspens at their peak, but how many walk up to the trees to get a close-up view of the veining in the leaves or the subtle compositions of a group of them on the end of a branch? Think to yourself, “What else can I photograph?” and all of a sudden, many new compositions will unfold.
Shooting Patterns
A pattern is created when a repeated design or form continues on and becomes recurrent. Patterns in nature become more obvious when seen on smaller scales. One that immediately comes to mind is a dahlia in full bloom. A central bud is surrounded by concentric petals as they radiate out from the bud. Ferns are another great example. Patterns that flow smoothly tend to make great subjects. On a larger scale, continuous bends in meandering rivers, aspen trunks in a large grove, the lines of wildebeests during the migration and more also work well. The pattern doesn’t need to be in-your-face obvious. Study your surroundings and environment more closely and you’re bound to find patterns in the unlikeliest of places.
Shooting Shapes
Shapes carry ambiguity as there needn’t be rhyme or reason to them nor do they have to show patterns or lines. They just need to be definitive to the viewers of your images. Hillsides dotted with random smaller groves of aspens are a good example. A silhouetted tree against a twilight sky with a crescent moon framing it is a good example that shows ambiguity but also one that shows known shapes. “S” curves are classic shapes in all art forms. There’s no mistaking its shape and it works as a great line to course a viewer through your photos.
Shooting Lines
As just stated, the “S” curve is the most iconic line that comes to mind when a composition is made. It allows the viewer to meander through the image from one end to the other. Lines that lead the viewer to a specific portion of a composition also work to enhance the aesthetics of an image. Horizontal lines imply rest as this is the position you take when you go to sleep. Vertical lines imply strength. When you’re told to “stand up tall,” it sends a message to be alert, on the ball and take on the world. Diagonal lines imply movement. Roll a ball down any diagonal incline and it will move downhill. Build these psychological aspects of line use into your images to influence viewers of your images to feel at rest, feel strong or show speed and movement.
Whether you use patterns, shapes or lines symmetrically to show rhythm or in a more chaotic way to be less obvious, think about the message each sends and how they’ll influence those who study your photography. Each time you venture into the field, incorporate one of these concepts into your repertoire of tricks. You just may come up with that image that hangs on the wall.
To learn more about this subject, join me on a photo safari to Tanzania. Visit www.russburdenphotography.com to get more information.
Mirrorless cameras are here to stay. They have taken over the camera market as the new dominating camera type. Professionals and amateurs alike are waking up to the benefit of a lightweight mirrorless camera that can replace their aging bulky DSLR.
So why should you stay deprived of this new, remarkable, and game-changing photography system?
The idea of a mirrorless full-frame camera is hard to overlook. As general rule mirrorless cameras are all about the benefits of an interchangeable lens camera and the advantages of a full-frame sensor packed into a small body that’s often no bigger than a compact/bridge camera. In this discussion, we shall discuss the top five best entry-level mirrorless full-frame cameras that you can buy. So, without further ado, here they are –
Comparative Analysis Of The Best Entry-Level Mirrorless Full-Frame Cameras
Mirrorless full-frame cameras are truly game-changing in more than one way. So much so that even professional wildlife, sports, and landscape photographers are switching to mirrorless full-frame systems. These three being the most demanding and the most difficult photography genres speaks volumes about the dependency of mirrorless camera systems.
Canon’s EOS RP is the cheapest entry-level full-frame mirrorless camera that you can buy. This compact full-frame camera comes equipped with a 26.2-MP CMOS sensor and is paired with Canon’s DIGIC 8 image processor. The 5-fps continuous shooting speed isn’t something to be too excited about. It’s okay for shooting everyday photos but not suitable for sports and wildlife photography. What’s something to write about is the presence of the dual-pixel CMOS autofocusing that’s perfect for shooting movies.
When you’re shooting stills the 4779 selectable on-sensor phase-detection points gives you all the creative freedom that you need to shoot perfectly focused stills.
The Nikon Z5 is a recent addition to the mirrorless camera lineup of Nikon. This compact full-frame mirrorless camera is powered by a 24.3-MP sensor. The important features of this camera include a 5-axis image stabilization system that works with all compatible lenses.
Plus, it has a 273-point selectable hybrid focusing system. This system uses both a contrast-detection autofocusing mechanism and a phase detection autofocusing mechanism that helps to lock focus accurately when shooting both stills and movies.
The Nikon Z5 is capable of shooting 4K/UHD videos. The lack of N-Log, however, means you won’t be able to shoot a flat profile for color grading later on.
The only Sony on this line-up, and also the cheapest full-frame mirrorless that the company currently makes. Although several years old now, the A7 II is a capable camera in the right hands.
The main features of the camera include a 5-axis in-body image stabilization system and a UHD/4K video shooting feature.
The A7 II comes with a continuous still shooting speed of 4.5 fps. This is okay for shooting everyday photography but is not enough for shooting wildlife and sports.
Additionally, the full HD video resolution of the company is a bit of a deal-breaker because all the other cameras can shoot 4K/UHD. If you’re looking for a mirrorless camera that can also shoot great videos you will find the Sony a7 II to be less than equal to the rest of the cameras in this line-up.
The Sigma fp too comes with a BSI sensor. That means it’s a capable low light shooter and that shows up in the specs with a base ISO range of 100-25600 as well in its performance with clean RAW files.
The sigma fp has a fantastic fast continuous shooting speed of 18 fps. It’s the fastest among all the other cameras in this line-up. In that sense, the Sigma fp is a good option for sports and wildlife photography.
Let’s quickly check the autofocusing technology of the camera. Autofocusing on the Sigma fp is powered by a 49-point selectable contrast detection autofocusing system. The Sigma fp’s focus tracking is decent plus it also has eye detection, face detection, and focus peaking.
There is nothing to differentiate the five cameras in terms of the sensor as they all are equipped with a full-frame sensor of identical measurement and similar resolution. The real technology is however inside.
The Z6 incorporates a BSI sensor which promises superior low light performance. The built-in 5-axis image stabilization system promises blur-free images in most kinds of lighting and regardless of the lens that you pair with this camera.
The advanced 273-point phase-detection autofocusing system covers 90% of the frame and promises superior focus lock and focus tracking. This excellent autofocusing system also works when shooting videos.
One of the better features of the Z6 is the UHD/4K video shooting capabilities. What sets it apart from most other cameras is the presence of N-Log gamma that allows you to shoot a flatter source footage that you can color grade later on.
The 10-bit HDMI output lets you record clean footage to an external recorder which comes in handy when shooting in outdoor locations.
Which Camera Should I Buy?
These five cameras are an interesting mix and even though they’re all mirrorless units and that they’re full-frame camera systems they have their differences. In this section, I shall be discussing a few scenarios and picking the camera that I feel is the best choice to shoot within the given scenario.
Please note that these are my personal opinion and that you may feel you don’t agree with my opinion. Feel free to let me know what you think your pick would be.
Portrait Photography
All five cameras are great for portrait shooting. Resolution-wise and feature-wise they’re all perfectly capable portrait shooters. However, as a lot of photographers prefer using external flash/lighting to shoot portraits, I recommend using the camera system that comes with the biggest selection of OEM and compatible third-party lighting systems. In that regard, the Canon EOS RP and the two Nikon Z series cameras are my picks. You cannot go wrong with any of these three cameras.
Recommended camera – Nothing specific. Choose any of the Nikon or Canon systems.
Street Photography
The Sigma fp is the smallest and the lightest full-frame mirrorless camera on this line-up. At 370 grams (body only), this is a very lightweight camera that you can always carry with you. The perfect sort of camera for street photography. There is a tiny EVF available from Sigma for this camera – the EVF 11. The latest firmware upgrade offers support for this EVF which will extend your creative options.
Recommended camera – Sigma fp
Landscape Photography
I have no particular choice among these five cameras when it comes to shooting landscapes. All of these are extremely good cameras to shoot landscape photography. All of these cameras have sufficient resolution for shooting great quality landscapes that you can print large.
Recommended camera – Nothing specific. Choose any.
Wildlife Photography
While the Sigma fp’s blistering 18 fps continuous shooting speed sounds mouth-watering, its autofocusing is a 49-point CDAF system that’s going to be slow. On the other hand, the Nikon Z6 produces a relatively ‘fewer’ number of frames at 12 fps but that’s enough for all practical reasons.
Plus, it’s powered by a 273-Point Phase-Detect AF System. It’s going to be a much better choice when it comes to wildlife photography.
When shooting wildlife generally your subjects are perched in dark foliage or mixed with their surroundings. Plus, small eyes are difficult to focus on from a distance. That means you need a camera that has superior low-light performance.
Plus, in wildlife, the subjects are never quite standing at one place all the time. For example, if you’re shooting a cheetah in full steam or an Osprey in dive mode you will need a camera that has capable autofocusing that can keep up and a fast continuous shooting speed to produce enough frames. Sports photography is relatively ‘easier’.
Plus, and this is a big plus, the Z6 (along with the Z7) has been upgraded with the new firmware, and with it comes animal eye detection and tracking. This is a huge addition and will come in handy when shooting animals.
You will still have to use the Custom Function buttons if you choose to replace the OK button or continue using the OK button to initiate the lock-on. It’s now a lot easier to lock focus on animals. And in case you’re wondering, it’s easier too to focus on people.
Recommended camera – Nikon Z6
Sports Photography
Going by the performance of the Z6 in terms of wildlife shooting it’s safe to say that it’s ideally suitable for shooting sports photography as well. Between wildlife and sports, there is not much of a difference, except that you get a bit more light to work around.
Both the Z6 and the Sigma fp are capable cameras in that regard. The other three cameras produce too few frames per second and therefore you will have problems keeping up with the action and capturing the best moments if you plan on using any of them at your son’s soccer game.
Recommended camera – Nikon Z6
Movie
Shooting videos is about two things, autofocusing and the ability to shoot high-resolution footage in a flat profile. The Z6’s autofocusing is decent. It does a great job of tracking the subject even as it moves side to side and back and forth. But it’s still not my favorite when it comes to shooting videos.
The Canon EOS RP features Dual Pixel CMOS AF. This is by far the best autofocusing technology for shooting movies. The reason is this technology offers a smoother AF performance rather than the jerky AF performance of phase-detection autofocusing. This is better suited for rocking focus back and forth.
The Nikon Z6 features both N-Log and the ability to record 10-bit HDMI clean output to an external recorder. These two are great features to have for shooting videos and then color-grade them as per requirements.
Additionally, the Z6 features Focus Peaking and Zebra Highlight warning. Focus Peaking is a great tool for manual focus locking. I love using it when shooting videos. It allows me to precisely lock my focus manually rather than use the jerky autofocusing feature of the camera.
The Zebra Highlights warning is a great tool that tells me when I am clipping my highlights. Again, something that’s very beneficial for manual exposure settings.
Finally, let’s talk about the movie features of the Sigma fp. The Sigma fp features a 12-bit CinemaDNG mode that promises a stunning amount of RAW detail that you can further process to fine-tune the results according to your requirements.
Plus, it comes with a list of features that are tailor-made for movie enthusiasts. These include a “Director’s Viewfinder” function which is a great tool if you wish to emulate the different angles of view and how the image looks when shot using certain cine cameras.
I would put the Sigma rf slightly ahead of the Nikon Z6 in terms of video features. But only for ardent movie enthusiasts. For everyone else, the Nikon Z6 is the recommended camera. The Canon EOS RP misses out because of its digital image stabilization system which I am not a fan of.
Recommended camera – Sigma rf for professionals, Nikon Z6 for everyone else.
Concluding Thoughts
All these five cameras are excellent in their rights. In terms of resolution, there is nothing that sets them apart. It’s only the additional features that put one camera ahead of the other in terms of usability in specific situations.
The Nikon Z6 is the most all-rounded camera of the lot and that’s why it gets three recommendations out of five segments. It’s also my favorite camera of the five in the fray.
We hope that the above scenario-by-scenario pick of a camera was helpful for you to zero in on the camera that you need for the kind of photography that you want to do.
Below is a good video on differences between DSLRs and mirrorless:
If you’re interested in learning more about the advantages of shooting with a full-frame camera or want to know about how to choose the right mirrorless camera for you can find more information on our website.
Are you looking for techniques that can help you get close to wild animals? You’ve come to the right place. Wildlife photography is one of the most exciting and beautiful forms of nature photography. It needs a lot of patience and hard work, though.
This article discusses the techniques wildlife photographers use to get close to their subjects.
To get close to wildlife, photographers study their subjects habits and locations, camouflage themselves and use blinds, use specific tele lenses and converters, high resolution cameras, tripods and monopods and remote shutter releases. They use techniques for approaching animals and at times leave their cameras. Drones are also used. Read on for specifics.
Finding Locations
Do you want to know how to find places to take pictures of wild animals near you? Lakes, parks, botanical gardens, natural habitats, and forests are some of the places where you can photograph birds and wild animals.
Do online research. There is a lot of information out there what species can be found where. Besides websites about national parks etc, there are forums where you can find out first hand from people. There are also pamphlets available at welcome centers and tourist information centers once you get to your destination.
Raccoons and squirrels can be found in urban and suburban areas. And forests are home to hundreds of wildlife species, from reptiles and amphibians to birds and mammals. Find a secluded area in the forest, and observe silently.
The animals will show up when everything is silent. However, moving about will probably frighten the animals before you even see them. Are you an early bird? You can increase your chances of seeing the wildlife by getting up early in the morning.
Freshwater habitats like ponds, lakes, and rivers are home to over 100,000 animal and plant species. Find out which kind of animals are present, and when they are most active.
Natural habitats or protected areas offer habitat to several wild animals. In fact, they are vital to prevent the loss of threatened or endangered species. Natural habitats are one of the best places for you to get up close to the wildlife.
Telephoto and Zoom Lenses
Telephoto lenses have longer focal lengths and are great for bringing distant animals nearer. As a matter of fact, they make subjects appear much nearer than they actually are, some allow you to view the beautiful details of a bird which is just a dot with the naked eye. Telephoto lenses between 70 mm- 200 mm are very popular for wildlife photography but they can go much much higher.
Keep in mind as you try to head out with a long lens to capture some amazing wildlife photos that you will a) be likely more visible because of the large object b) will tire more easily if its a heavy lens c) will likely be noisier when approaching animals than with a small compact lens.
Many wildlife photographers are a fan of zoom lenses. Why? Because they allow for flexibility and give you a range of different focal lengths to use. Unlike a zoom lens, a prime lens gives you a single focal length. However, prime lenses are lightweight and tend to be more compact than zoom lenses. Additionally, they have a bigger maximum aperture, which allows faster shutter speeds and lets more light in.
A lens focal length, which is measured in millimeters, determines the view angle and the magnification. It usually ranges between 8 mm and 800 mm. If you have a long focal length, the magnification will be higher and the view angle will be narrower. And if you have a short focal length, the magnification will be lower and the view angle will be wider.
This makes it much easier to spot and follow an animal, especially a fast moving one like a bird, with a shorter focal length lens and much more difficult with a long focal length lens. But the latter one will get you closer to the animal more safely, whether its a dangerous animal like a leopard or you are shooting across a canyon and cannot walk any further to the edge.
You have to practice using very long focal length lenses before you head out, try it in a city where there are many small moving objects to focus on, or a sporting event. You can also limit yourself to a shorter focal length. Sometimes that 800mm heavy long less is overkill for the animal you are trying to capture, especially larger animals.
Tele Converters
Also known as extenders, teleconverters are gadgets that are mounted between a photographic lens and the camera body to enlarge the image made by the lens. Their purpose is to extend the reach of your lens and get nearer to birds and animals. As a matter of fact, these optical accessories increase your lens’s focal length by a factor of 2.0x, 1.7x, or 1.4x. A 2.0x extender will extend the focal length of a 300mm lens to 600mm.
Keep in mind that there is likely to be light loss with these as they add more glass so be careful what lens you use with them and the light your are shooting in.
Camouflage and Blinds
Blinds and camouflages are great tools that let wildlife photographers stay out of sight. Photography catalogs and magazines carry advertisements of several ready-made blinds. Some of these blinds are easy to assemble and light in weight. Camouflage clothing can help you get closer to animals. The best thing about camouflage clothing is that it is affordable and enables wildlife photographers to move as they want.
You can also purchase a ghillie suit, which is a kind of camouflage outfit made to blend with the background environment such as sand, leaves, or snow.
It is extensively used by hunters, snipers, and wildlife photographers because they have to get close to wildlife without disturbing them. In addition to photography stores, you can check out hunting stores like Cabelas.
It is not easy to take photos of animals from a close range. They could get scared and leave the area. However, you can blend with the environment around you and click photos from a close range by using a ghillie suit. The garment comes in four camouflage patterns: Leafy Green, Mossy, Woodland, and Desert.
Camera Resolution
Resolution is measured in megapixels (one million pixels) and pixels and it is the total amount of pixels that your digital camera can capture. It determines how big an image can become without becoming vague. And if you’re wondering what a pixel is, it is a small square portion of the digital picture.
The megapixel count and pixel information will determine the quality of your photos.
The greater the number of pixels in a picture, the higher the resolution will be. You can buy 50 megapixel cameras these days and even 100 megapixel ones, which will give you a larger digital photo. As a result, you will be able to crop more of the photo and still get enough detail on a small object in the photo, like a bird.
When buying a high-resolution camera, keep in mind that not all pixels are created the same, and some high megapixel cameras do not produce the same quality picture as others. This will affect what you can distinguish in a blown up cropped picture. Do your research before buying. Here is the popular Nikon D850 for example.
Tripods
The tripod is one of the essential tools in wildlife photography. It helps photographers stabilize their lens and camera and it is one of the best ways to decrease the blur in pictures caused by the movement of the camera.
If you are shooting with a teleconverter or in dimmer light, or with a long heavy lens, a tripod will do wonders in capturing that small faraway animal. For long heavy lenses, the lens, not the camera is actually attached to the tripod to keep the camera/lens combo balanced, and you will likely need a special gimbal tripod head such as this one.
The majority of tripods are usually made from aluminum or carbon fiber. Carbon fiber is light in weight, long-lasting, and resistant to rust. Aluminum may not be as light but its a little more durable, and much lighter than steel or iron.
Some of the factors you should consider when buying a tripod for nature photography are weight, size, construction material, load capacity, stability, height, and price point.
Keep in mind that as you will be taking pictures from different angles and in different conditions, the tripod you choose should let you shoot from high and low levels. The best tripods are easy and fast to set up, compact when folded, and light in weight. You do not want to be fussing around with your tripod as your subject animal comes into view, nor when a dangerous one approaches too close.
Even a monopod will give you some stabilization even for a heavy long lens.
Here are some of the best tripods for wildlife photography:
Binoculars are a quite useful piece of equipment for wildlife photographers. By improving awareness, binoculars help you find subjects you want to take pictures of quickly, as they are small and can be hanging around your neck. However, without binoculars, there are chances to overlook crucial details, particularly in dense environments.
Make sure to go through the owner’s manual when you purchase a pair of binoculars. Follow the maker’s instructions prior to using them.
Here are some of the best binoculars for wildlife viewing:
A gimbal is a handheld device that stabilizes your digital camera using sensors and motors. It is available for smartphones, mirrorless cameras, and digital single-lens reflex cameras (DSLR). So, the gimbal you choose should support your DSLR camera.
It is another way to keep your camera steady which will prevent blurry photos due to shaking, similarly to a tripod. Here is a good one.
Headlamp
Wild animals and birds are usually more active late in the evening or early in the morning. It almost means that wildlife photographers will spend some time in low light conditions. Therefore, they should essentially carry a headlamp with them. A headlamp is an essential piece of equipment for finding your way around the landscape at night. It does a fantastic job of lighting up your surroundings when you are walking at night.
It will also keep your hands free to work with your photo equipment and check your maps. Headlamps usually come with different brightness modes including a red more which will make you less detectable while still giving enough light to see what you are doing.
If you are looking for a good headlamp, here is one.
Remote Shutter Release
A remote shutter release is an extremely useful accessory, particularly for wildlife photographers. It lets photographers trigger their camera shutter from a distance without touching the camera. This means they are able to hide away from the camera in the bushes or behind a boulder. Yes, you have to be clever to get the best wildlife photos.
A remote shutter release is affordable costing between $5 and $20.
These devices come in many varieties:
a) Specialized camera triggers: Depending on your photographic requirements, specialized camera triggers can be wireless or tethered. Motion detection, lightning trigger, and intervalometers are some of the features of these camera remotes.
b) Infra-red remote shutter releases: These remotes are cheap, reliable, and easy to use. The downside is that they need batteries and have a limited range. Before you buy an infra-red remote shutter release, ensure your camera has a built-in IR receiver.
c) Wireless radio shutter releases: These devices have a broader range than infra-red remote shutter releases. Some remotes can release the shutter from an incredible distance.
d) Smartphone-based remotes: They work with most cameras that come with Bluetooth or Wifi connectivity. What’s more, they have a large range and are reliable.
e) Mechanical cable releases. They do not work with all kinds of cameras. However, the best part is that these remotes do not need batteries and are easy to use and reliable.
f) Tethered shutter releases: They connect to your camera with a cable or wire. They work with most cameras and are easy to use and reliable. However, tethered shutter releases need batteries and have a limited range.
Drones
Drone photography is a kind of aerial photography that depends on drones (remotely handled devices) to take videos or pictures. Also known as unmanned aerial vehicles, drones can cost anywhere from $300 to $60,000.
The best drones for shooting wild animals should be portable, have zoom capabililities, be reliable, have great battery life, and have very low noise. They can be used to get angles of animals you would never be able to with a handheld camera.
Some drones allow mounting of full size DSLRs underneath them, which gives you camera and lens options. However, a drone will not carry a heavy long lens unless its a large loud one. If you cannot use such a drone where you are going because of hiking etc, look for a small one with zoom capabilities and a decent camera like a Hasselblad.
Some of the best drones for wildlife photography are:
These drones will let you photograph the animals and birds in their natural habitat.
Patience and Quietness
It’s worth knowing that having patience is necessary to capture good wildlife shots. Whether you want to photograph deer or elephants, it can be beneficial to devote some time to studying the animals common to the area. Learning where the subjects are usually found and what time of day they are most active can boost your chances of getting excellent pictures.
Remember to remain still and quiet. Fast movements and unnecessary noise can frighten wildlife easily. You should remain calm to avoid frightening animals when taking their pictures. Once you get settled in and comfortable, do not move. After some moments of stillness is when you will see animals start to come out.
Leave your camera
Sometimes the animal you are attempting to capture is just too smart or shy to be photographed if you are there. Another option is to leave a camera unattended and leave the location, then come back some hours later or next day.
This can be accomplished with motion sensor cameras. Such cameras can be set up to be triggered by various animals and movements, a great invention for animals too shy or dangerous to be photographed in person. They often perform well in the dark which is another plus. Some of these cameras are listed here.
Keep in mind that if you are in an unknown open area where others may come, leaving a $200 camera with less picture resolution is preferable to a $5000 DSLR with a motion sensor.
Dealing with predators
While taking pictures of wildlife, keep in mind that some animals such as cheetahs, tigers, lions, and wolves, are predators, and can be extremely dangerous for you. Hence, you should photograph these predators with the utmost caution.
Stay in a place where you can take pictures of your subject but it cannot see you.
Stay downwind to prevent these dangerous animals from picking up your presence and smell.
Always take pictures of a predator from a distance.
Here is a good video on camera settings for wildlife photography:
Take Stunning Wildlife Pictures
Wildlife photography requires patience, dedication, time, commitment, and photographic skills. In addition to this, it also needs equipment and accessories, such as telephoto lenses, zoom lenses, headlamps, binoculars, and more. Above all, you should be ready to devote some time studying animal behavior and tracking them in remote areas. Some animals are active throughout the day. However, dusk and dawn are the best times for spotting several mammals and birds. Last but not least, patience, perseverance, and positivity are essential for success in wildlife photography.
What is still photography and what is still life photography? Are they the same?
In this article I will describe the differences and all you need to know about them, including techniques, equipment, lighting and selling photos.
The idea behind still photography is that you shoot images of items that are non-moving. A lot of things qualify for such a genre. Everyday household items like flower vases, pencils, coloring tools, watches, electronic items, utensils, everything qualifies as still photography subjects.
The terms still photography and still life photography are sometimes used interchangeably, which is both right and wrong at the same time. You see, still photography is any photography. The term still photography comes as a juxtaposition for video work. More precisely, when I say still photography, I mean images of non moving subjects.
Even in motion pictures and 3d animation, a still is one frame of a sequence, which alone represents a moment captured in time, unlike the changing scenery of a sequence.
What qualifies as a still life photo?
Throughout history still life has always shared this intimate relationship with artists. Everything qualifies as still life photography, from a vase of flowers to a bowl full of fruits and the modern Instagram image of a plate of food at a restaurant.
If you have ever taken art classes, you have probably been introduced to the idea of still life subjects in the form of a fruit bowl, a flower vase, or even a rock. You should be aware of the classic still-life look of still-life photography. This is the most simplistic example that I can give of what a still life photo looks like.
For those who have no prior art experience, a photograph that depicts an object at rest, in other words, not moving, is considered a still-life photo. Please note a picture of an animate thing or a living being, even when resting, does not qualify as a still life photo.
Still photography often focuses on objects that are typically not the focus of attention daily. These could be household items or simple stuff lying around in your home.
As a still-life photographer, you can make these items appear special using lighting, composition, and advanced editing techniques.
I will discuss the equipment you need later in this article. But for the moment, let’s say as a beginner still life photographer, you don’t need too much equipment to get started. Apart from a camera and a lens, a simple flash is more than enough to get started.
Types of still photography
There are many different kinds of still photography that you can practice. Believe it or not, there is more than one type.
Product photography
Much of the technique used in still photography is also used in commercial photography, such as product photography. The method is used to photograph small items like watches, smartphones, or a bottle of wine.
Although the photography technique might be similar, the lighting technique isn’t. It depends on the exact product you’re photographing, its nature of light reflectance, and how it can best be represented to determine how the product needs to be lit and photographed.
Lights play an essential role in the whole setup of product photography. It would help with a multiple light setup, modifiers, and diffusers to ensure that the product is appropriately lit.
Yes, I mentioned you don’t need too much equipment to shoot still life photography. But that was for getting started. Once you grasp things and want to move on to the next stage, you will need additional equipment.
There are two distinct types of lighting used in illuminating products for a commercial still photography session. One is a bright and cheerful, almost high-key lighting setup. The other is a darker, gloomy, and often moody and high-contrast low-key lighting setup.
The picture of the watch above is an example of a brighter lighting setup.
The picture below is that of another watch, but this time it’s lit in a way to render a darker moody vibe.
Abstract Photography
There is a whole wide world of abstract photography done with small items such as pieces of rock, collectibles, and odd items of everyday use. There is simply no limit to what you can do with this genre if you have both the imagination and the will to experiment.
Modern Still Photography
The widespread availability of digital cameras, the advent of smartphones with fantastic built-in camera systems, and the growth of social media are the key driving force behind the adoption of still photography by the masses.
Today everyone has access to a smartphone. Every family reunion, every weekend trip to the bar, every staycation is an opportunity to shoot more still photography and still life photography.
I bet even you’re guilty of photographing a plate of food at a restaurant before eating it at least once. It’s highly contagious, and the simple fact that you have a camera with you at all times makes it worth the while.
Today, millions of still photos are shot and uploaded to social media platforms every day. And the numbers are only going to go up.
One of the significant platforms that have helped is Instagram. Photographers feel that this is a platform that works for them. Many photographers prefer to use this as their primary platform to showcase their work.
Food photography
Speaking of commercial photography, the second most important still life photography genre is food photography. Food photography is a booming business, and skilled food photographers are highly demanded.
Food photography demands that the product, which is a plate of food, must look good in the photograph. Often food photographers hire specialist food stylists to help them make a platter presentable before photographing for their clients.
Food photography is mainly done with a high-key lighting effect. Everyone loves a brightly lit photograph of a food plate that clearly shows the details and is tempting. That said, some food items can also be given a low-key effect for the best results.
Equipment for shooting still life photography
Photography is an equipment-heavy pursuit once you decide that you will leave the shores of amateur photography and get into professional stuff. No matter the genre of photography you are interested in, you have to have some additional tools beyond the mandatory ones to shoot more than decent photos.
However, when it comes to still life photography, you can start with the bare minimum items. A camera, lens, and a single light are more than enough.
You could add a reflector to fill in the shadows.
However, to reiterate, you will need additional items for professional results, especially if you’re interested in shooting commercial photography and product photography as a career option. It would help if you had tools like artificial lights, light stands, modifiers, reflectors, diffusers, and many other tools.
Best camera for shooting still photography
Let’s discuss the best camera for shooting still photography like products and commercial photos.
Any camera is good enough for shooting still photos. It’s imperative to note that still photography doesn’t require expensive equipment. It would help if you had a camera and a lens. You can even shoot with a smartphone with a built-in camera with decent resolution. If you have a budget point-and-shoot camera, even that will work.
Therefore, start with whatever equipment you have with you. You can always upgrade when the time is right.
Some simple tips to shoot still life photography
A lot has been said about what qualifies as a still-life photo. But now is the time to get head-on with the actual process of making these images. Photography is a hands-on subject, so the techniques can be best explained when using examples.
Composition
The first thing you need to pay attention to is the composition part. One of the primary things about still life photography is that you can and have to do many experiments.
If you ever wanted to try out all the rules of photography, still life photography is one genre that allows you to do that—changing things around, playing with the positioning of the object being photographed, and so on. You can do a lot with just the composition bit.
You can play around with things like the rule of thirds, the golden rule, the rule of odds, leading lines, and more.
Lighting
Whether you’re shooting with natural or artificial lights, you can change and experiment with things. In terms of lighting, you can play around with shadows, textures, and shapes.
The option to change things around will be more if you’re using artificial lighting.
If you can afford one or more lights, you can experiment with them. Use one as the key light and the second as the fill, rim, or background light.
Additional lights will help you to create depth and dimension in your photos. This is what allows you to create an interesting image.
Don’t fret if you do not have multiple lights. Even one light is helpful for many types of commercial photography. You can use the low-key effect easy to create with one light in specific commercial photography applications.
As a beginner, you can use a window that lets abundant natural light work as your key light. If the light is hard, you can diffuse it by using a diffusing material like a piece of translucent white fabric.
This will help you create a soft all-encompassing light that will produce very minimal shadows. Adding a reflector to this equation will make a bright high-key lighting setup.
Camera angle
Still, life photography has evolved, and so have the camera angles used to shoot still life photography. Previously, during the golden days of film photography, still, life photos were shot entirely from a tripod set up with the object set on a table or bench.
The standard camera angle was straight on. The camera angle would rarely change. Things have evolved since those times. Still, life photographers are experimenting with the camera angle and coming up with new approaches to shooting.
A tripod is an excellent tool to have, along with a PTZ head, to exploit different camera angles. Some tripods like this Neewer 72.4-Inch Aluminum Camera Tripod comes with a 360-degree rotatable center column.
Although a tripod is an excellent accessory to experiment with the camera angle, it’s not always necessary. With a bit of ingenuity, you can try out different camera angles.
Take a small ottoman or bench and stand on that to shoot from above. Get low down to shoot from the same level as the product to look closer.
How do still life photographers make money
The best way to make money doing still life photography is to become a commercial product photographer.
These days, the boom in online shopping warrants the requirement of many images for listing products on online marketplaces. From fashion items to room decoration, anything and everything that can be sold and shipped requires a decent photograph so that customers may get a feel of the product before they get their hands on them.
The best images are always appealing, give a good idea about the product and its features, and compel a user to buy it. Ideally, it results in a sale.
Online shopping is a platform that does not allow a buyer to get a physical feel of the product. So, a product photographer has an immense responsibility to depict the right colors and a sense for the product, and an honest representation of the product on a two-dimensional platform.
Note I mentioned ‘honest representation.’ This is important. These days, with powerful photo editing applications at our disposal, it’s very easy to get overboard with possible edits.
How to become a still life photographer
It’s easy to start shooting still photography as a hobbyist photographer. As has already been explained in this discussion, it does not take a lot of effort or specialized tools to get started as a still photographer. All you need is a camera and a lens, and you can get started.
If you have a large window with a lot of natural light coming in, you also have your light problem solved.
Perhaps you could get yourself a few reflectors, and you have your fill light problem taken care of as well. If you don’t have readymade reflectors, you can make a few using DIY methods.
But those are the tools and the accessories. Beyond that’s the theory and the practice. Let’s find out what else you can do to become a still photographer.
Join a workshop
The best way to become a still life photographer is to join a workshop. Joining a workshop has many benefits. First and foremost, the advantage is that it’s a professional environment, and the trainer is usually a professional from the industry with experience in one or more branches of photography.
If you’re lucky, you can even learn from a commercial photographer with experience in product photography.
Suppose you’re looking to start a career in product or commercial photography. In that case, this is the best way to grasp how everything works, right from the process of setting up a product for photographing to setting up the lights, the best camera angles, and even post-processing techniques. You can learn everything at a workshop.
Learn from YouTube and social media
Social media, mainly YouTube, is a repository of information on every conceivable subject. Still, life photography is no exception. You can learn a lot if you research YouTube about still life photography.
Many professional still-life photographers, commercial photographers, and product photographers publish regular videos on various aspects related to their genres of photography. These are mostly free to access and give a ton of information on multiple aspects of still life and commercial photography.
You can subscribe to the top channels and get regular updates when fresh videos are uploaded. That way, you can study those videos even when traveling or when you are in your spare time to update your knowledge.
Many aspiring still-life photographers, commercial photographers, and product photographers have started this way. They have self-taught themselves the basic techniques of still life photography from such social media resources.
It’s a learning process
Still life photography is a learning process. It’s a continuous process because the art is dynamic. As new avenues of still life photography start evolving new approach is necessary.
Fifty years ago, still, photography was but entirely shot in a studio environment. No one thought that in 50 years, people would be shooting such photos on the move, in places unimaginable, and sharing them in the blink of an eye.
Below is a video on shooting still lifes:
Conclusion
Still life or still photography is a multi-faceted and dynamic photographic genre. Many of the traditional techniques are still in use, but they have been refined and adapted for the demands of modern consumers.
Still life photography is easy to get started in, but you need a suitable investment in gear, time, and learning once you decide to achieve professional success.
Thanks to the burgeoning online business and digital marketplaces, still photography genres like the product and commercial photography have seen many resurgences in terms of demand. So it’s possible to get success after a few years in brand building and marketing.
I hope that the above tips will help you get started on the right note.