Remember the days when we eagerly awaited each new camera generation to see how noisy its high ISO photos would be? Not so long ago, ISO 6400 was the absolute limit of real usability. Anything above that was, at best, suitable for special events like UFOs, Loch Ness monsters, or alien landings. Not so any more. Today, I’m going to back the Nikon Z9 into a corner and show you how well it performs at extreme ISOs. How high can you go?
Blend modes can be very confusing for inexperienced Lightroom and Photoshop users, and this quick tutorial with Nicholas Warner cuts through the grease by demonstrating the only ones nature photographers really need. This is what he says regarding the plethora of Blend modes available: “There are 27 of them, they have confusing names, and I’m here to let you know which ones are actually useful for nature photography.”
Spoiler alert: You can simplify your workflow by ignoring most of them. Warner describes his favorite nature photography Blend modes in descending order, beginning with “Darker Color.” He demonstrates the benefits of this mode for rehabilitating images that suffer from unsightly halos. All you have to do is grab the Clone Stamp tool, change the Blend mode from Normal to Darker Color, and follow Warner’s simple instructions for making the fix.
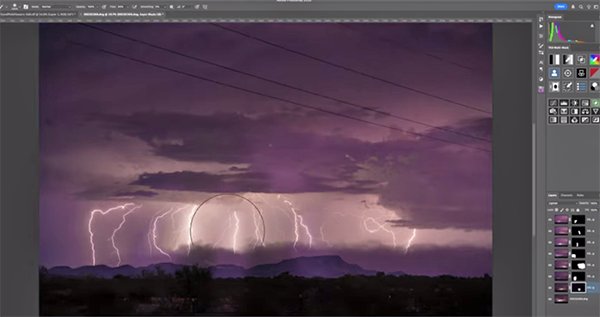
Next on Warner’s list is the Lighten mode which works wonders for creating star trails, or when stacking multiple images of lightning strikes. This straightforward technique begins by selecting all the images you want to include, clicking the Photo tab atop the screen, and choosing the Edit In option from the dropdown menu that appears. Then select “Open As Layers in Photoshop” from the subsequent window and get to work.
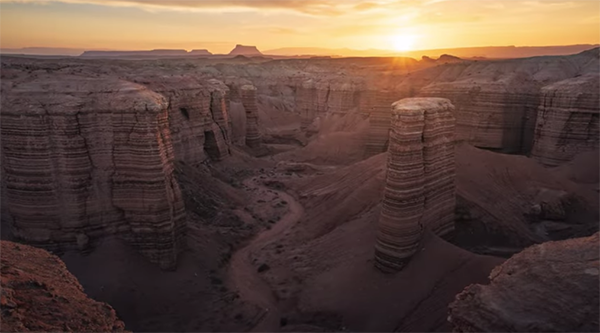
What about when your goal is to enhance the mood of a landscape photo by introducing a bit of haze or other atmospheric effect to increase the depth of your shot? There’s a Blend mode for this too known as Screen and you’ll want to add this one to your everyday workflow. The same goes for a few other options you’ll learn as the five-minute lesson proceeds.
When the video concludes make sure to visit Warner’s instructional YouTube channel where he provides inspiration and insight into how he edits outdoor photos in Lightroom and Photoshop to achieve spectacular results.
Noise reduction is a hot topic these days and we frequently bring you Photoshop and Lightroom tutorials that demonstrate various methods for addressing the problem. This tutorial from Adorama TV takes a totally different tact by exploring the actual relevance of noise reduction tools when shooting with a modern mirrorless camera or DLSR.
Instructor David Bergman is a versatile NY-based pro specializing in sports photography, celebrity portraiture, and on-location performance imagery. The video below was provoked by a query submitted to his unique Ask David Berman website where anyone can post questions on common photography concerns.
Today’s question goes like this: “I primarily shoot sports and sometimes need very high ISOs. I’ve seen some people use noise reduction at lower ISO settings but it seems that the cameras these days look good—even at ISO 12,800. At what point is noise reduction useless.
Bergman’s seven-minute response addressea these issues and more. He acknowledges that new technology has changed the game in recent years and says, “today’s sensors are so good that even some super high ISO shots look pretty darn clean.” He notes further, however, that whether you need to reduce that noise depends upon a few important factors.
He begins with a discussion about why you may need to use high ISO settinga in the first place, and most of the time it’s not because you want to but because you have no choice. It other words, “if you’re photographing sports, wildlife, concerts, or really anything in low light, you need a fast enough shutter speed to freeze motion.”
Thus, if your aperture is wide open and you still need to brighten things up, the only remaining option is to raise ISO. Bergman describes the compromise like this: “If the choice is between a noisy shot that’s sharp and a clean one with motion blur, it’s a no brainer—I’ll take the sharp image every time.”
The remainder of the lesson takes a practical approach with Bergman’s recommendations for when, why, and how to reduce noise. You’ll learn the difference between luminance noise and chroma noise, the implications of Jpeg vs. Raw, and the tradeoffs between long exposures and high ISO noise.
Once you’re done watching be sure to check out the Ask David Berman website where you can submit questions of your own and view the complete episode archive.
I’m excited to announce two things today! First, we have just published the newest video from Photography Life: a field test of the Nikon Z 28-135mm f/4 PZ, with extensive sample footage from the lens. And in bigger news, I am very excited to welcome Jakub Horák to the Photography Life team! Jakub is a skilled videographer and filmmaker from Czechia. He and Libor will be collaborating to film more Photography Life videos in the coming months. You can meet Jakub, and watch Libor’s field impressions of this lens, in the video below.