
The BEST Photo Sharpening Tool Isn’t What & Where You Thought (VIDEO)
The video below from instructor Brendan Williams begins with a quote that will stop you in your tracks: “Throw everything you know about sharpening out the window because there’s only one sharpening tool in Photoshop you need for pro results, but it’s hidden in an unlikely place.”
The topic of conversation is Photoshop’s oft ignored High Pass filter and this tool id sort of hidden because it’s neither under Sharpening nor within the Camera Raw filters. Instead, it’s found by clicking the Filter tab top the screen, choosing Other from the first dropdown menu you see, and selecting High Pass from the second dropdown that appears next.
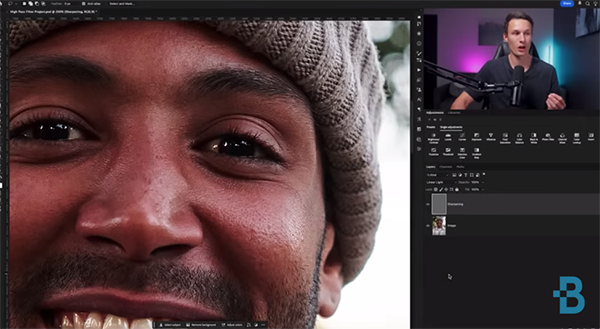
Williams says you can apply this filter directly on you image and it typically works really well. He adds that, “If you ever find that the results display a little bit of a color change, then you’ll want to first click on the image layer, use his keyboard shortcut to make a duplicate, and desaturate the image in the way he explains.
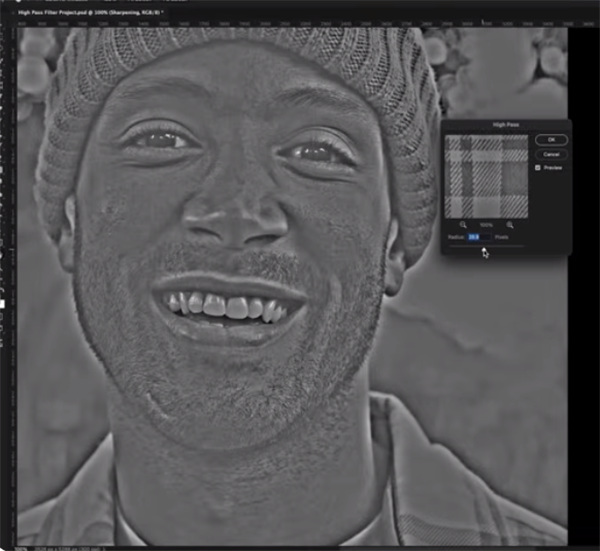
This second layer is where you’ll apply the easy-to-use Unsharp Mask effect. Williams explains what going on under the hood because you’ll be presented with a plain gray window and wonder how this can possibly help you to sharpen the original shot.
The secret it this: “Sharpening, at the most basic level, is nothing more than edge contrast because every edge in an image has a light and dark side.” The High Pass filter works by accentuating these opposing light and dark areas.
This is where your plain gray layer becomes very useful. This is because as you increase the Radius of the filter you get more and more of your subject pops through the gray. The trick is taking a very subtle approach by carefully moving the Amount slider until details just begin to appear. Going any further is likely to result in an overcooked mess.
There are a few other important considerations for maintaining a realistic look, and Williams demonstrates how to avoid any image-killing mistakes. Be sure to add this transformative technique to your everyday Photoshop workflow. Then head over to the Brendan Williams YouTube channel that has over 18 million views.
We also recommend watching the tutorial we posted easier from another post-processing expert who demonstrates how to repair outdoor photographs with uneven, blotchy, polarized skies in both Lightroom and Photoshop.


