
The New AI Harmonize Tool: Beyond the Basics of 1-Click Composite Photos (VIDEO)
Earlier this week we brought you a quick tutorial from the highly regarded Photoshop Training Channel that reveals what one Adobe expert says are his five favorite features in the game-changing late-July Photoshop update. Instructor Jesus Ramirez is back again today with a deep dive into the powerful AI-based Harmonize tool that enables you to blend multiple objects into a scene with a single click.
As easy as it is to create effective results, you’re missing out on what makes this feature really shine if you limit yourself to the default settings. That’s why this step-by-tutorial takes you beyond the basics. Here’s how Ramirez describes today’s comprehensive episode: “You’ll learn how to combine classic Photoshop techniques with the new Harmonize tool to achieve the best possible results.”
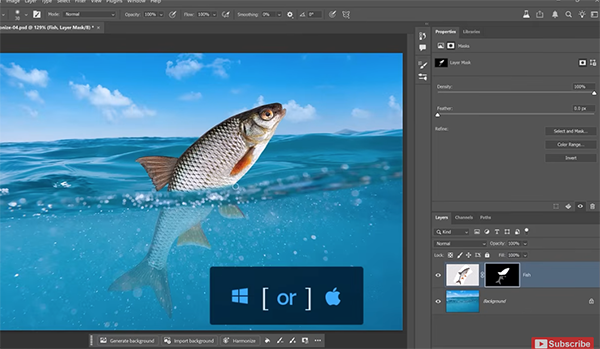
One of the most difficult aspects of believable composites is getting a subject to blend seamlessly with a new background, because “even with a perfect cutout the results will often look fake. Photoshop fixes all that with one click.”
Photoshop’s versatile Harmonize button comes to the rescue by automatically matching lighting, color, and contrast. And it even includes shadows and reflections to make your subjects feel like they’re really part of the scene. Ramirez says that by following his advice you’ll be able to create pro-level composites with ease.
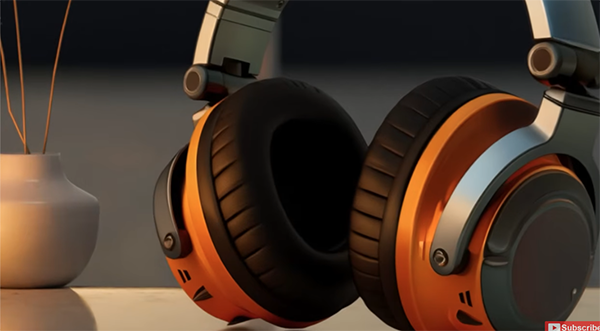
The Harmonize feature is currently only available in the Photoshop beta, and Ramirez demonstrates the typical approach by combing two layers—his background shot and a photo of headphones that he wants to integrate within the frame. And the quick results are surprisingly good.
Unfortunately, when you tap on the “Z” key to zoom in on the shot you’ll notice a faint white line around the headphones that shouldn’t be there. But watch what happens when you click Harmonize button in the contextual task bar: As Ramirez says, “doing so will generate a new layer that will precisely match colors and relight the headphones.
There’s a bit more to learn as the lesson proceeds, and Ramirez discusses how all this works with photos of people, transparent objects, small accessories, and even when making head swaps. The lesson concludes with the aforementioned workaround for dealing with Photoshop’s low-resolution output limit.
Be sure to pay a visit to the Photoshop Training Channel on YouTube, and don’t miss the earlier primer mentioned above.


