Angela Scanlon reveals the 3 things she bought ‘just for the aesthetic’
Not even Angela Scanlon is exempt from going after the pretty things
You’ve probably admired photos of the nighttime skies and the Milky Way, and thought these amazing images required specialized equipment and were beyond your skills. But guess what, this is a misconception as you’ll see in this beginners guide from our friends at the Photo Genius YouTube channel.
Australian pro Paul Farris is an accomplished photographer who has been teaching photo workshops for over a decade. Like with the quick episode below, he specializes in tutorials designed to help beginners up their game. As he says, “taking photos of the night sky isn’t just for pros,” and in barely nine minutes he explains how you can get started tonight.
Farris covers all the basics from camera settings and gear, to straightforward shooting techniques that result in impressive images. A sturdy tripod is required because you’ll be shooting with slow shutter speeds. Just about any DSLR or mirrorless camera will do fine—as long as long as it includes standard manual functions.

Exotic lenses aren’t needed either, and even a normal 50mm will get the job done, but Farris says a wide-angle is preferable because “it will let you capture a larger expanse of the sky and include some foreground in the shot as well.” Fast lenses with a wide maximum aperture are a bonus, but not absolutely essential.
The darker the sky, the brighter the stars will appear, so choosing the best location available will boost your chances of success. A remote location with minimal light pollution is ideal, so if you can get out of the city that’s great. Farris realizes that this isn’t always possible, so the images he features here were taken in semi-urban locations— just to show you what can be achieved near home. The phase of the moon also factors into the equation.
The first thing to do with regard to camera settings in rotate the mode dial to Manual so you can select the correct aperture, shutter speed, and ISO to suit the task. Farris then walks you through the settings he recommends for each of these variables—beginning with the widest aperture available on your lens. Shutter speed and ISO settings follow from there.

Farris then moves on to shooting tips, beginning with proper focusing techniques. If you want to include a foreground subject, he recommends using a flashlight (as a Brit he calls it a “torch”), so you can briefly focus on the subject and turn off the light before snapping the shutter. Farris notes that autofocus tends to struggle when focusing on distant stars, so manual focus is a much better choice.
The episode wraps up with a few other tips, illustrated with images captured by Farris recently in preparation for this episode. Bottom line, by following his advice, and doing a bit of practice, you’ll be making beautiful images of starlit skies in no time.
There much more to learn on Farris’ YouTube channel and in the tutorial we posted recently, explaining how to shoot epic landscape photos by composing with symmetry in mind.
Most photographers prefer to be out in the field with their cameras, rather than sitting behind a computer processing photos. That means finishing up your edits as soon as possible without sacrificing quality.
The two-minute tutorial below from image-editing impresario Anthony Morganti reveals a relatively unknown Lightroom trick for doing just that when Curves adjustments are part of your process. This only works in certain situations, but when it does it’s a boon to your workflow.
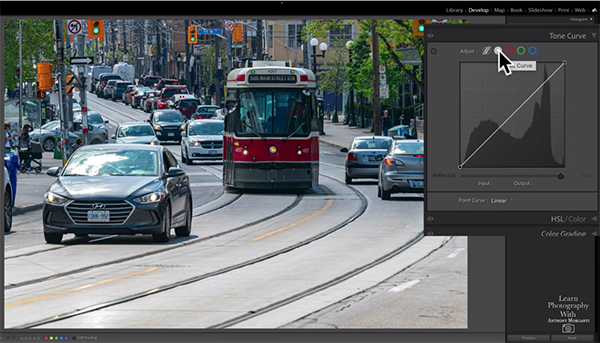
Morganti explains that there are actually five different Tone Curves in Lightroom: The Parametric Curve, Point Curve, and the three Color Channel Curves—read, green and blue. What he demonstrates today falls under the Point Curve, and the technique applies to those of you who often employ relatively complicated Curves when editing your work.

The goal for Morganti’s demonstration image is to give it an old, vintage appearance, and he uses a complicated Point Curve to create the effect. He really likes this look and uses it often but doesn’t want to recreate the Curve every time he does. The solution: save a Tone Preset that can be used over and over again.
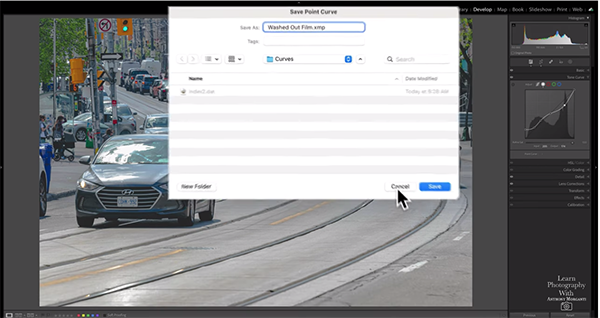
This task is super easy to accomplish, and you can do it right within Lightroom’s Tone Curve tool. As you’ll see, all you have to do is tap a button beneath the Tone Curve, choose the Custom option from the dropdown menu, and click “Save.” Then give your preset a name in the window that appears—in this case Morganti calls his preset “Washed Out Film.”
You can create as many presets as you want for the Tone Curve adjustments you use regularly and doing so will really streamline your workflow. Then the next time you’re working in Curves, just click the dropdown and your presets will immediately appear and you won’t have to redraw the Curve once again.

This oft-ignored trick is about as easy as it gets, and we suspect you’ll use it often. Morganti’s instructional YouTube channel is full of tips and tricks like this, so be sure to pay a visit and check back often.
We also suggest watching another tutorial we posed recently, demonstrating five helpful features in Adobe Bridge that you won’t find in Lightroom.
Adobe has long been the go-to source of software for photographers, designers, web experts, art directors, and other other creatives. Their offerings include Photoshop Lightroom, and Express, as well as Illustrator, Premiere Pro InDesign, and several others.
But what if you’re on a budget and don’t want to purchase editing software or pay for monthly subscriptions than can really add up? The video below from the popular Brett in Tech YouTube channel reveals 10 no-cost options that may effectively serve your needs.
Instructor Brett Bristow evaluates a variety of free choices for just about anyone who relies on Adobe software to pursue their interests, whether they’re pros or enthusiasts. We’re going to mention them out of order so we can concentrate on software for photographers with various needs.

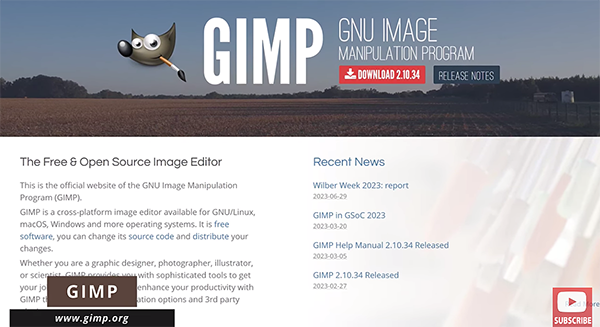
Most of Bristow’s recommendations are available for both Mac and PC users, and when it comes to free Photoshop alternatives his top pick is the professional-quality software known as Gimp. He says this quality cross-platform image editor “is packed with so many features that you won’t likely miss using Photoshop.”
Bristow notes that Gimp includes the ability to work with layers, boasts a ton of filters and effects, numerous drawing tools, and supports most file formats. Another option is Photopea, an online photo editor that works with any web browser. This choice is popular with some users because its layout more closely resembles Photoshop.
When it comes to free Lightroom alternatives, Bristow has two choices as well. The first is the open-source Raw Therappe. As the name suggests, this software supports working with Raw image files, along with most other image formats. The interface has been improved recently and allows for non-destructive editing so re-dos are always possible if need be.

Another excellent fee Lightroom alternative is Dark Table. This open-source package supports Raw files and other formats, as well as non-destructive editing. Bristow offers limited details while offering his picks, so we suggest visiting the makers’ websites to learn which option is best for you. Your wallet will appreciate the effort.
There are several more free recommendations for creatives that do more than photography. So if you’re an artist, web designer, or create printed materials like brochures, annual reports, packaging or logos, there are a variety of money-saving tips for you too.
After watching this video head over the Bristow’s popular YouTube channel where you’ll discover much more of interest.
We also suggest checking out an earlier tutorial we posted recently that explains how to use Photoshop to make dramatic high-contrast b&w conversions.
