5 warning signs in new build homes you should never overlook, according to property experts
Being able to spot these red flags is crucial
Today we’re featuring a quick trick from the Rogala Photography YouTube channel that will help make it easier to adjust the exposure of photos in Lightroom. You’ll learn why the histogram is “essential” for getting the light right, and what a long-time pro says is “the best simple Lightroom trick you don’t know.”
Instructor Mike Rogala is an accomplished landscape photographer who began shooting film in the ’80s. His skills, equipment, and knowledge of image-editing techniques have greatly evolved, as reflected by the helpful tutorials he posts on a regular basis.
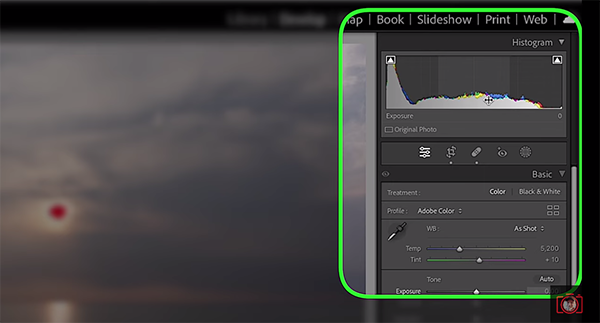
Rogala insists that “understanding the histogram is essential for achieving accurate exposures.” He provides a brief overview of how this tool works before jumping into his favorite trick, just in case you haven’t used this important Lightroom tool to make precise adjustments to your photos. Put simply, “The histogram is a graphical representation of the tonal distribution of an image.”

In other words, the histogram displays the brightness levels from shadows to highlights, thereby helping you analyze and adjust exposure to arrive at a perfectly balanced shot. In Lightroom Classic the tool can be found in the top right corner of the Develop Module. The left side of the graph represents shadows and blacks, the right side corresponds to highlights and whites, with midtones in the middle.
Rogala’s demonstration image contains plenty of shadows and blacks, with minimal highlights and whites. He introduces his trick by saying, “we’re going to change that, which is why we shoot in Raw.” As you’ll see, his method focuses on both ends on the histogram, while letting midtones fall into place.
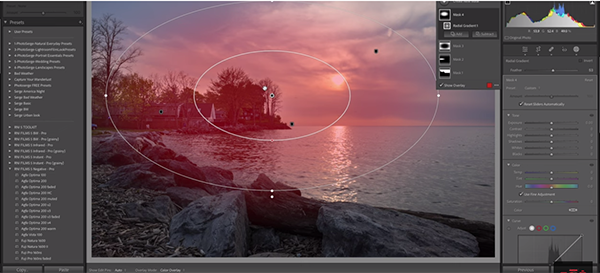
The goal is to avoid either blown-out highlights, crushed shadows, or both—for an even distribution of tones that results in a far more balanced image. He demonstrates how hovering over different portions of the histogram highlights the tones in that area. By clicking and dragging on any of these sections of the graph, the corresponding sliders underneath automatically move to reflect the change.

Watching the sliders shift as you modify the histogram is a great way to understand how the image is being altered. The foregoing provides the theory behind Rogala’s technique and reflects just a small bit of how it works. But by the end of the lesson you’ll be fully up to speed.
There are more helpful shooting and editing tips and tricks on Rogala’s YouTube channel, so don’t forget to take a look.
You’ll also want to check out the tutorial we posted from another image-editing expert, explaining how to organize Lightroom using keywords for a fast and efficient workflow.
All serious photographers study their craft and practice diligently to improve their skills. Hence, the thought of losing our precious images can best be described as a nightmare. The quick tutorial below will help wipe that thought from your mind.
If you don’t back up your images, well, shame on you. But even if you do there’s a chance you’re doing in wrong. Today we’ll introduce you to the “3-2-1 Backup Rule” that provides what one pro says is a “foolproof method to safeguard your photos.”
Landscape photographer James Vooght posts weekly tutorials designed to help you become the best photographer you can be, but impressive skills don’t mean much if your image library disappears in an instant. In this episode you’ll learn the fast-and-easy method he recommends for preserving your visual memories.
The purposes of Vooght’s 3-2-1 backup strategy goes beyond accidently deleting photos or losing everything due to a crash. It will also ensure that you have all the data and images you need in the appropriate locations so they’re easy to find and readily accessible. These practical tips are just as important to beginners as they are for pros.
The first component of this technique is having three different copies of your images. This is really important to guard against the potential failure of an internal or external storage device, as well as corrupted software. Knowing your imagery will always be intact provides great peace of mind.
Vooght’s second tip involves saving three backups on at least two different devices or media. These could include saving to the Cloud, on a reliable hard drive, a network connection, and perhaps on DVDs (as well as on your computer for convenience). He explains how set up an external device in a way that your images are quickly available.
By now the concept should be clear: You don’t want to be reliant on one piece of hardware that could possibly fail—thereby wiping out all your hard-earned work. The last part of Vooght’s backup strategy represents the “1” in his 3-2-1 method, and it’s possibly the most critical.
What Vooght is talking about here is the importance of “having at least one of your backups off-site.” We don’t want to get into a discussion of hurricanes, flooding, fires, tornados, or break-ins, but you get the idea.
After watching this video, and hopefully following Vooght’s advice, take a look at his popular YouTube channel where you’ll find much more of interest.
And don’t miss the tutorial we posted earlier this month, revealing the best free Adobe software alternatives in 2023.
If you’re looking for a way to improve your photography without spending big bucks, the video below is just what you need—with 10 budget lenses that one pro says, “will blow your mind.” Whether you’re a beginner or an experienced photographer you’ll be surprised by what these “hidden gems” can do.
Photographer Mark Wiemels’ popular YouTube channel is devoted to budget gear that delivers “pro results,” and this episode is all about cheap glass. The 10 bargain optics that he reveals today are all designed for crop-sensor cameras, and some of them cost less that a camera bag.
Weimels’ top picks range from $19 to $500 and everything in between, they vary in focal length, and include both zooms lens and primes. These gems are also available in mounts for most popular cameras, and Wiemels include links beneath the video to where you can find them.

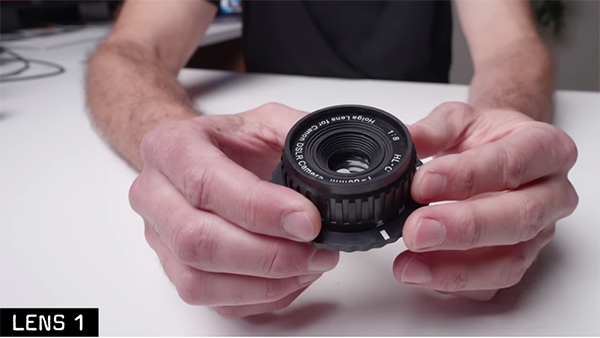
At $19, the first lens is the cheapest, and it’s what you might call a “plastic fantastic.” This is the fixed-aperture Holga 60mm f/8 prime that Wiemels bought on a whim, just to see what could be accomplished for $20 bucks. He was really surprised and says this: “I can’t tell you how much I love shooting with this lens.” His fascination has to do with how this lens is intentionally designed to provide light leaks for photos with an interesting vintage look.
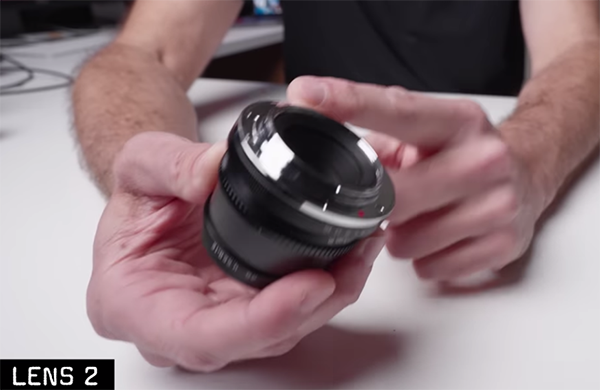
Weimels presents his choices in order of price, from low to high, and the next bargain is the $88 manual-focus 35mm f/1.4 from TTArtisans, with surprisingly good build quality. In addition to its fast maximum aperture, this “amazing” lens boasts an all-metal body and a polished metal mount. Weimels explains the great results you can expect, saying, “you really can’t believe you’re getting a lens of this quality for this price.”
Next on the list is another rather awesome prime from TTArtisans, the 17mm f/.4. Wiemels highly recommends this one as “a budget alternative to the Sigma 16mm f/1.4.” Wiemels earlier posted a comparison of these two lenses, and you can find a link in the description beneath this video.

Weimels’ other picks include a 50mm f/1.2 prime, a 5-27mm f/2.8 wide-angle zoom, and a super-fast 35mm f/0.95. There’s also a 7-12mm f/2, an 8-23mm f/1.4, a 9-30mm f/1.4, and an 18-50mm f/2.8 at the top of the heap.
We should warn you that you’re likely to spend some money after watching this video. The good news is that you’ll get a real bargain with whatever lens you choose. Be sure to check out Weimels’ YouTube channel for more great budget gear.
We also recommend watching the video we posted recently from our in-house expert, with six affordable photo accessories that will make a big difference in your photographs.
