
The BEST Simple Lightroom Histogram Trick You Don’t Know (VIDEO)
Today we’re featuring a quick trick from the Rogala Photography YouTube channel that will help make it easier to adjust the exposure of photos in Lightroom. You’ll learn why the histogram is “essential” for getting the light right, and what a long-time pro says is “the best simple Lightroom trick you don’t know.”
Instructor Mike Rogala is an accomplished landscape photographer who began shooting film in the ’80s. His skills, equipment, and knowledge of image-editing techniques have greatly evolved, as reflected by the helpful tutorials he posts on a regular basis.
Rogala insists that “understanding the histogram is essential for achieving accurate exposures.” He provides a brief overview of how this tool works before jumping into his favorite trick, just in case you haven’t used this important Lightroom tool to make precise adjustments to your photos. Put simply, “The histogram is a graphical representation of the tonal distribution of an image.”
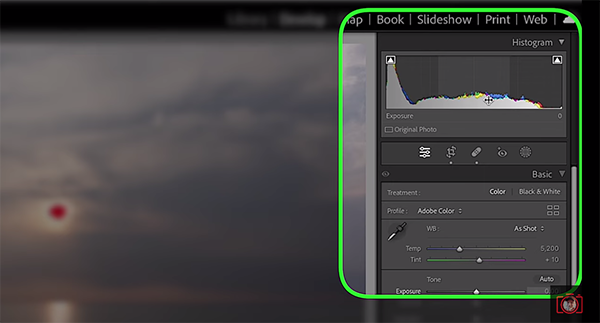
In other words, the histogram displays the brightness levels from shadows to highlights, thereby helping you analyze and adjust exposure to arrive at a perfectly balanced shot. In Lightroom Classic the tool can be found in the top right corner of the Develop Module. The left side of the graph represents shadows and blacks, the right side corresponds to highlights and whites, with midtones in the middle.
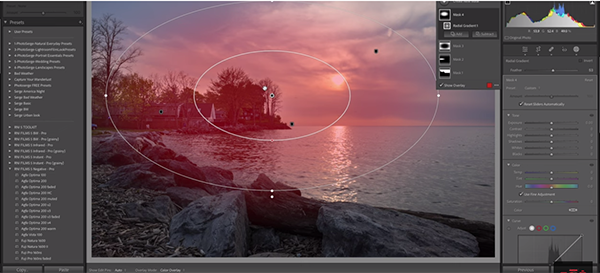
Rogala’s demonstration image contains plenty of shadows and blacks, with minimal highlights and whites. He introduces his trick by saying, “we’re going to change that, which is why we shoot in Raw.” As you’ll see, his method focuses on both ends on the histogram, while letting midtones fall into place.
The goal is to avoid either blown-out highlights, crushed shadows, or both—for an even distribution of tones that results in a far more balanced image. He demonstrates how hovering over different portions of the histogram highlights the tones in that area. By clicking and dragging on any of these sections of the graph, the corresponding sliders underneath automatically move to reflect the change.
Watching the sliders shift as you modify the histogram is a great way to understand how the image is being altered. The foregoing provides the theory behind Rogala’s technique and reflects just a small bit of how it works. But by the end of the lesson you’ll be fully up to speed.
There are more helpful shooting and editing tips and tricks on Rogala’s YouTube channel, so don’t forget to take a look.
You’ll also want to check out the tutorial we posted from another image-editing expert, explaining how to organize Lightroom using keywords for a fast and efficient workflow.


