This noughties-inspired furniture trend is the ultimate trick to make small living spaces look bigger
Who knew we’d be seeing this trend back in fashion
If you use Lightroom to process outdoor photos you’ll want to pay close attention to the eye-opening tutorial below. In just 12 minutes you’ll learn a better way to give all sorts of outdoor images more contrast and texture, without damaging the files.
Instructor Christopher O’Donnell is a professional landscape photographer who regularly posts straightforward lessons designed to help others achieve faster and more effective edits in Lightroom and Photoshop. By following the advice in today’s video you’ll be able to easily enhance photos by adding more depth and interest.
What makes this lesson so interesting is that you’ll be able to get the job done without relying upon filters, presets, or other creative “shortcuts” that often deliver hit-or-miss results. It’s a simple three-step process that O’Donnell says “will instantly enhance any landscape image with zero side effects—no crushed shadows or blown highlights.”
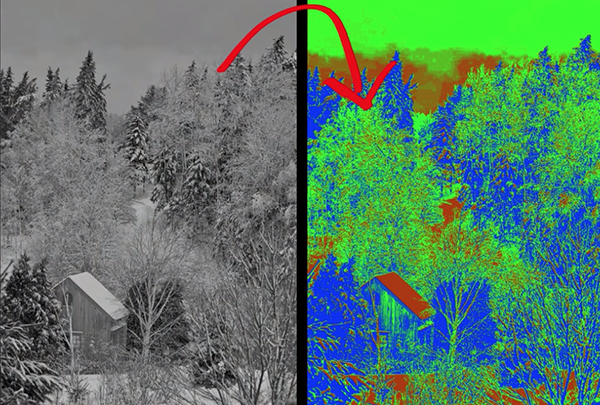
Conventional techniques often deliver images that look fake or overprocessed. Or as O’Donnell puts it, “Many photographers make a big mistake by simply adding more contrast with Lightroom’s Contrast slider.” While this approach may seem like the logical way to make photos more engaging, “it’s probably the worst thing you can do to your Raw file.”
Instead, O’Donnell’s preferred method enables you to take that boring Raw file and add instant interest without damaging the image. Here’s the common problem: When you bring an image into Lightroom you’ll often see a rather lackluster representation of what you saw in the field, with much of the detail hidden.
The power of O’Donnell’s approach is that it enables you “chisel away at the Raw file to bring out its full potential.” He temporarily converts the image to monochrome, which make the task easier to accomplish without the added complications of color.
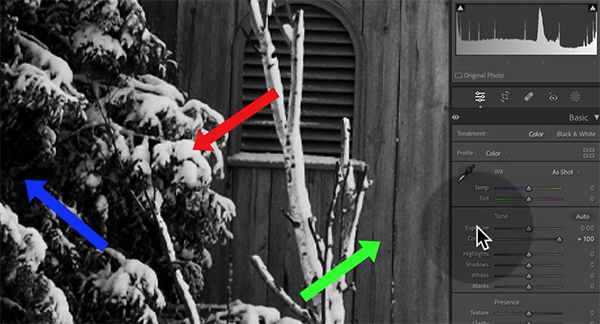
Rather than using the standard approach of adding texture to the entire image at once, O’Donnell groups the pixels within the file according to brightness values. By putting highlights, shadows, and midtones into “three separate buckets,” you’ll be able to adjust each of these parameters independently—thereby achieving optimum results with far more control..
If you want to skip directly to how this works, without the discussion of why global methods fail, you can jump to the 5:15 mark in the video. In any case, you’ll notice a huge difference by comparing the before/after images.
You can find more helpful editing tips by visiting O’Donnell’s YouTube channel, and watching an earlier tutorial we posted that explains how to use Lightroom’s new HDR Optimization tools for photos with more realism and depth.
An exaggeration? Not in my opinion. These two innovative Lume Cube lighting tools are definitely the most fun and most versatile I’ve ever used. And both are controlled by the Lume Control app and your smartphone, so operation is easy and straightforward.
Portable constant-source LED lighting gadgets have been popular for years. With the introduction of the Lume Cube RGB Panel Pro 2.0 and Lume Cube RGB Tube Light Mini, they’re now grown up and have become almost addictive.
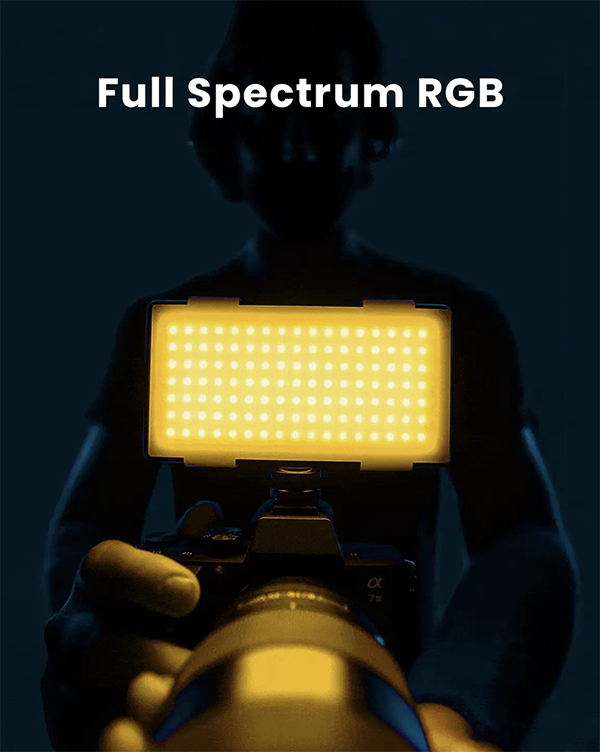
Lume Cube RGB Panel Pro 2.0
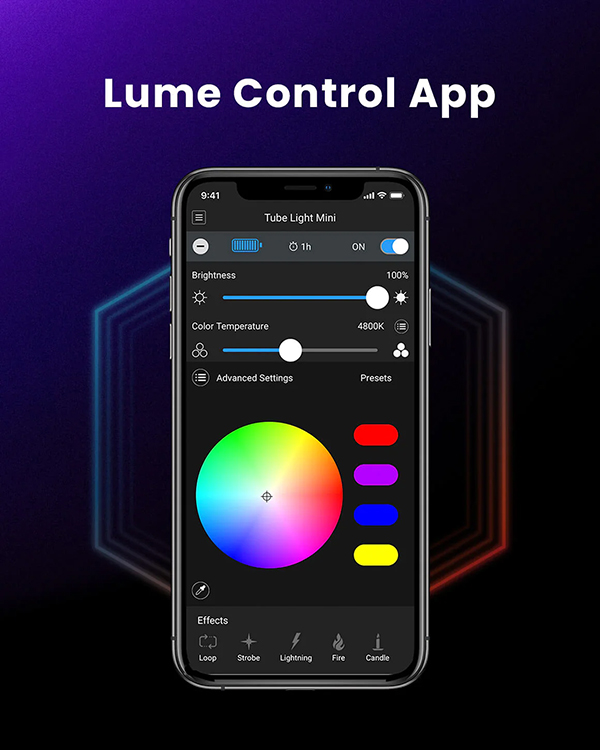
Delivering the full range of RGB colors and a whopping 595 Lumen output, the tiny (6 x 3.1 x .43 inches) Lume Cube RGB Panel Pro 2.0 can be attached to your camera’s hot shoe or strategically located outside the scene for primary light, fill light or just to add some color effects. The CRI (Color Rendering Index) is 96+ so you’re assured lifelike colors. The Panel Pro 2.0 is intuitively controlled via your smartphone and the Lume Control app, a marvelous piece of software that features a color-picker option and Photo Eyedropper tool to enable accurate color match instantly.
Key Features
Full Spectrum RGB Colors (over 16 million options)
204 high-quality LEDs
595 Lumens
835 lux at .5 meters
Color temperature range 2700K – 7500K
Green/Magenta tint control
96+ CRI rating
Bluetooth control via Lume Control App
Seven pre-programmed Special Effects
Rechargeable lithium battery
Runs up to 4 hours at 50% power, 2 hours at 100%
Includes removeable diffusion lens
Power bank functionality (16.72 Wh capacity)
Dimensions – 6 x 3.1 x .43 inches (15.2 x 8 x 1.1cm)
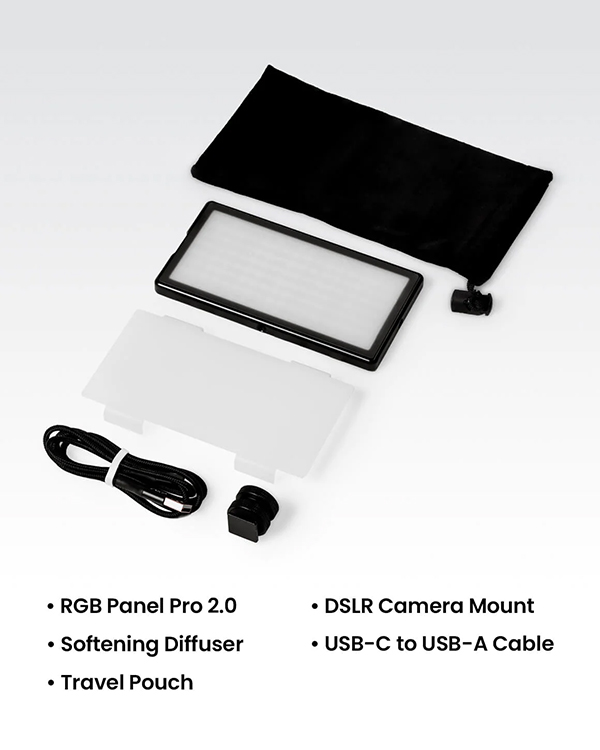 The RGB Panel Pro 2.0 is available directly from Lume Cube for $179. If you plan to order from a different source, confirm that you’re buying version 2.0 of Panel Pro — we’ve noticed some ambiguous ads.
Compared to the original Lume Cube Panel Pro, the RGB Panel Pro 2.0 delivers increased brightness, 20% longer battery life, improved durability, a new power bank feature and an all-new, modern app experience. It also features a wider color temperature range (2700K – 7500K vs. 3200 – 5600K) and a higher CRI rating (96+ CRI vs. 90+ CRI).
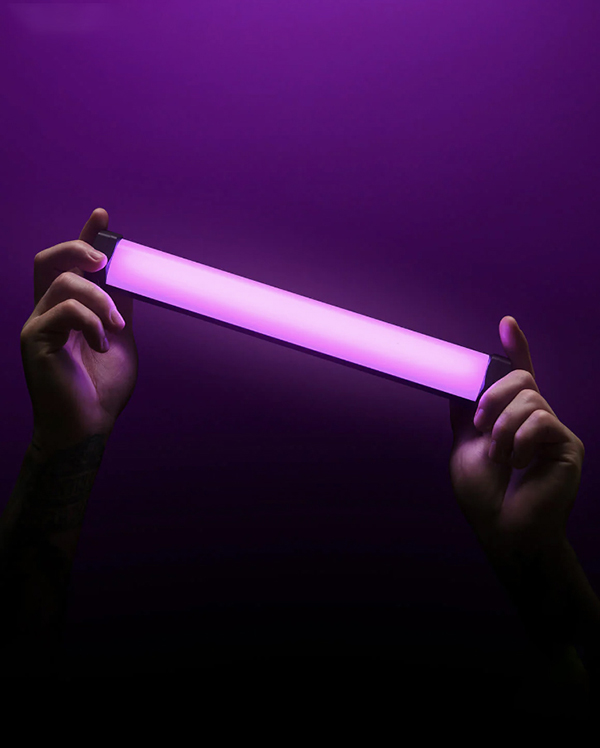
Lume Cube RGB Tube Light Mini
Very similar to the Panel Pro 2.0 except in a 1-foot long tubular shape, the Lume Cube Tube Light Mini is likewise can be controlled via Bluetooth and the Lume Control app. It delivers 950 Lumens, 920 lux, and can provide light at 50% power longer than three hours. Additionally, the Tube Light Mini has a CRI rating of 96+ and is sturdily built from aluminum alloy but still weighs just 3/4s of a pound. For easy deployment Tube Light Mini has rotating magnetic end caps and features female 1/4-20 sockets on each end cap.
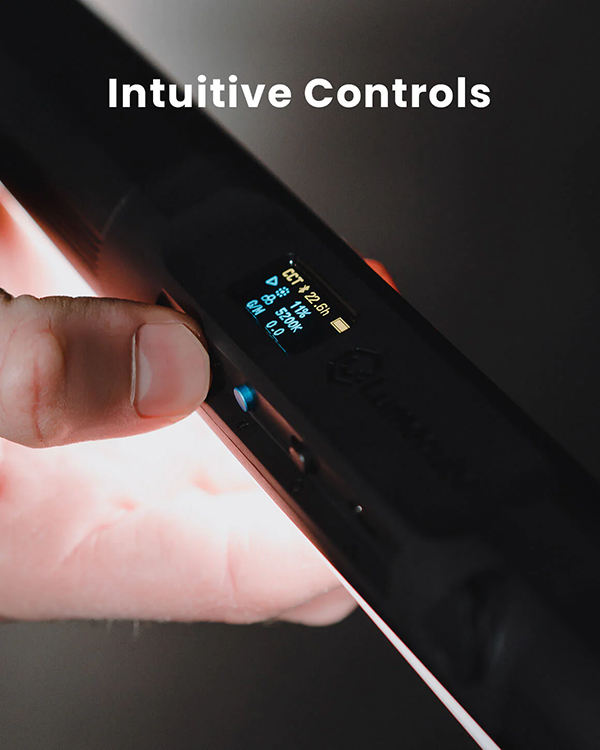
Key Features
Full Spectrum RGB Colors (over 16 million options)
124 high-quality LEDs
950 Lumens
920 lux at .5 meters
Color temperature range 2700K – 7500K
Green/Magenta tint control
Advanced HSI & CCT adjustment
96+ CRI rating
Bluetooth control via Lume Control App
Seven pre-programmed Special Effects
Rechargeable lithium battery
Runs up to 192 minutes at 50% power, 102 at 100%
Power bank functionality (14 Wh capacity)
Shock & drop resistant aluminum alloy body
Dimensions – 12 inches (30.5cm)
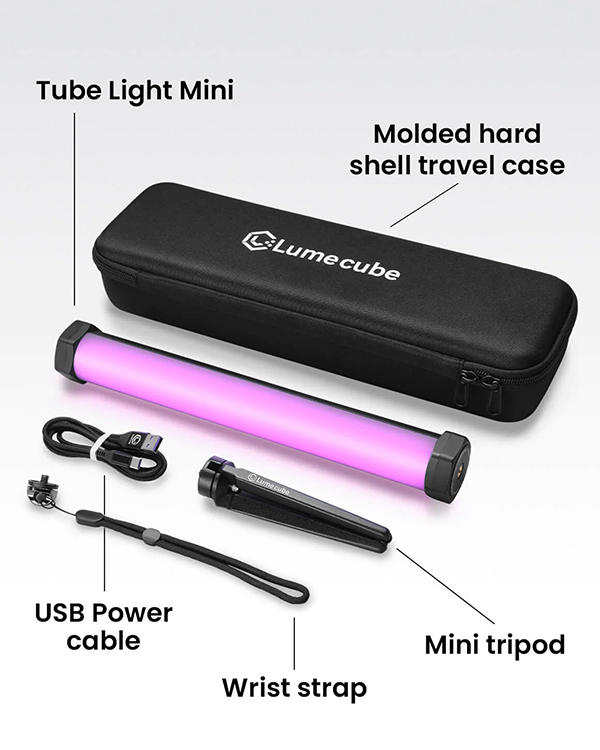
The Lume Cube RGB Tube Light Mini is available directly from Lume Cube for $149.99. Or order the money-saving 2-pack for $279.99. The larger Lume Cube Tube Light XL is also available as a 4-foot version for $299.
In the Field
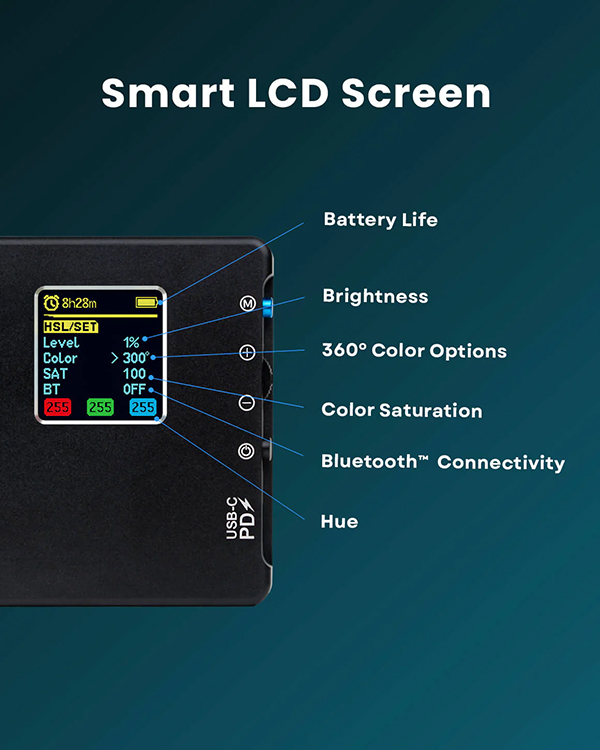
Except for size, configuration and deployment options, the Lume Cube Panel Pro 2.0 and Tube Light Mini have very similar features; consequently, the operation of both is essentially the same apart from their respective LCD menu formats.
The Lume Control app is very powerful yet still simple to use. No technical knowledge is needed, and if you have any experience with any image editor (or how color works) you can hit the ground running.
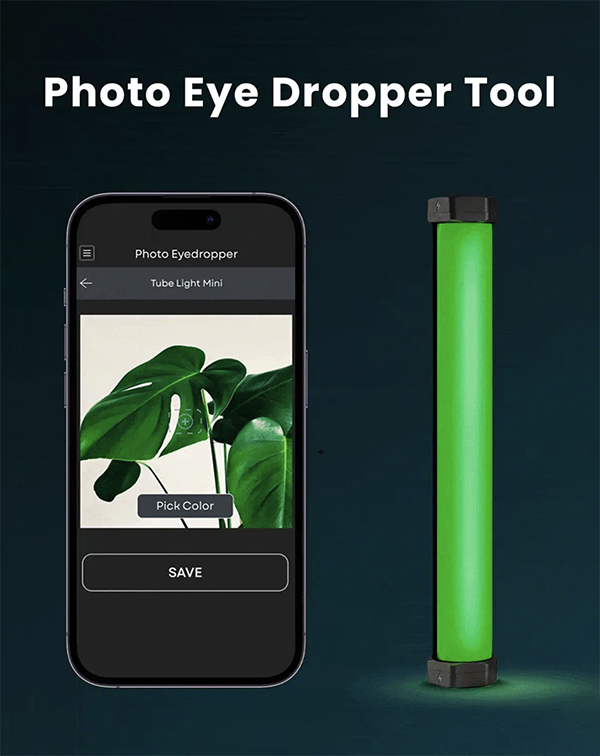
The most exciting feature is the Photo Eyedropper tool. If you want to match the color of a particular object to the color output on either the Lume Cube Light Mini or Panel Pro 2.0, simply capture an image of the object and select the appropriate portion of the image with the Eyedropper. Instantly the RGB color of the Lume Cube tool changes to match.
Seven Special Effects are accessible via the Lume Control app. The possible Special Effects are loop, strobe, lightning, fire, candle, siren, and TV. The siren effect flashes red and blue and could get you into real trouble if mistaken for a police lightbar. All seven effects have 10 speed settings and are ideal for filmmakers.
The Lume Cube Panel Pro 2.0 includes a removeable foot that matches the hot shoe on a camera or the cold shoe on a light stand accessory. There are 1/4-20 threaded holes on three of the sides to accommodate vertical as well as horizontal orientation. It’s well balanced when position on a table top tripod. I used it often with the mini-tripod that’s included with the Tube Light Mini.
The Lume Cube Tube Light Mini has magnetized end caps. The magnets are very strong; in fact, I was able to secure the tube to a 3-inch diameter round steel beam despite the limited surface the round shape provides. Also, there are 1/4-20 threaded holes in the center of each end cap. Since it weight just 0.77 pounds it’s easy to deploy in just about any situation.
The LCD menus on this pair of Lume Cube tools are different but equally simple to navigate with minimal practice. It took me a couple of tries to get the rhythm down, and from then on it was smooth sailing.
Frankly, I did not use the power bank feature, but I can understand how it could come in handy if your smartphone is out of juice.
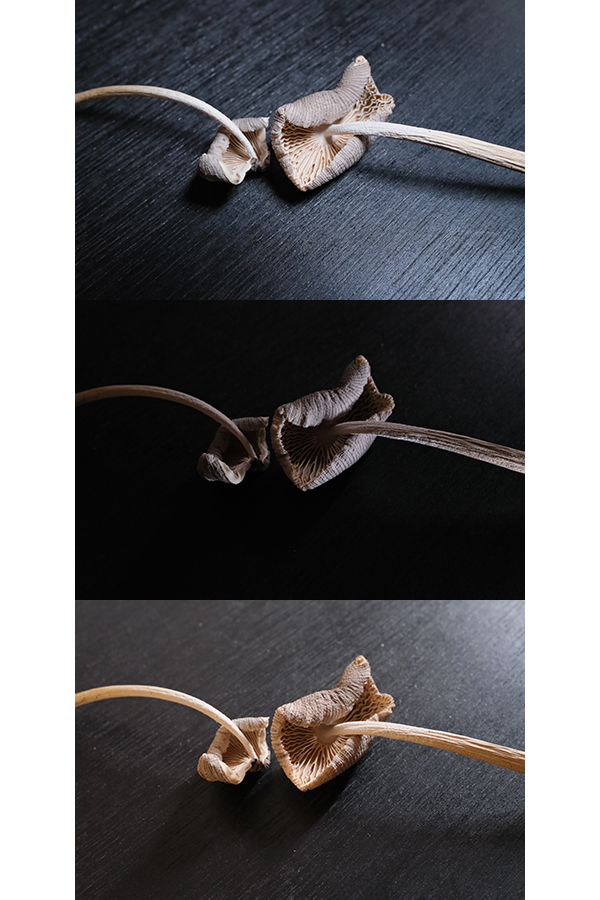
A Lesson in Lighting in the Palm of Your Handbecause of the many features, especially the full spectrum RGB color range and exceptionally easy setup, using either of these Lume Cube portable lights is like receiving a lesson in lighting control. Using them both at the same time is a master class. Because the light output is constant as (opposed to flash) you can immediately see the effect of changing the color, level, direction, etc., on the subject and make informed adjustments accordingly.
Conclusion
I was impressed by the bright output and top-level construction quality of the Lume Cube Panel Pro 2.0 and Lume Cube Tube Light Mini—but then when I saw the remarkably affordable prices I did a double take. I expected each to be about $20 higher. These Lume Cube tools are fun to use, powerful enough for most reasonable purposes and simple to master. Any photographer who shoots macros, portraits, food/beverage or video for online content should add both the Lume Cube RGB Panel Pro 2.0 and Lume Cube RGB Tube Light Mini to their lighting toolkit. For information about other Lume Cube products, visit lumecube.com.
—Jon Sienkiewicz
