
The BEST Way to Give Landscape Photos More Texture & Contrast (VIDEO)
If you use Lightroom to process outdoor photos you’ll want to pay close attention to the eye-opening tutorial below. In just 12 minutes you’ll learn a better way to give all sorts of outdoor images more contrast and texture, without damaging the files.
Instructor Christopher O’Donnell is a professional landscape photographer who regularly posts straightforward lessons designed to help others achieve faster and more effective edits in Lightroom and Photoshop. By following the advice in today’s video you’ll be able to easily enhance photos by adding more depth and interest.
What makes this lesson so interesting is that you’ll be able to get the job done without relying upon filters, presets, or other creative “shortcuts” that often deliver hit-or-miss results. It’s a simple three-step process that O’Donnell says “will instantly enhance any landscape image with zero side effects—no crushed shadows or blown highlights.”
Conventional techniques often deliver images that look fake or overprocessed. Or as O’Donnell puts it, “Many photographers make a big mistake by simply adding more contrast with Lightroom’s Contrast slider.” While this approach may seem like the logical way to make photos more engaging, “it’s probably the worst thing you can do to your Raw file.”
Instead, O’Donnell’s preferred method enables you to take that boring Raw file and add instant interest without damaging the image. Here’s the common problem: When you bring an image into Lightroom you’ll often see a rather lackluster representation of what you saw in the field, with much of the detail hidden.
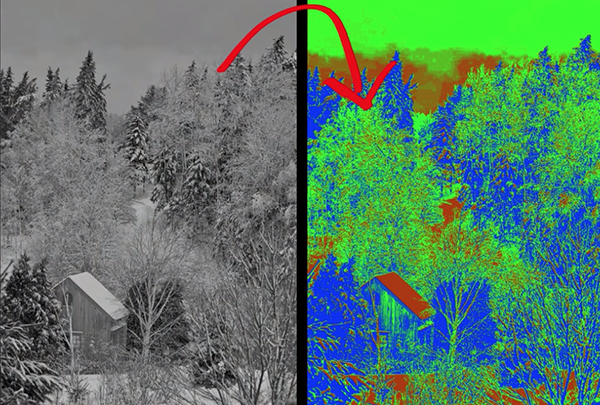
The power of O’Donnell’s approach is that it enables you “chisel away at the Raw file to bring out its full potential.” He temporarily converts the image to monochrome, which make the task easier to accomplish without the added complications of color.
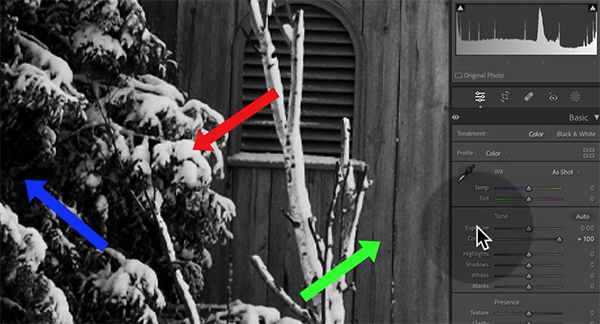
Rather than using the standard approach of adding texture to the entire image at once, O’Donnell groups the pixels within the file according to brightness values. By putting highlights, shadows, and midtones into “three separate buckets,” you’ll be able to adjust each of these parameters independently—thereby achieving optimum results with far more control..
If you want to skip directly to how this works, without the discussion of why global methods fail, you can jump to the 5:15 mark in the video. In any case, you’ll notice a huge difference by comparing the before/after images.
You can find more helpful editing tips by visiting O’Donnell’s YouTube channel, and watching an earlier tutorial we posted that explains how to use Lightroom’s new HDR Optimization tools for photos with more realism and depth.


