Gingham bedding is the must-have of the year that’s both timeless and on trend – here are 6 affordable sets to shop now
6 of the best gingham bedding sets that are both timeless and trendy – as inspired by cult brand Piglet in Bed
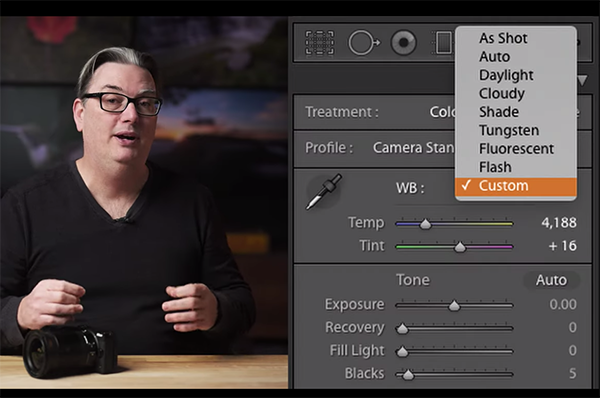
A thorough understanding of the ins and outs of White Balance is essential if you want to create photos with accurate colors, regardless of the type of images you shoot. And according to professional photographer Chris Parker, “there are three things pros know about White Balance that are rarely taught.”
In the seven-minute tutorial below Parker explains this important trio of concepts so you can select the most appropriate White Balance setting every time. As he says, making the wrong choice for the task at hand “can have a huge impact on how successful your image is.”
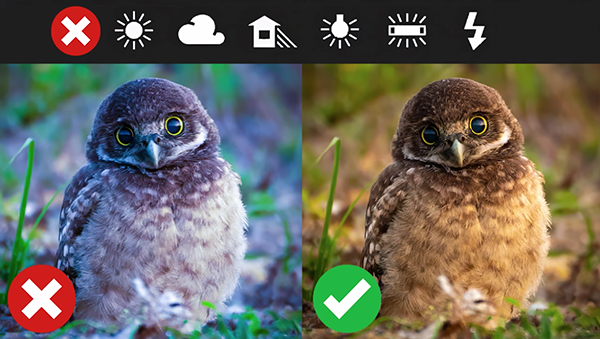
Before digging into practical details Parker provides a quick theoretical discussion of “the color of light” which makes it super easy to understand the tips and tricks that follow. As you already know, there’s a big change in the color of light throughout the day—from sunrise to sunset. Morning light is cool, late-day light is warm, and in mid-afternoon it can almost be white.

To further confuse matters, there are also seasonal changes in the color of light. Hence, “the color of light at noon during summer is a different shade of color at the same time of day in winter. And weather, sunny or cloudy, also factors into the equation. As a quick side note, just in case you want to impress a friend, these seasonal color changes are due to the Earth’s “axial tilt.”
OK, enough of the theory, because you’re likely more interested in what all this means for your images, and that’s what the remainder of this lesson is all about. If you want a quick takeaway from the foregoing, here you go: “This is why the pre-made White Balance settings are only a starting point, and you’ll have to manually adjust during the editing process to get perfect White Balance.”
Now onward to Parkers discussion of the three things you need to know. Along the way you’ll learn why “perfect” color balance may not be what you want for every single image, and how tones in a photo can affect the moods and emotions you intend to convey.

In other words, as you use White Balance tools to modify shades of blue, yellow, green, and magenta, interesting and wonderful things can happen to an image—whether it’s a landscape, an environmental portrait, a wildlife shot or anything else. So pull up your chair, click the play button, and see how it’s done.
Be sure to pay a visit to Parkers instructional YouTube channel where there’s much more to learn.
And if you want to improve the photographs you shoot at night, don’t miss the tutorial we posted earlier with tips from another accomplished pro for using proper camera settings, shooting techniques and more.
Today you’ll learn how to elevate your landscape photography game by using an oft-ignored Lightroom tool to process images that need a bit of help. The method known as “midtone contrast” is both easy and effective, and it’s guaranteed to add impact to just about every image you edit.
This lesson come from Signature Edits, a great source of hands-on tutorials for beginners and experienced shooters alike. This episode explains how to unlock the secrets of midtone contrast in lightroom, and the difference between this approach and other contrast adjustments you’ve likely used in the past.
Instructor Ryan, founder of the channel, walks you through this game-changing method in barely 13 minutes. He provides a clear step-by-step explanation of editing images with this Lightroom adjustment-layer masking technique. Once you get the hang of it your landscape images will have more POP and deeper colors than ever before.

Ryan’s goal is to give the demonstration image more punch, but the conventional approach to adjusting contrast in Lightroom blows out the sky and crushes shadows in the foreground—leaving both areas devoid of detail. You’ll then see how to add contrast to the rest of the scene, while leaving the top and bottom of the frame unaffected.
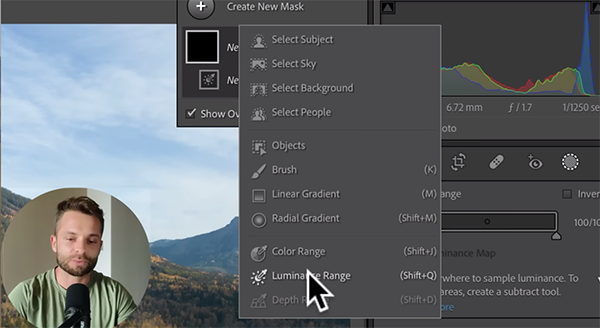
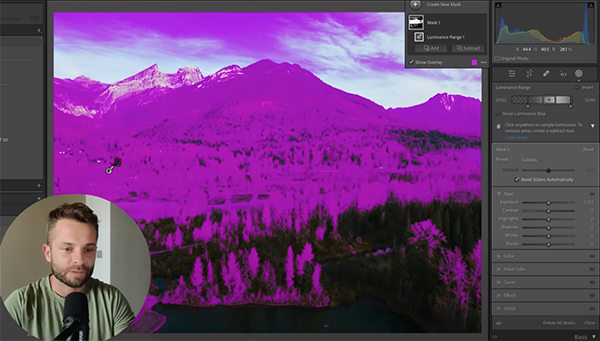
The trick involves selecting Create New Mask and choosing the Luminance Range option from the dropdown menu. An Eyedropper then appears that you’ll use to target an area in the image that’s neither super bright nor too dark—in other words, somewhere in the midtones. One the selection appears, simple sliders enable you to refine the range up or down.
Here’s the big takeaway: now you can selectively use Lightroom’s Contrast slider to pump up the image only where it needs it, while the sky and shadows remain untouched. The foregoing is just a quick summary, so watch the video for some great advice for completing the task to perfection.

The key here, like with most post-process adjustments, is to avoid a heavy-handed approach so that your final result not only looks great but appears realistic as well. You can find a variety of powerful shooting and editing tips with a quick visit to the Signature Edits YouTube channel, so make a point of doing that when you have time.
We also suggest watching the tutorial we posted recently from another image-editing expert, explaining the best way to install, manage, and organize Lightroom presets for a smooth and effective workflow.
