
Basic B&W Workflow for Photos That Look Boring in Color (VIDEO)
All of us who shoot in color have experienced the disappointment of capturing a unique scene that fails to meet expectations. The video below from the PHLOG Photography YouTube channel explains why some images can be significantly more compelling in b&w, with a basic workflow for making a dramatic transformation.
Instructor Christian Mohrle is one the most inspirational landscape photographers in Germany. He’s also a post-processing expert who’s very generous about sharing editing tips that contribute to his success. Be sure to download today’s sample Raw file with a link beneath the video so you can follow along and make the changes yourself as they’re explained.
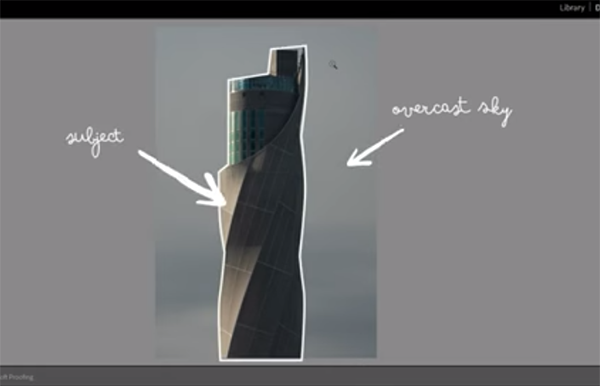
Mohrle’s original image was captured against an overcast sky and there’s a strange color cast in the center of the subject. Rather than struggle to make a silk purse out of sow’s ear, he recommends this: “By turning this shot into a b&w image we can emphasize the lights and shadows of the scene and make the subject stand out in a very pleasing way.”
As always, Mohrle begins in Lightroom’s Basic panel and makes several global adjustments to prepare his image for the targeted enhancements that follow. After clicking on the B&W button below the histogram, Mohrle drops exposure until details are barely perceptible in the darkest parts of the image. He also drops highlights, bumps up whites to enhance contrast, and boosts Texture, Clarity and Dehaze to sharpen things up.
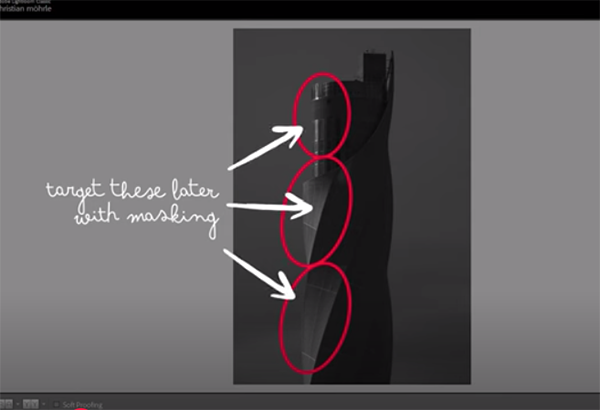
Mohrle also demonstrates the versatility of Lightroom’s White Balance settings when editing monochrome images, with modifications to color temperature that create specific effects. Now that he has the best-possible base image it’s time for local enhancement with straightforward masking techniques that balance out tones and add punch for an attention-grabbing look.
He chooses the Select Background option in Lightroom’s masking panel and takes advantage of the subject’s definitive lines to create precise separation. Mohrle then walks you through the remaining steps that significantly darken the background and further accentuate his main subject. He wants to maintain light coming in from the left and this is quickly accomplished with a Radial Gradient.
All that remains for Mohrle’s impressive b&w transformation is a bit more color grading and some very careful sharpening. All the proof you need can be discovered with a quick glance at his before/after images.
Mohrle’s popular YouTube channel is a great source of instructional videos, especially if landscape photography is your thing.
We also recommend watching the recent tutorial we featured with another accomplished pro who provides a quick refresher on exposure basics and demonstrates the best way to capture detail in photographs of unusually dark subjects.


