A 10-Second Edit Hack for Landscape Photos That Jump Off the Screen (VIDEO)
We’re always a bit wary about so-called editing hacks, tips, and tricks that promise great results, especially when they’re of the 10-second variety. But the quick Lightroom technique you’ll today really pays off on the promise to easily transform any landscape photo in a hurry.
Instructor Roy van der Wens is a versatile Dutch pro with a unique style of shooting and editing landscapes, weddings, and a variety of other genres. In this six-minute episode he promises “to show you how to make professional-quality landscape photos that Pop off the screen” with an almost instantaneous editing hack.
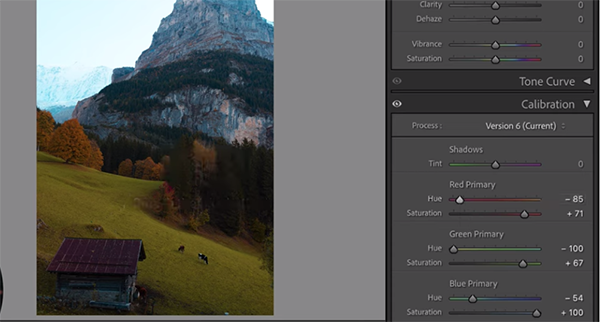
The secret to this magic is Lightroom’s Calibration tool. And truth be told, this isn’t what we’d consider a hack, because this method is part of Lightroom’s vast array of capabilities. Regardless of what you call it, it’s well-worth learning how it’s done because the proof is evident in Roy’s impressive results.

Roy like to underexpose his photos for reason he explains, and he typically uses Lightroom’s Tone Curve to pinpoint the exposure. His goal for this video is to make things as simple as possible, and that’s where the powerful Calibration tool comes into play.
You’ll see how to locate the Calibration tool and move it higher in the panel if you decide to use it frequently. Once you’re there it’s a simple matter to move a few sliders to quickly achieve the specific look you want. Roy walks you through the quick process for transforming dull images into money shots.
For the image at hand he simply adjusts the Red, Green, and Blue Primary Hues, while significantly increasing Saturation in the new tones. He also explains the importance modifying White Balance accordingly so everything falls into place.

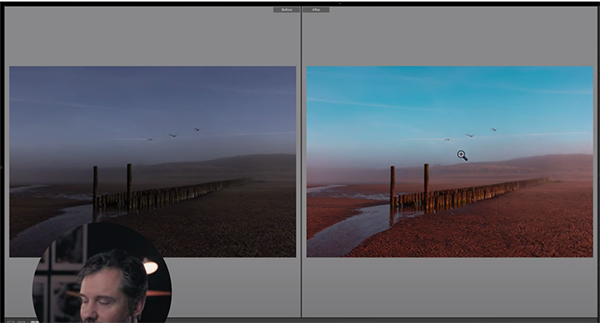
The foregoing takes mere seconds and BOOM, you’re done! Roy provides helpful keyboard shortcuts to further accelerate the process. We think you’ll be amazed by the super-fast transformation after viewing Roy’s before/after images.
Roy repeats the process with a few other images, that require different but equally fast adjustments to the sliders. By the time you’re done watching you’ll understand exactly how the hack works, and you’ll likely add this method to your Lightroom bag of tricks.
You can find a variety of other straightforward editing methods on Roy’s instructional YouTube channel, so be sure to take a look.
And don’t miss the tutorial we posted with another pro recently who explains why polarizing filters cause problems with wide-angle lenses and the best way fix photos when this occurs.


