
The Secret to Landscape Photos with Maximum Impact: Lightroom’s Linear Profiles (VIDEO)
We’re all looking for a creative edge when editing outdoor photos captured in difficult light. One goal is to create images with maximum impact, and the other is to accomplish that task in way that makes our imagery stand out from the crowd.
This tutorial from the PHLOG Photography YouTube channel demonstrates how to get it all done by unlocking the power of Lightroom’s frequently ignored Linear Profiles. Once you understand how these simple tools work your landscape images will be forever changed for the better.
So what’s so special about Linear Profiles, and why should you add them to your workflow. Well, according to instructor Christian Mohrle, “they are the secret for full control over your photos.” And it takes him barely 13 minutes to bring you up to speed.
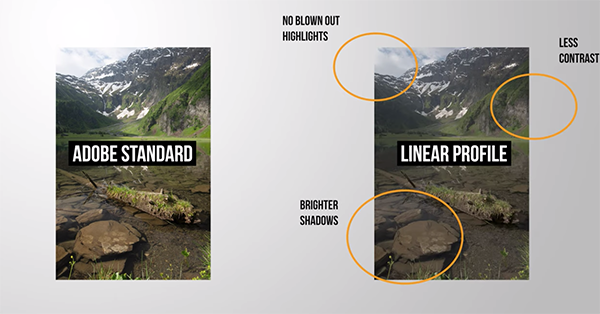
Mohrle pulls up a Raw file that you can download with a link beneath the video so you can experiment with the options and adjustments as they’re explained. The first graphic you’ll see is a side-by-side comparison of two versions of his photo: one with the Adobe Standard Profile and the other with a Linear Profile.
It’s immediately apparent that the image on the right is devoid of blown-out highlights, has brighter shadows, and a bit less distracting contrast. So what’s going on? Mohrle explains that “the minute we open up a Raw file in Lightroom a profile is applied. By default, it’s Adobe Color” (whether or not that’s the best choice for the image in question).
As it turns out, however, there are many other Profiles available, and it’s up to you to select one that will deliver optimum results for the photo you’re working on. Mohrle puts it like this: “I love using Adobe Standard for a little more control over Contrast, Adobe Landscape for enhanced base Saturation, and Adobe Neutral for the most neutral version of the Raw file.
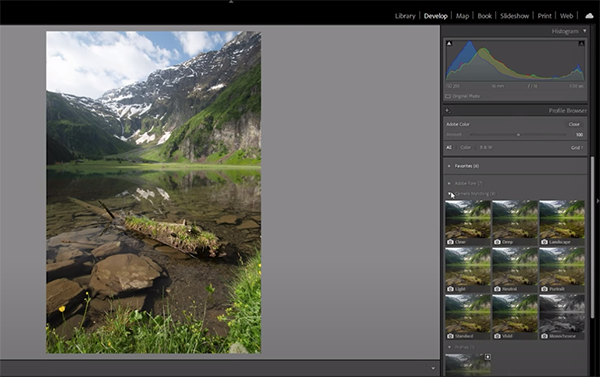
The key is that all of these different attributes are automatically applied before the actual editing process begins. Thus, the particular Profile you select determines the look of your base image and may also affect the tools you use and the adjustments you make as post processing continues.
With these explanations out of the way, Mohrle devotes the remainder of the lesson to demonstrating what all this means in practical terms. He first makes a few global adjustments to the chosen image, and then he proceeds with selective enhancements to various portions of the scene.
Mohrle employs the Tone Curve, simple masking and color grading, and careful sharpening to complete the impressive transformation. Here’s the takeaway: Don’t settle for Adobe’s default Profile unless it’s the best choice for the task at hand. There’s far more to learn about editing landscape images on Mohrle’s instructional YouTube channel, so be sure to take a look and explore what he has to offer.
And don’t miss the landscape tutorial we posted from another pro recently, demonstrating an oft-ignored technique for creating landscape photos with deeper colors and “more POP.”


