
A New Way to Banish Noise from Nature & Wildlife Photos in Lightroom (VIDEO)
Have you ever captured what would be a great photograph, were it not for an abundance of image-killing noise? If so, the following video from the Birdman Photography YouTube channel will help fix the problem thanks to a new Denoise tool in Lightroom.
Instructor Sean Leahy is an accomplished pro based in North Carolina who posts weekly tutorials dedicated to shooting techniques, gear, and straightforward post-processing methods. In today’s episode he demonstrates how to use Lightroom’s new tool and achieve clean images every time.
Leahy illustrates the process with a noisy image of a bird, but the technique is just as powerful for other types of photos you shoot in the field. He begins in Lightroom’s Develop module under Details. He zooms in on his shot and distracting artifacts are readily available in the sky, background and foreground, and to a lesser degree in his subject.
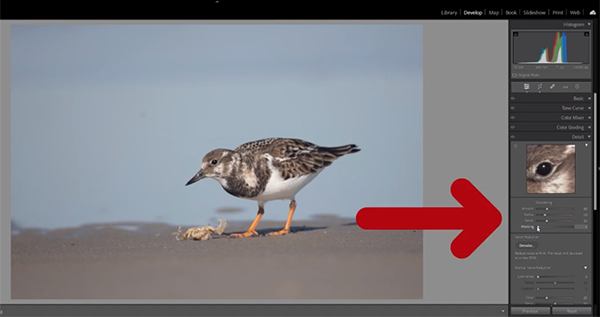
There are a couple of preliminary steps that Leahy recommends before you initiate the noise reduction technique, the first of which is to carefully examine the image and determine exactly where noise needs to be removed. Then it’s time to create a Mask and get to work on the specific area(s) that need repair while leaving clean portions of the image untouched.
The trick is not to soften the entire image, and in this case Leahy wants to retain sharpness in the bird, which is why he’s very cautious when moving the appropriate slider. Once the parameters of the Mask are set, the next step is clicking on Lightroom’s Denoise icon, at which point you’ll see a progress bar that proceeds based upon the speed of your computer. Lightroom will also open a wizard to help you refine the results.
When working on a wildlife shot make sure to target the eyes of your subject as well as the larger areas that need to be fixed. Once the image is denoised Leahy walks you through several important ways to enhance the image even further—using familiar Lightroom tools you’ve likely employed before.

The final step is careful sharpening of the bird itself. That’s because, even though the eye is sharp, the subject’s feathers lost a bit of detail during the noise removal process. One you’re done watching head over to Leahy’s instructional YouTube channel for more tips on shooting and editing wildlife photos.
We also recommend watching the tutorial we posted from another accomplished pro who explains how to give outdoor photographs maximum dynamic range by using a one-minute Lightroom trick.


